This is the fourth in a 5 part series of safety articles written by Tom Severin of Badlands Off Road Adventures. Tom is an International 4WD Trainers Association certified professional 4WD trainer and a Wilderness First Responder (WFR). He is an instructor for the United Four Wheel Drive Association and the CA Association of 4WD Clubs.
Just as you put a lot of thought and preparation into your trip before you set off, you should also take the time afterward to ensure that your vehicle and gear survived the off -road drive and are ready for the next adventure. Even a mild off – road course can affect your vehicle.
Print this checklist and keep it in your glove compartment or other dry location. By following this list carefully, you ensure that you review every important section or component of your vehicle.
First and foremost, do a thorough inspection of your vehicle to make sure that it is in safe driving condition. You should not take the vehicle onto roads, especially the highway, if there are significant structural or other safety issues.
1. Air up your tires. Don’t try to drive on pavement with your tires low on pressure. Not only will you have difficulty handling the vehicle, but you risk serious
damage to tires and rims. Check your tire pressure the following morning. It can drop 2 to 5 PSI overnight. Remember that you aired up when the tires were hot.
2. Wash and vacuum your vehicle. This will help prevent the spread of weed seeds to other areas, but also makes it easier to spot any fluid leaks and damage that needs repairing. Invasive plants are a problem all over the U.S., caused in part by people driving in multiple areas—sometimes even in different states—without cleaning their vehicles between trips. As a result, they spread noxious weeds to new locations. Be a good sport and clean your vehicle after each off-road drive.
3. Wash your engine. Drive to an appropriate facility, turn off the engine, and hose it down. With a clean engine, you can spot any leak that has developed, as well as a loose bolt, hose, clamp, or other part.
4. Check fluid levels, fan or serpentine belt, and other parts. If you do this frequently enough, you will become accustomed to your engine compartment, and it will be easier to spot a problem or potential problem when one occurs.
5. Examine the differential and transmission for cracks and the fluids for water.
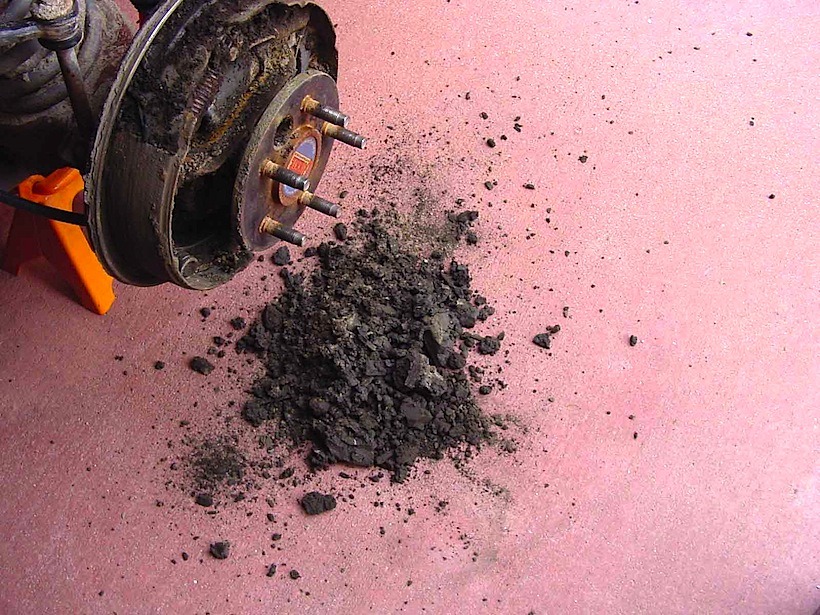
6. Clean Brake Drums. Inspect and clean drum brakes, if applicable. Pull off the drums and clean out any mud or sand inside. That will wear down your brakes in a hurry. This is a good time to adjust your brakes or even replace the shoes, if need be.
7. Inspect CV boots, struts and shocks, and other underbody parts. Any need replacing? Take a look at joints, bearings, and other parts that may need re-greasing. What about the nuts and bolts that hold the axle and suspension together? The vehicle’s suspension system (track bar, control arm, shocks, and springs) are very susceptible to loosening and affect the drivability. Problems with any one of these items could cause damage to the drive train over time.
8. Push and pull on the suspension to see if anything is loose. Push on the side of the vehicle. Are the track bars loose? Have a friend rotate the steering wheel back and forth while you inspect the tie rod ends.
9. Inspect your tools. Are they clean, in order, and accessible?
10. Clean and restock any fluids or gear that you used or that became damaged. This includes medical supplies, spare parts, your fire extinguisher, recovery straps, etc.. Create a list of repairs and other things you will need to take care of post – trip during the trip or on the way home while they are still fresh in your mind. Make sure you put back all the essential items, and that your vehicle is tidy and prepared for your next trip.


