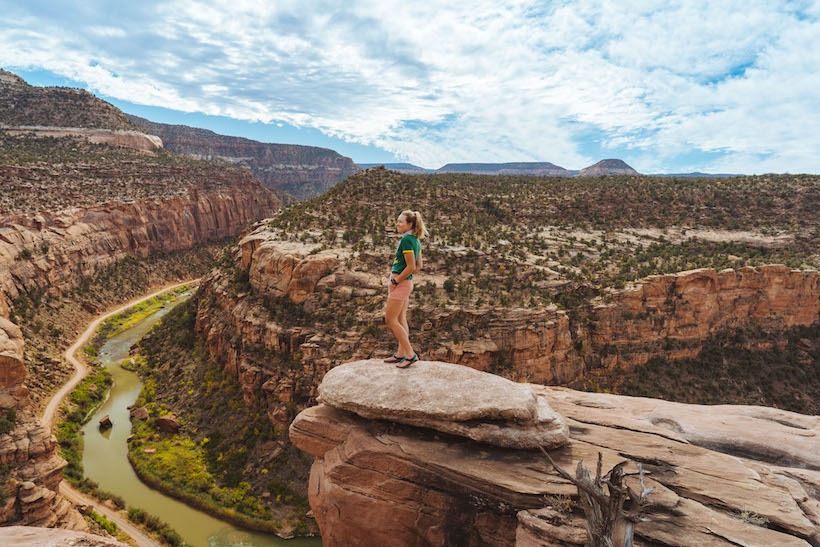
Ride On Designated Roads, Trails and Areas is a national campaign created by Tread Lightly! to promote responsible offroading and overlanding to keep the trails we love open, healthy and accessible. As more people are getting outside and exploring our trails, it’s imperative to have the tools and knowledge to protect public land.
Being responsible doesn’t mean being boring. Start by approaching any type of outdoor recreation you love with the T.R.E.A.D. principles:
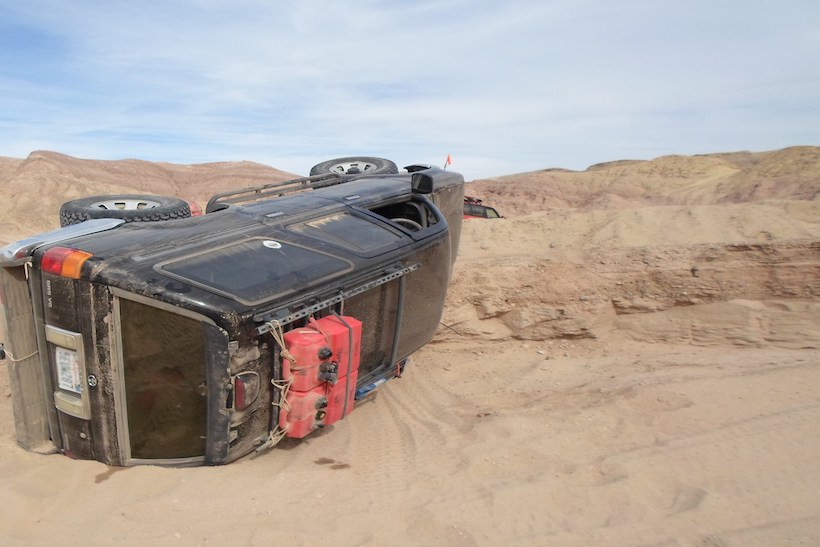
Time for a little short-but-sweet tough love. Four-wheeling involves near constant decision making. Numerous challenges face you along the trail. Whether you successfully navigate around or through those obstacles falls entirely on your shoulders.
Sorry, my friend, but you can’t blame anyone else. Not your spotter. Not your mechanic. Not the fellow camper who messed up breakfast that morning.
Some 99% of all mistakes are caused by the driver. (The remaining 1% can be blamed on “testosterone poisoning.” But I’ll leave that for another article.)
It all boils down to:
Your assessment: How well you evaluated the obstacle.
Your decision (“go” or “no go”): Most obstacles can be overcome. But sometimes you need to back away.
Your execution: How well you implement the driving techniques required to successfully negotiate around or through that obstacle.
Vehicle flop
Follow the fundamentals of four-wheeling:
Four-wheeling offers unique circumstances every moment. Sure, city driving has its hazards – screaming police vehicles, major road construction, zombie cab drivers, an occasional pile up. But you get used to those. Off road, it’s a different story. You have to learn to expect the unexpected. And act accordingly.
Because every situation is unique, there are no “cookbooks” to guide you. Adhering to sound principles and executing properly will ensure a successful 4WD adventure.
All driving involves getting from Point A to Point B. Four-wheeling sets itself apart by constantly challenging drivers. For simplicity, I use the word obstacles to refer to all challenges. Understand that doesn’t mean just a large boulder. It could be a blind curve on a hillside. Or a narrow passageway through a brush-shrouded canyon.
You first must recognize the obstacle. That involves doing the recon. Four-wheeler’s don’t reconnoiter enough. My mantra is, “recon, recon, recon.”
Always recon what lies ahead
Often that involves getting out of the vehicle and checking out the scene. Sometimes you can’t see well enough through the windshield. Get out and walk up to the top of the hill or down to bottom of slope. Whatever the situation calls for.
Next, decide on your path. That is, pick the line. Every obstacle off road has to be analyzed. Determine the best route to take; there could be more than one. You’re looking for the one best suited to your vehicle.
How to pick the best line:
As you analyze the situation, consider these four factors.
All four wheels must remain on the ground. If on a slope or mountainside, the vehicle could pitch slightly. Minimize the pitching or sideways sliding so all four wheels are available to you.
Verify clearance on all sides. Any rock outcroppings, branches, brush, or ruts that could hang up or damage your vehicle? Don’t look in just one direction. Consider all angles: overhead, underneath and from either side.
Maintain traction. If driving on soft surfaces, adjust accordingly. You may have to air down, for example. Like point #1 above, you want to keep all four wheels working for you.
Use appropriate throttle. Don’t go too fast or too slow. A good rule of thumb is: Go as slow as possible but as fast as necessary. Maintain that momentum.
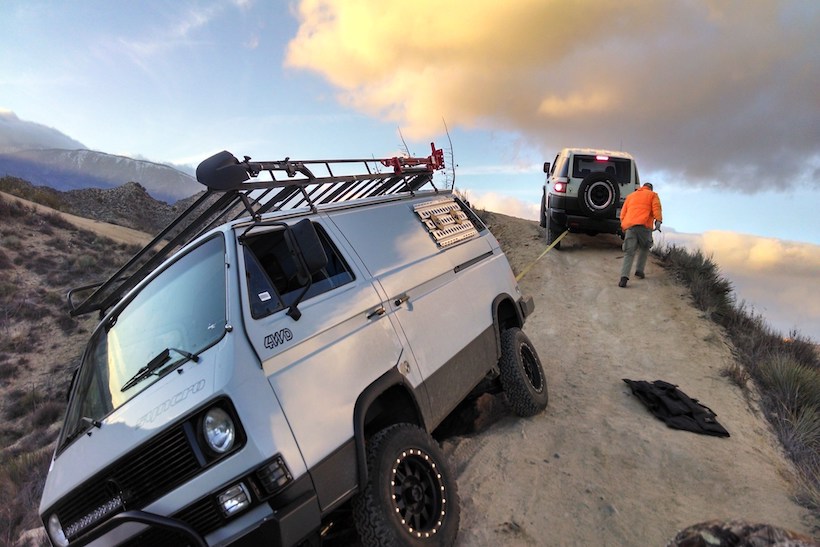
Don’t travel alone
Four-wheeling involves diligence on the driver’s part. From assessing the situation to making the decision to executing. It’s all about using the fundamentals properly. You as the driver are responsible for the successful execution of the trip. Keep driving, and over time you will develop the necessary skills.
As those skills develop, you will routinely make sound assessments and prudent decisions, and successfully execute those decisions.
P.S. While we’re on the subject of decision making: For god’s sake, never try to help retrieve stuck vehicles by hanging or climbing on them. It is very hazardous to your health. We have safer ways to free them.
The Rimrocker Trail is a newly minted 160-mile dirt 4×4 trail that leaves from Montrose, Colorado and goes to Moab, Utah. The trail is named after the miners called “Rimrockers”, who used to work the many mines in Montrose County. The trail was designed to bring tourism to this otherwise seldom visited part of Colorado and was officially opened to the public in 2016.
Montrose – Nucla
The Rimrocker Trail officially starts in the town of Montrose, Colorado. We arrived in the late afternoon and not wanting to miss anything we went a quick 20 overland miles before pulling into the Iron Spring Campground for the night.
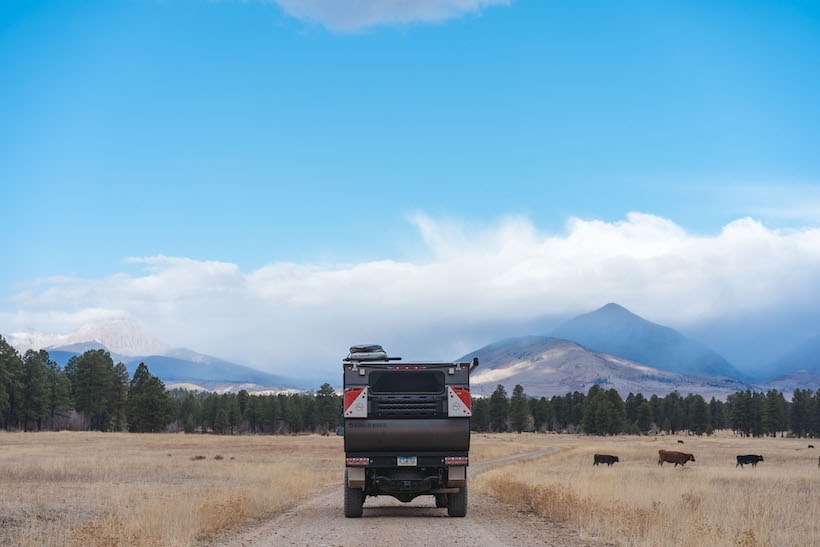
The next morning we woke up and headed out early to make the most of our day. With the Uncompahgre Plateau nearby we decided that could be a good place to stop and make breakfast with a view. The off-road drive was beautiful through the remaining fall colors and we passed many operational logging roads and slack jaw cows as we made our way to the plateau.
After, we descended into the sleepy, little town of Nucla. We stopped to take a look around before heading to the equally small town of Naturita, which was just a quick detour away from the official trail. Either town has a few small places to eat if you are in search of a pitstop.
Please Note: There is no cell service in either town and it’s also the last chance for gas until Utah if you plan on following the Rimrocker past HWY 141. It’s also wise to have your maps saved offline before venturing past this point!
Nucla – HWY 141
Just after Nucla, we went through some of the most technical, but still pretty mild, sections of trail yet. We eventually came to the rim of the San Miguel River Valley and the official start of the Uravan Mineral belt which is home to over 200 mines. This area is rich in carnotite ore, which contains radium, vanadium, and uranium. The rest of our drive to camp was dotted with mines named Joe, Sandy, Fox, Dolores, Club Sandwich, Last Chance, Big Dick, and Little Dick to name a few.
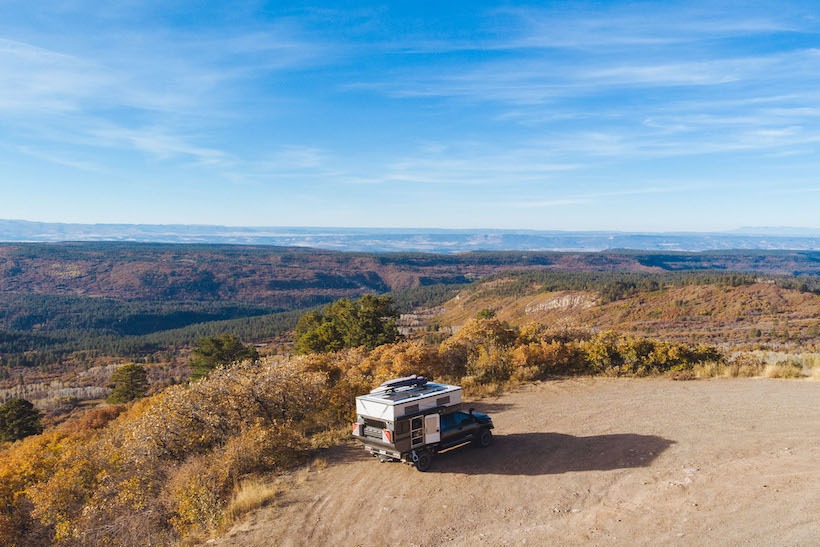
We spotted a little road that branched off the Rimrocker Trail and decided to see if we could find a camp spot for the night. Sure enough, we found a beautiful spot on the edge of the cliff line overlooking the San Miguel River and the surrounding valley. We also could see four mines that were in direct proximity to our home for the night.
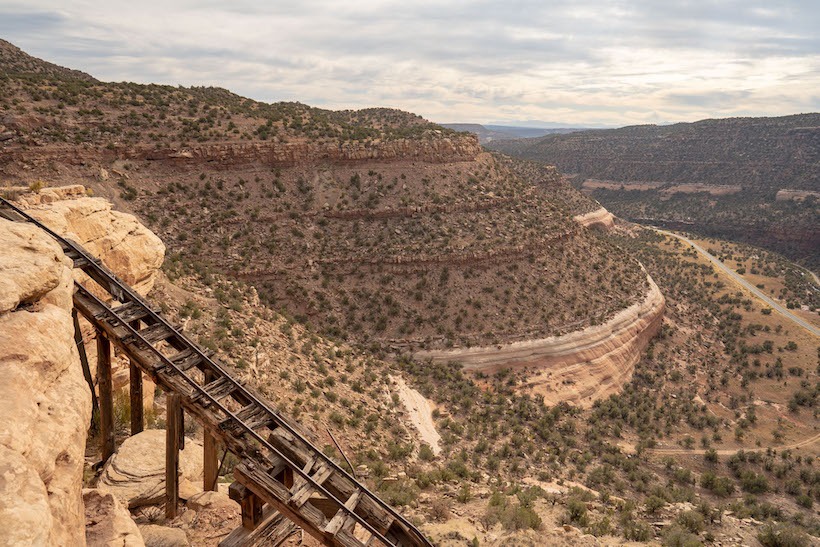
The next morning, we went on foot to explore the nearby mines. Just a quarter of a mile from our camp was where an old miner dwelling perched on the same ridge. We found the old refrigerator, oven, countless tin can meals, and even pieces of old dinner plates among the wreckage. This area is so dry that we even came across a pile of eggshells that have been out there since the days of the mine operation. We spotted some rails disappearing over the cliff and decided to check them out. The rails went all the way down into the mine… Ask me how I know!
After finding signs warning that the mines are still radioactive, we quickly made our way back to camp where we packed up and continued down the Rimrocker Trail towards Highway 141.
HWY 141
When the Rimrocker Trail intersects the pavement of Highway 141 there’s a ton of detour potential that all lie just a few miles off the Rimrocker.
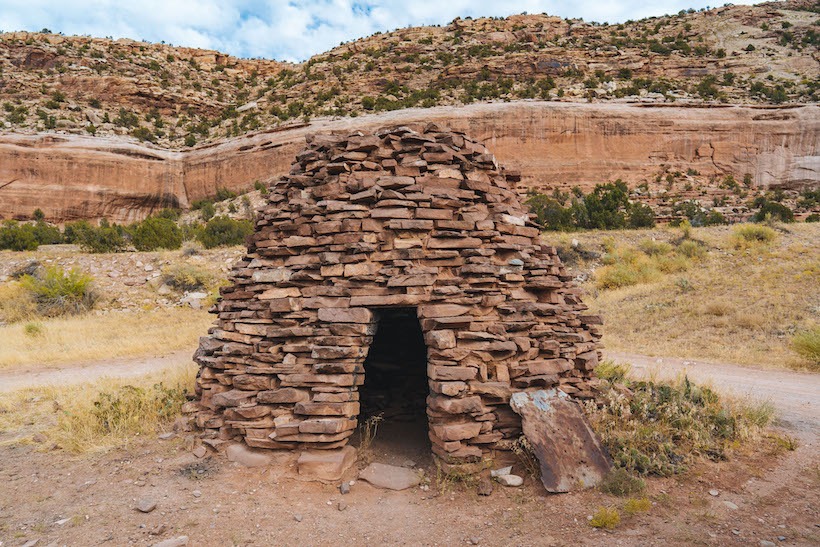
The first stop was to the roadside coke oven. Constructed in the late 1800s the oven was used to convert green coal into coke coal, which burns much hotter and produces virtually no smoke.
Continuing south on Highway 141, the hills are spotted with more mines on the eastern side of the valley. We stopped at an overlook to see the remains of the Dolores River Hanging Flume. The flume was completed in 1891 and was an architectural achievement that was celebrated around the world. The flume carried water from the Dolores River, upstream more than five miles to the Lone Tree Placer Gold Mine. Sadly, the mine was less successful than the flume and was shut down shortly thereafter. The wood used to construct the flume was sourced from Pine Flat and Carpenter Ridge near Buckeye Reservoir, which we’d drive through later that day.
Just another mile down the highway we pulled down an unmarked dirt road where we parked and walked to an overlook of the confluence of the Dolores and San Miguel Rivers. Being that the two rivers are different colors, it was interesting to see the two converge and swirl together as they travel downstream as one.
Going just a bit further south on Highway 141, we reached our furthest point of interest, the former town of Uravan. Uravan was a company town established by the Vanadium Corporation in 1936. The entire town of 800 people supported a mill whose sole objective was to process the carnotite ore into uranium oxide, aka yellowcake. The yellowcake was sent elsewhere to be enriched into pure uranium, some of which was used in the atomic bombs that ended World War II. Insane right? The mill remained open until December 1986, but was then closed after the US stopped purchasing uranium, causing the entire uranium industry to go belly up. After the mill was closed for business, a Superfund cleanup began to do its best to remove the radioactive town and mill. Now all that can be seen in the town of Uravan, which is still listed on any map, is fenced off fields warning that the area is radioactive. It’s an incredibly eerie sight to see and left us wondering what became of the miners that worked in a mill that was so radioactive that they’re still cleaning it up today. Nearby there was a sign (provided by the still present Vanadium Corporation down the street) stating their pride in the cleanup efforts to return “the canyon almost as it was before mining operations began”… Minus the many radioactive signs.
Side note: We HIGHLY recommend spending some extra time to explore down HWY 141. It’s an interesting and seldom told part of our history that is worth knowing about, and the San Miguel River Valley is unspeakably beautiful in its own right!
Headed back towards the Rimrocker Trail, we crossed the Dolores River on a bridge and followed Y11 Road alongside the Dolores to get a closer look at the hanging flume. Just a few miles down we came to our destination, a fully reconstructed section of the Hanging Flume. We thought it would be interesting to see the flume in its original state to get a better idea of how it worked. There was a little pull-off at the site where we made and enjoyed our lunch on the banks of the Dolores River.
After spending the vast majority of the day wandering the San Miguel River Valley we surmised that we could spend several days exploring this area and still not see everything we’d like! Despite that, we made our way north and back to the Rimrocker.
HWY 141 – 2 Mile Road
The steep road climbed up the side of the San Miguel River Valley past biscuit rock. We drove past even more mines (which we believe to be radium mines because they were named Radium King and Radium Queen) until we reached Pine Flat. The flat was some of the most forested sections of the trail thus far and is the home to the wood sourced for the Hanging Flume. For a while, the road was made up of deep sand before we turned onto the side of the flat to get sweeping views of the valley below.
Paradox Valley was strikingly beautiful and got its name from the Dolores River which “paradoxically” runs across the valley instead of with it. Fascinatingly, the valley was created from water flowing beneath an ancient salt dome. The flow of water eventually dissolved a subterranean layer of salt causing the weak sandstone above to collapse forming a valley where there was previously a dome. Nature is impressive, is it not?!
From there we continued towards camp. As we traced the cliff line of the Paradox Valley the road had some technical features and a sharp drop off on the left-hand side. A short while later we came to Buckeye Reservoir and Recreation area where we planned to camp for the night. Since it was late fall, there was only one other family camped in the entire area and made for a nice quiet night. To that point, we’d only seen a single person on the Rimrocker Trail since leaving Nucla!
From our camp spot, we had a vault toilet to ourselves and uninterrupted views of the La Sal Mountains off to the west.
The next morning we woke up for our last day on the Rimrocker. After coming around the far side of the reservoir we came to the Colorado and Utah border, which marked our last stretch of road before we would be exiting the trail at Two Mile Road.
The vast majority of the driving was on easy roads that took us through many different ranch lands. The La Sals got a fresh blanket of snow the night before making for a very picturesque drive through the last of the yellowing aspens. Before we knew it, our exit off of Two Mile road arrived and we hit pavement for our last stretch towards Moab.
The Rimrocker Trail does continue all the way to Moab but we read that the last bit is “an overly rough cobblestone street” and gets really narrow. We read this from people who were traveling in Jeeps, which are much narrower than we are. We opted to exit to save the paint on our Four Wheel Camper and truck.
We really loved the Rimrocker Trail. We felt that it was a great “first time trail” that also features tons of history and interesting waypoints to get you out of the car along the way! I know that after reading this a lot of you will be curious if your vehicle could successfully do the trail. There is one river crossing after Nucla and before HWY 141 that gets deep during the spring run off. At times it can be totally impassible. By going in the fall, the creek was entirely dried up. We could have easily done the entire road in 2WD if we wanted to, but in areas of sand and uneven rocks 4WD is really nice for peace of mind and control. There are just a few spots of technical driving that are easy to navigate. Overall any stock 4WD vehicle should be fine on this trail. Even a capable 2WD would probably do just fine. If you’re concerned about the capability of your vehicle or unsure of your skill level driving, we highly recommend that you do the trail with a partner vehicle. Otherwise, this is a great entry-level trail and we highly recommend it!
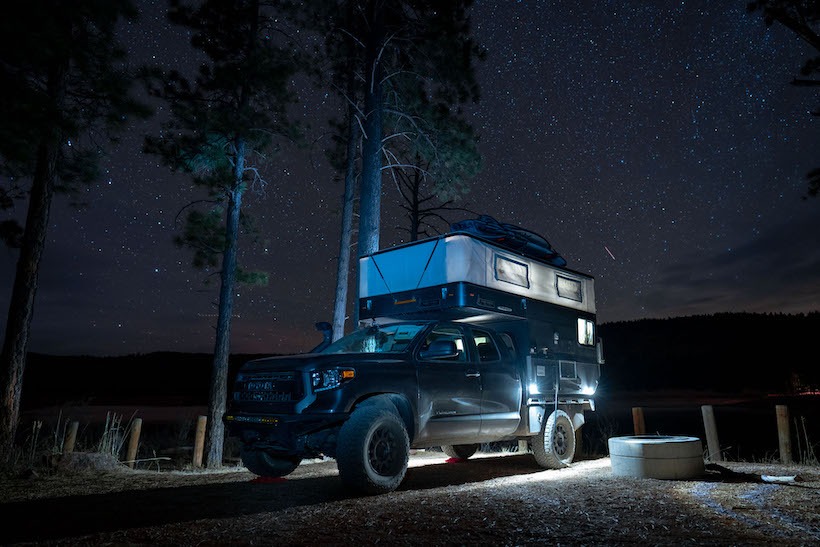
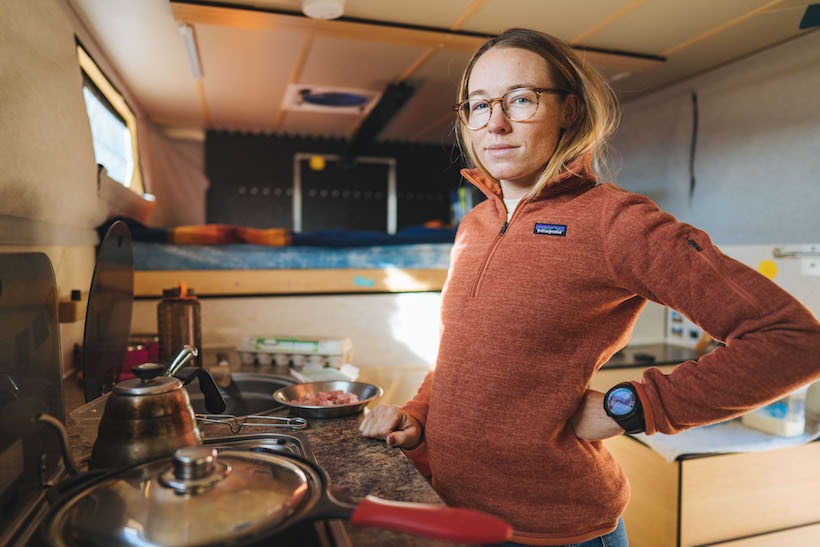
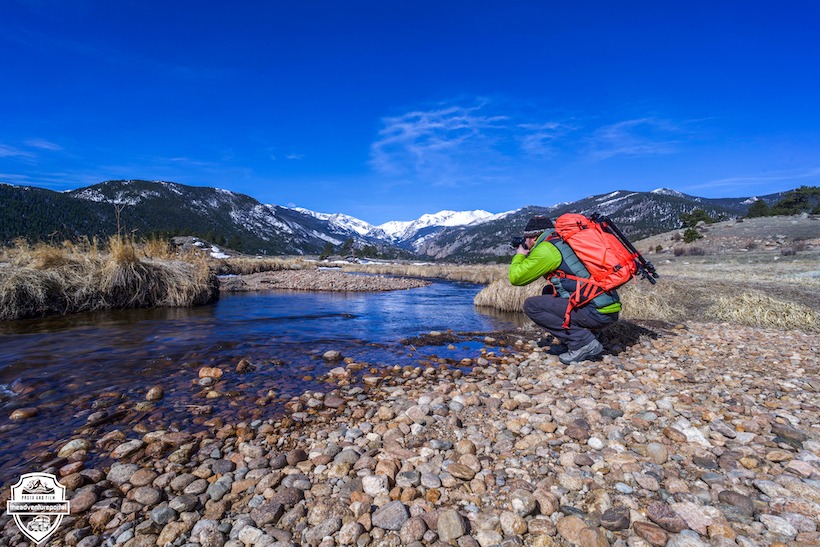
We’re Owen Chikazawa and Mary Ashley Krogh (MAK), a husband/wife team, that’s been living and working from the road since April 2016 with our cat Luna. We currently live and travel in a 2019 Toyota Tundra with a flatbed Four Wheel Camper. Between the two of us, we’re designers, illustrators, animators, photographers, videographers, and writers. We fill our time seeking new experiences through rock climbing, hiking, backpacking, swimming, surfing, and documenting the journey.
With any creative endeavor there are many styles and applications and this is certainly true when capturing Vehicle Supported Adventure. Much of TAP’s work captures the environment we find ourselves in and when featuring a rig or person, we feel they should fit naturally into the landscape, as oppose to dominating the shot. For us, our rigs are simply fun tools, that allow us to get deep into inaccessible and remote areas and our cameras are there to record the adventure. Check out www.theadventureportal-photo-film.com for examples of our work.
What’s in our bag?
At TAP we take capturing Vehicle Supported Adventure seriously and a common question we get asked is “What gear do you guys use?”. That said, here’s a comprehensive breakdown of what’s in our camera bag(s), what the item is primarily used for and why we chose it. Please feel free to post comments if you’d like any further details.
Cameras:
Firstly, the best camera is the one you have or the one you can afford. Expensive cameras are of course awesome, but they don’t make you a better photographer. Time, a lot of practice and many mistakes, eventually result in good photography. Another important point is to understand your photographic goals, as different set ups are suitable for different applications. If you simply want to take social media ready pics of your rig or camp set up, then honestly a recent gen i-phone will likely be all you need. If you want to specialize in astro or complicated time-lapse projects, then that’s a different story.
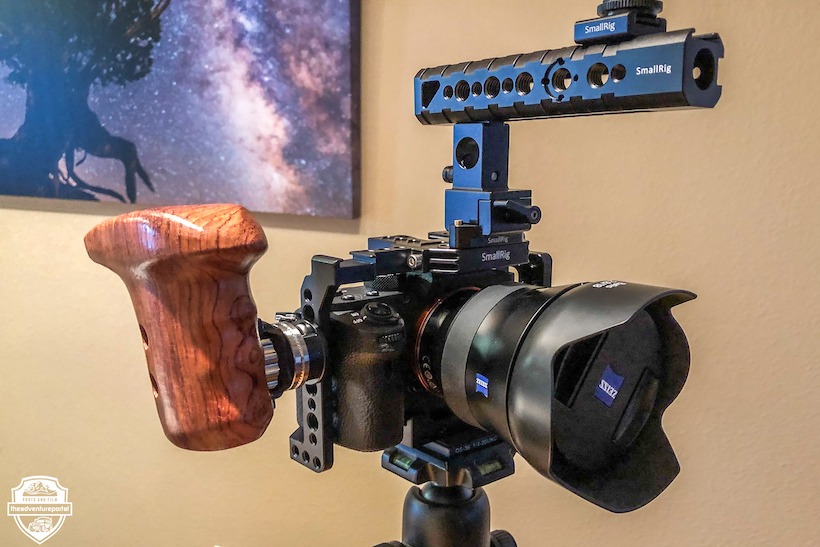
Sony A7sii– After spending a couple of years with a Canon 70D, I decided I wanted to get serious with astro projects, so the Sony A7Sii was the natural upgrade choice. It’s a full frame camera, incredibly light and has an amazing low light sensor. When it came out in Oct 2015, it was revolutionary and became the industries astro camera of choice. It also shoots amazing in camera 4k video. (It was used on Planet Earth 2and by Chris Burkhard Under an Arctic Sky, so what more can I say!) It has stood the test of time, however Sony has recently announced a new generation and we’re all waiting anxiously to see what changes they make to keep ahead of their competition.
Pros: Full frame, low light sensor is just phenomenal, size and weight, fantastic internal 4K video recording.
Cons: Poor battery life, non intuitive menu, low mega pixels, so printing a problem.
Sony A7SII with Zeiss Batis 18mm and Small Rig cage
Sony A7Riii – With the A7Sii being our astro specialist, I decided to add the A7Riii for all round use, while capturing Vehicle Supported Adventure. It’s identical in looks and size to the A7Sii, but with a larger battery, two SD card ports and massively increased 42 MP capacity. Picture quality is simply fantastic and frankly for a landscape photographer, this camera is one of the best on the market.
Pros: Full frame, stunning picture quality for printing, 42 mega pixels and awesome IS0 100-6400 capability.
Cons: Non intuitive menu (that is annoyingly different than the A7Sii). Frankly, hard to find much wrong with this camera!
Lenses:
Sony FE 2 / 28mm(Super light and compact and a solid general purpose prime lens)
F-Stop Anja 40l bag. My go to if I have to carry a lot and hike in somewhere.
Lowe pro Hatchback 25l backpack. Great small bag for day hiking or general carry. Cons: doesn’t have straps to carry tripod. Side pockets carry a water bottle or our Job mini tripod.
F-Stop Anja 40l camera bag and Vanguard Alta Pro 284 CT tripod
SLIK 504 QF11 – I use this for time-lapse and video work as it’s heavy and sturdy
Joby Gorilla Grip (Super light to hike with and flexible legs allow custom locations)
Misc:
SanDisk Extreme Pro 95Mb’s (3) 64 – 128 GB’s (We have multiple cards always stashed in both camera bags and also in our rigs. So easy to forget a card and yes, we’ve learnt by experience!)
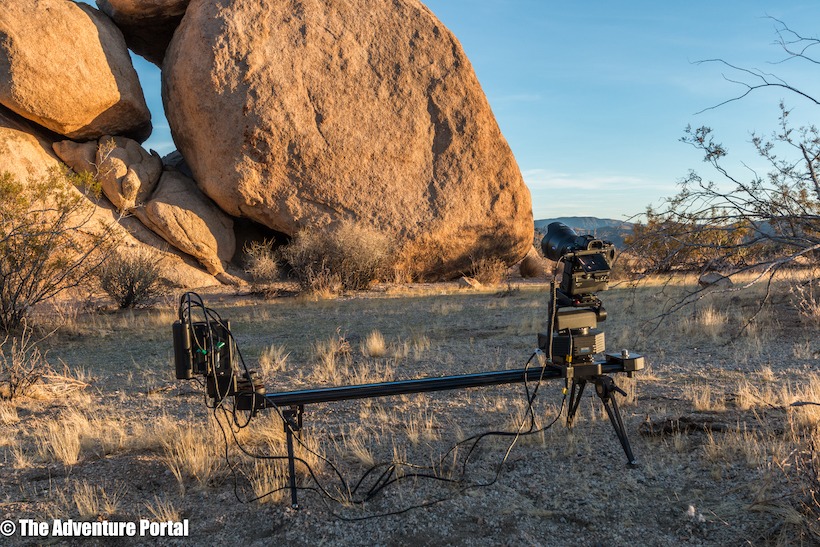
Syrp Mini Genie 2: My go to, for all 2 axis (pan and tilt) projects. Light/compact for throwing in a backpack and very easy to use through their App. Highly recommended for Time-Lapse. As you can see from the photo below, I use 2 of them in a combo attached to a Syrp Pan Tilt bracket
Syrp Mini Genie combo and bracket
Kessler Crane Stealth Slider and Kessler Crane Second Shooter Plus (Robust and definitely not a light weight setup, used for more complicated 3 axis projects (pan, tilt and slide) where I can carry the equipment in the rig and not have to hike anywhere.
Kessler Crane Stealth Slider and Second Shooter Plus
Zhiyum Crane Gimbal– Used for run and gun hand held video footage. Not going to lie, I have found it difficult to stabilize the gimbal in the field.
5″ Atmos Shinobi4k photo and video monitor. I wished I’d upgraded to a model that can store the footage shot. This is just a monitor.
Small Rig cage and various accessories – Primarily used for video work in doors
Drones:
DJI Mavic Pro– I have a love hate relationship with drones. On a positive note, they can create some beautiful cinematic results in your video production. On a negative, I don’t know anyone who hasn’t crashed theirs and it’s honestly hard to get good at using them, due to the over regulation of their usage. Rather than simply banning them in all National and State parks, a better system would be to license the operators, so serious users can maintain standards and use them appropriately. ****Pro Tip: Buy the extra batteries – You’ll need them. I use the daisy chain charging system with 4 batteries.
This video “a story for tomorrow” was written and produced while traveling through Chile & Patagonia with my girlfriend. We spent 5 weeks exploring this amazing country, and this is how we chose to document it. Thanks so much for checking it out.
Special Thanks to:
LensProToGo, for helping us out with cameras and lenses. They are an awesome company, and the perfect place to rent DSLR’s and lenses.
…Castulo Guerra for helping out with the voice over. He is an extremely talented man, who was great to work with…and I am so grateful he decided to take on this project…thank you very much Castulo.
…and also, to my girlfriend Nina for putting up with my nerdy ways, and for making this such an awesome trip…you’re the best.
Equipment used: Canon 1D mark IV + full Canon lens package – 17 tilt shift, 24, 50, 70-200, polarizer, gradient filter, monopod, tripod.
******* TAP NOTE: This was the video that was the original inspiration for The Adventure Portal. Ask yourself “Are you enjoying your story?” – Thanks Gnarly Bay for the kick up the ass we needed!
I won’t lie to you, living full time in a van is not without its challenges. Areas being closed due to Covid restrictions has added a new element to navigate around for many van lifers. However quarantine in a van allows you more freedom than quarantine at home and there are still lots of things you can see and do to enjoy a socially distanced road trip!
We recently took a road trip South from North Dakota to Nebraska and found some great places to stop along the way. We came into North Dakota from the East, Google maps will want to have you on the fastest route, but like many travellers we find joy in the journey as much as the destination. Pin smaller towns along your route to trick your map app into taking you along the smaller highways. We did US Highway 2 (rather than Interstate 94) where there was plenty to see and some great camp spots along the road.
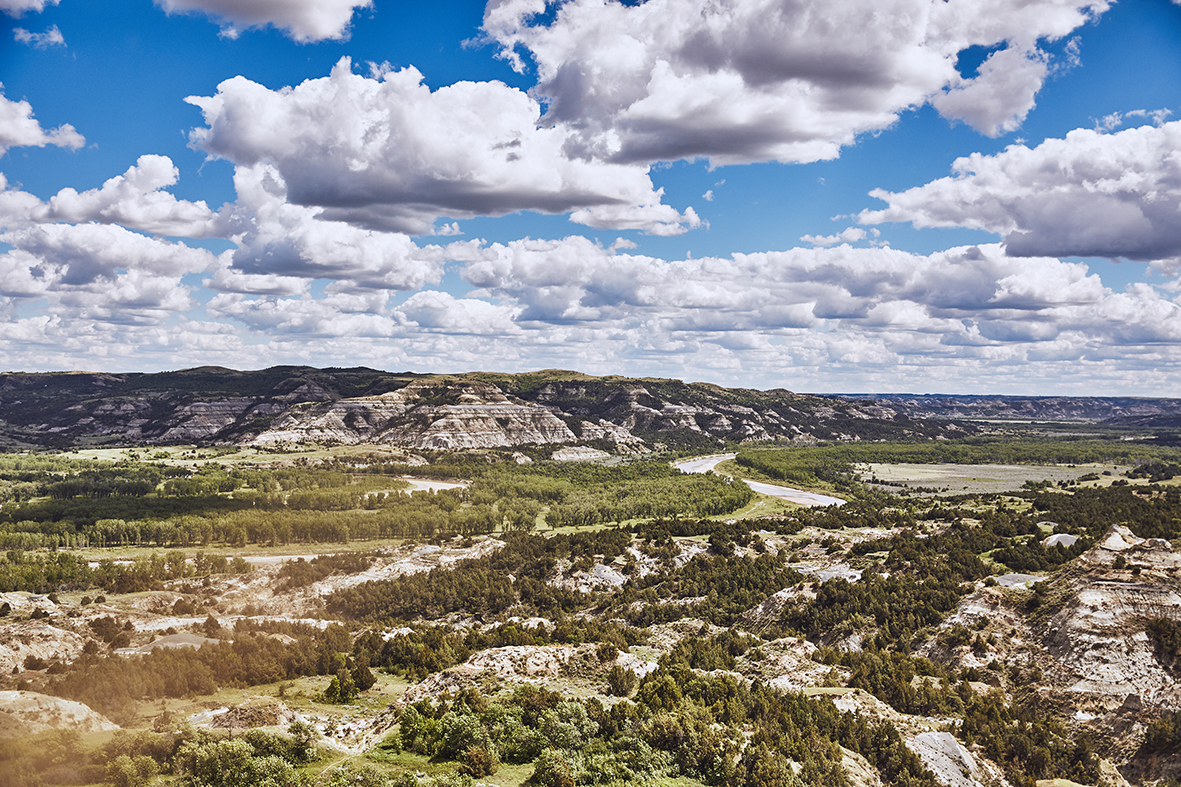
Theodore Roosevelt National Park
Our first stop was Theodore Roosevelt National Park North Entrance in North Dakota. This is a beautiful park and home to many Buffalo, if you enjoy hiking there are plenty of trails to explore, for those with a more relaxed approach you can take in some incredible views along the parks in and out drive. The park facilities are closed for Covid, however you can still enter the park for the day, bring cash to pay your entry using an envelope provided.
Theodore Roosevelt National Park
Along with facilities being closed, the park is not offering access to its usual campgrounds, closures can add difficulties to your socially distanced road trip. Not to worry, there is a campground just a few miles south of the park entrance, which is open and is $6 a night. Look for CCC campground on google maps. Overall we found the park to be almost empty of visitors, so if you have a rig with everything you need on board, now is a great time to be getting the most out of parks like this one.
Camp site at CCC campground
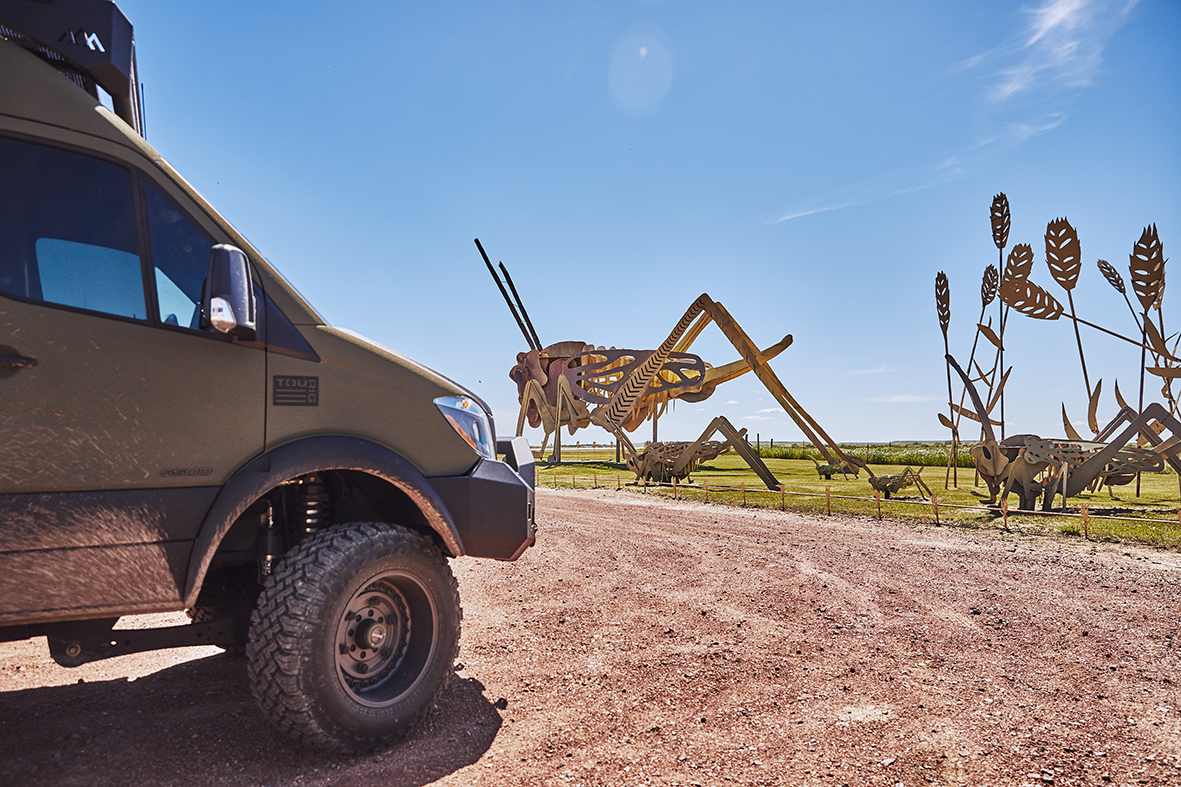
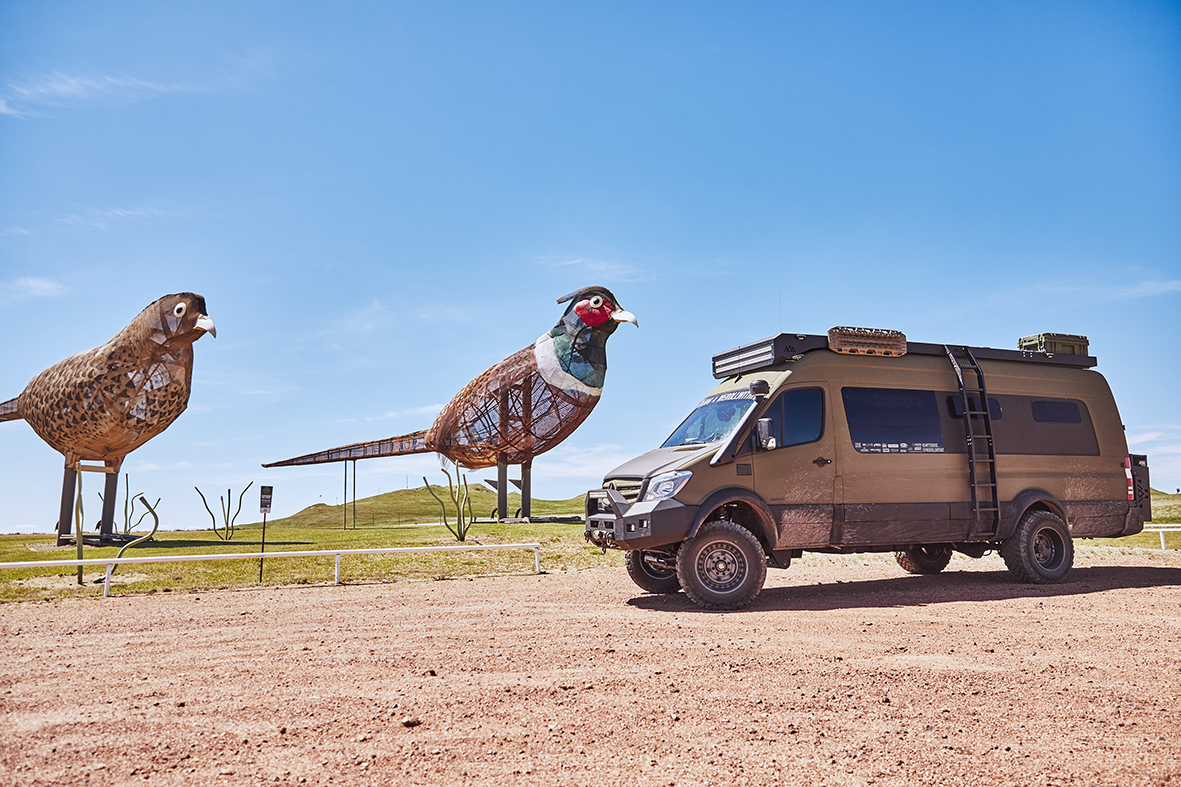
The Enchanted Highway
Heading south we were in search of a section of road known as The Enchanted Highway. The Enchanted Highway runs for 32 miles between Gladstone, ND, and Regent, ND. The Highway is home to 7 large sculptures commissioned by different artists, each has a pull off with ample parking for larger rigs, you can get up close to the art and get some great shots of your rig all while safely enjoying your socially distanced road trip.
Sculptures along the Enchanted Highway making even Bruce Banner look small
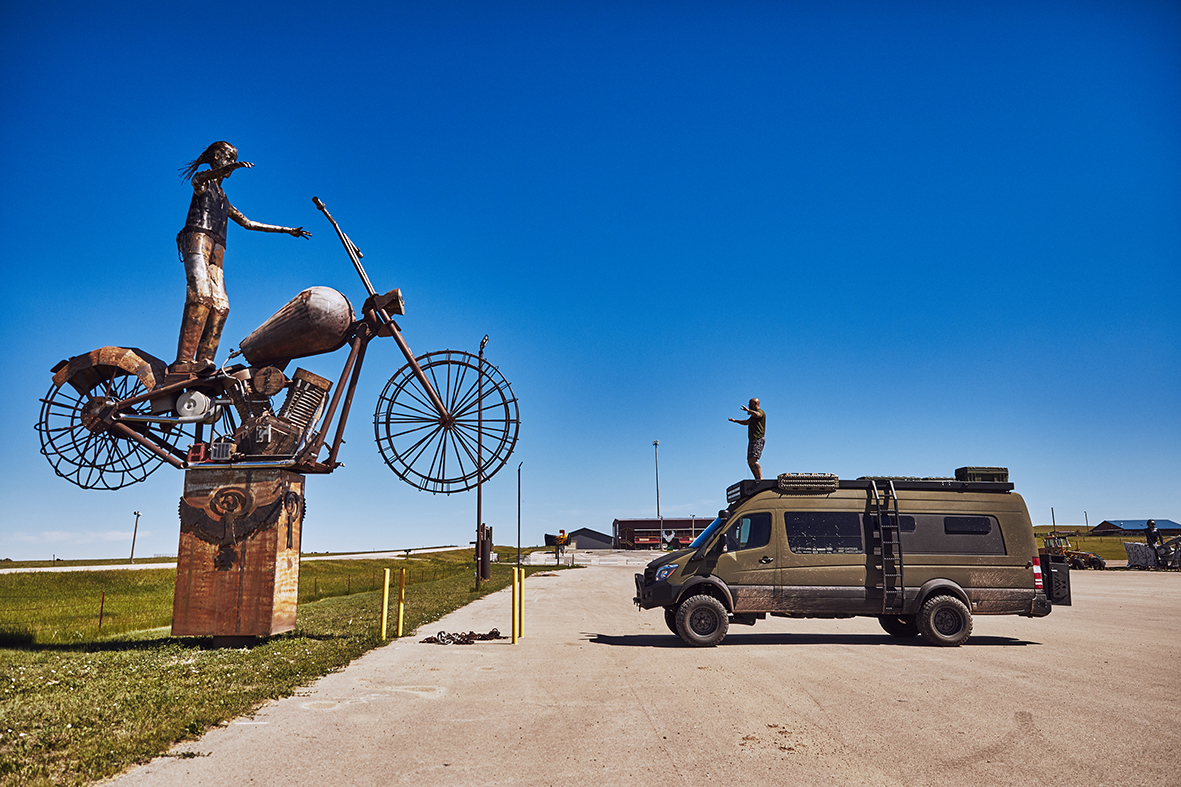
Sturgis
This brings us into South Dakota and a town called Sturgis. Any motorcycle rider will tell you that Sturgis is home to one of the largest motorcycle rallies in the world which has been running annually since 1938. The Rally runs in early August so be prepared for a lot of people if you pass by this area then. If you stop in at any other time of year the town is relatively quiet, you can visit the heart of the rally and admire the metal sculptures of biker legends like Indian Larry and grab a drink at the saloon.
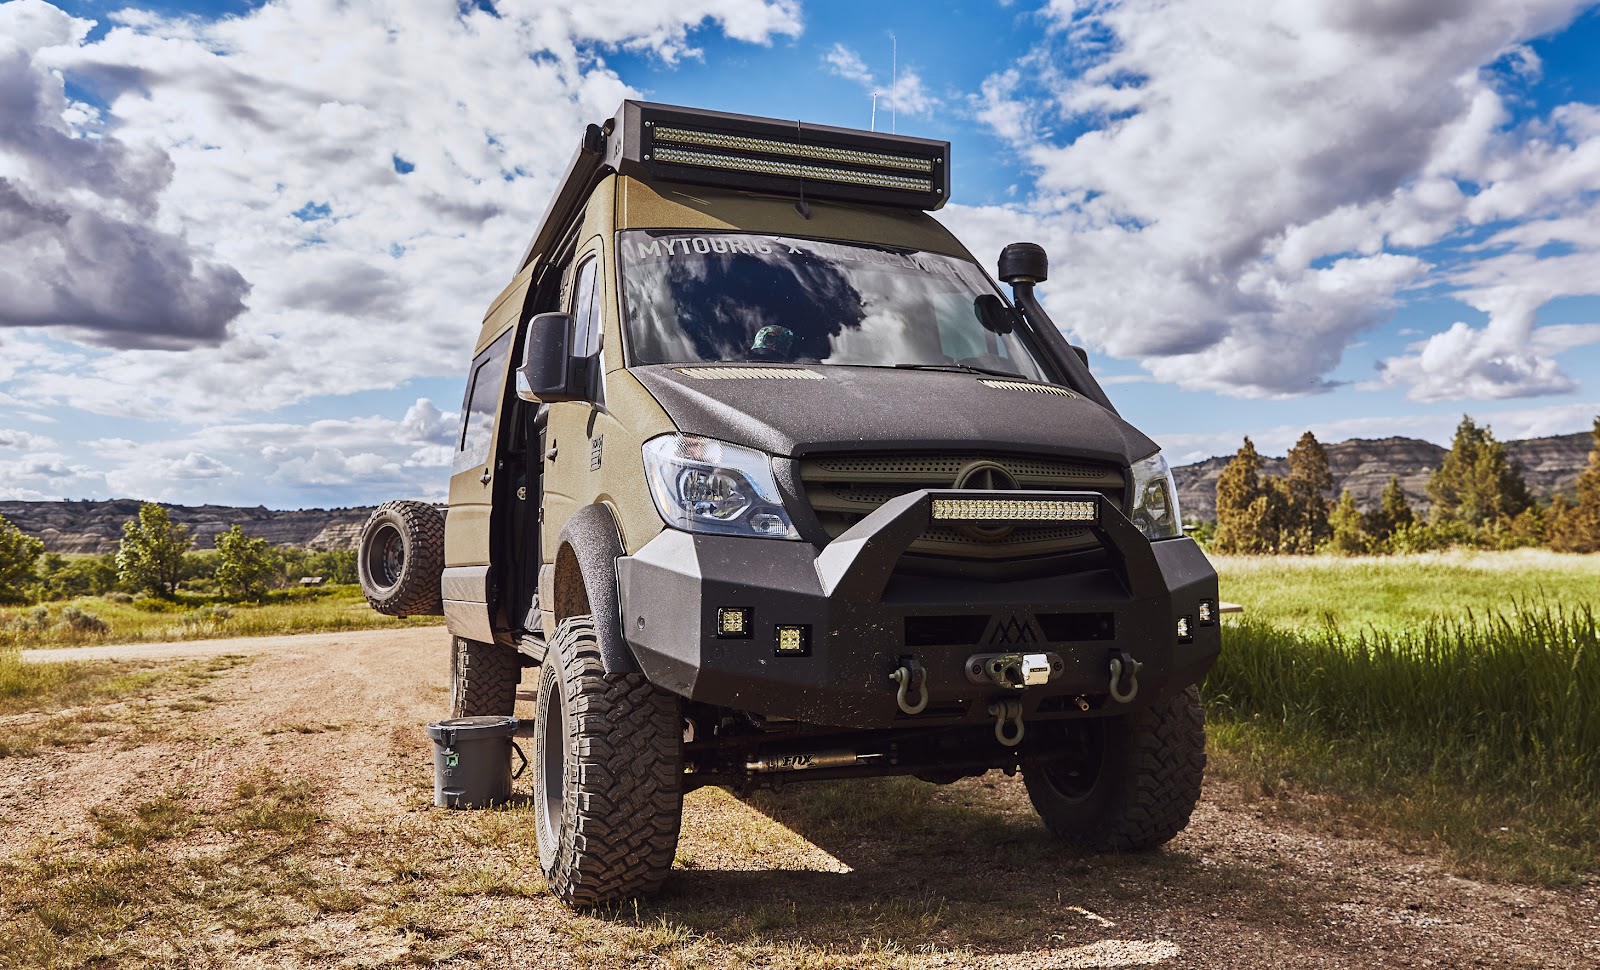
Indian Larry meets Sprinter Levi
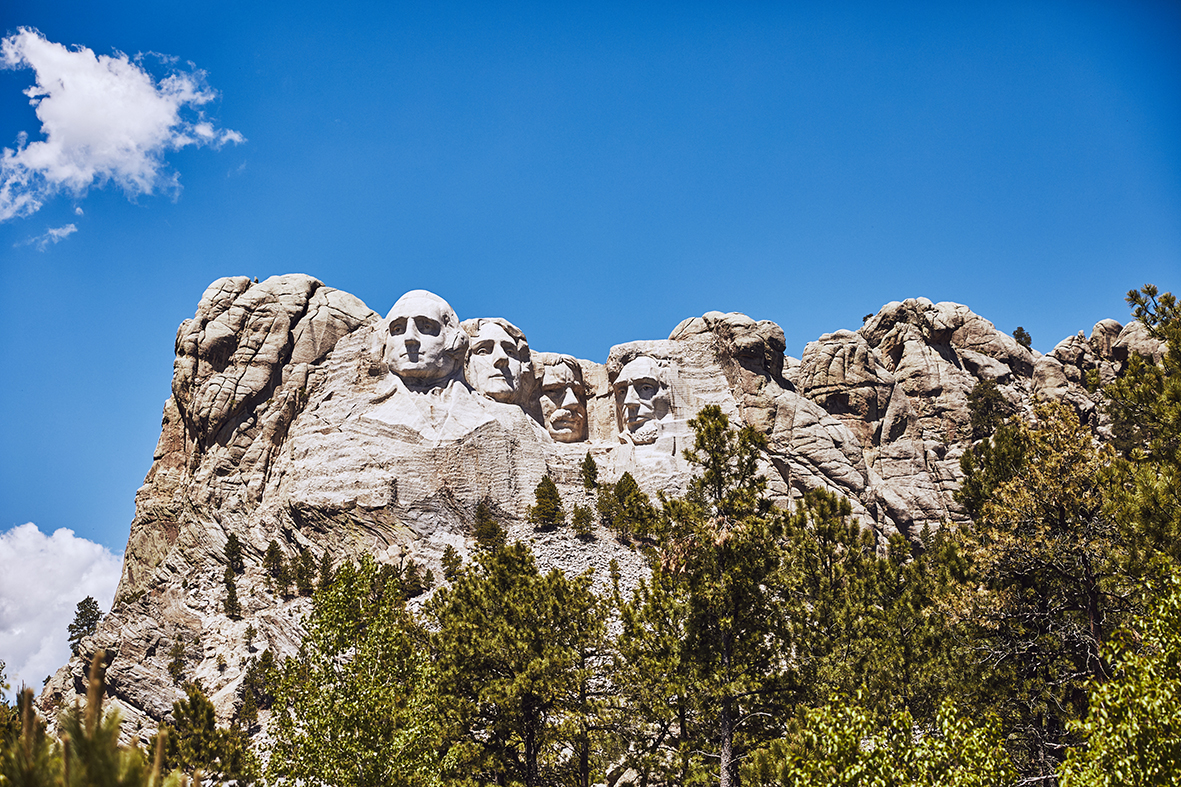
Mt Rushmore
Is any American Road trip complete without a visit to Mt Rushmore? Our visit to Mt Rushmore was a quick stop, again we found it to be pretty quiet at this time. We parked and were able to walk up to the viewing area. We also stopped into the Crazy Horse monument. Access to this under construction mountainside sculpture is a little more difficult, it requires you to park at the base and take a bus ride up to view – everything is open and running but you won’t be able to keep your distance at this site.
Mt Rushmore
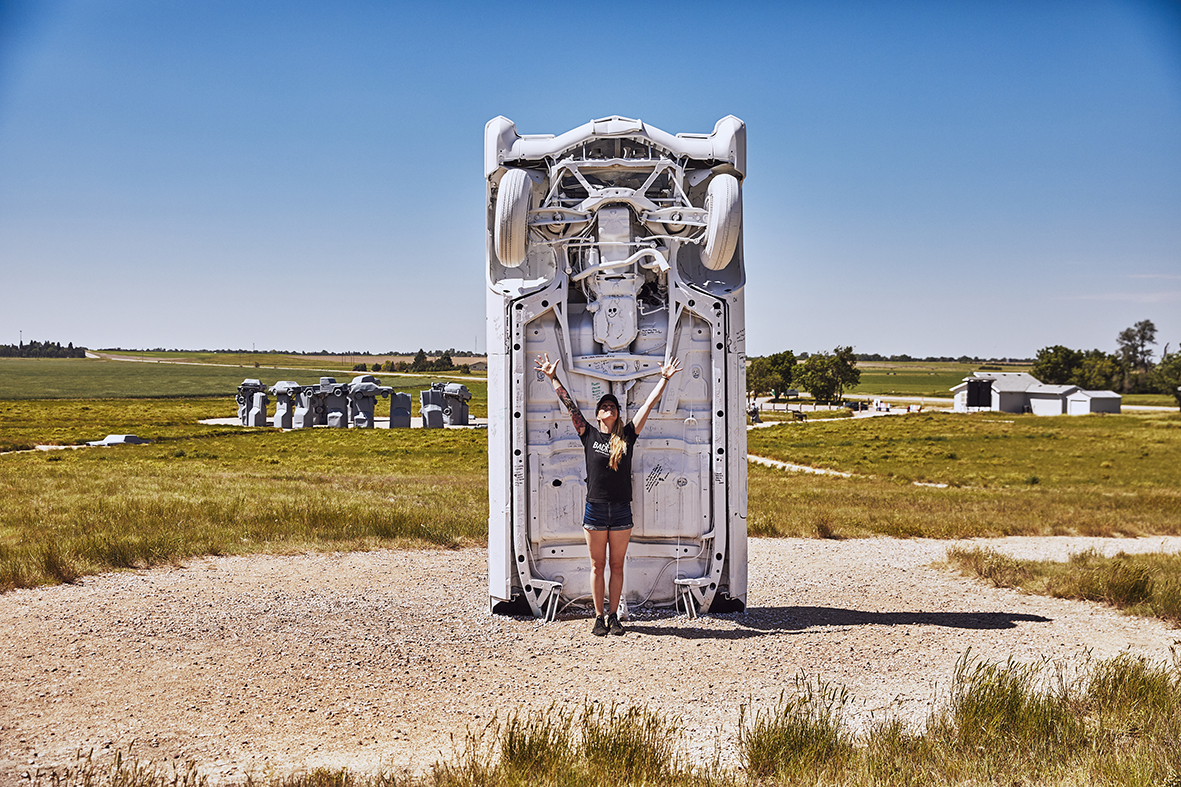
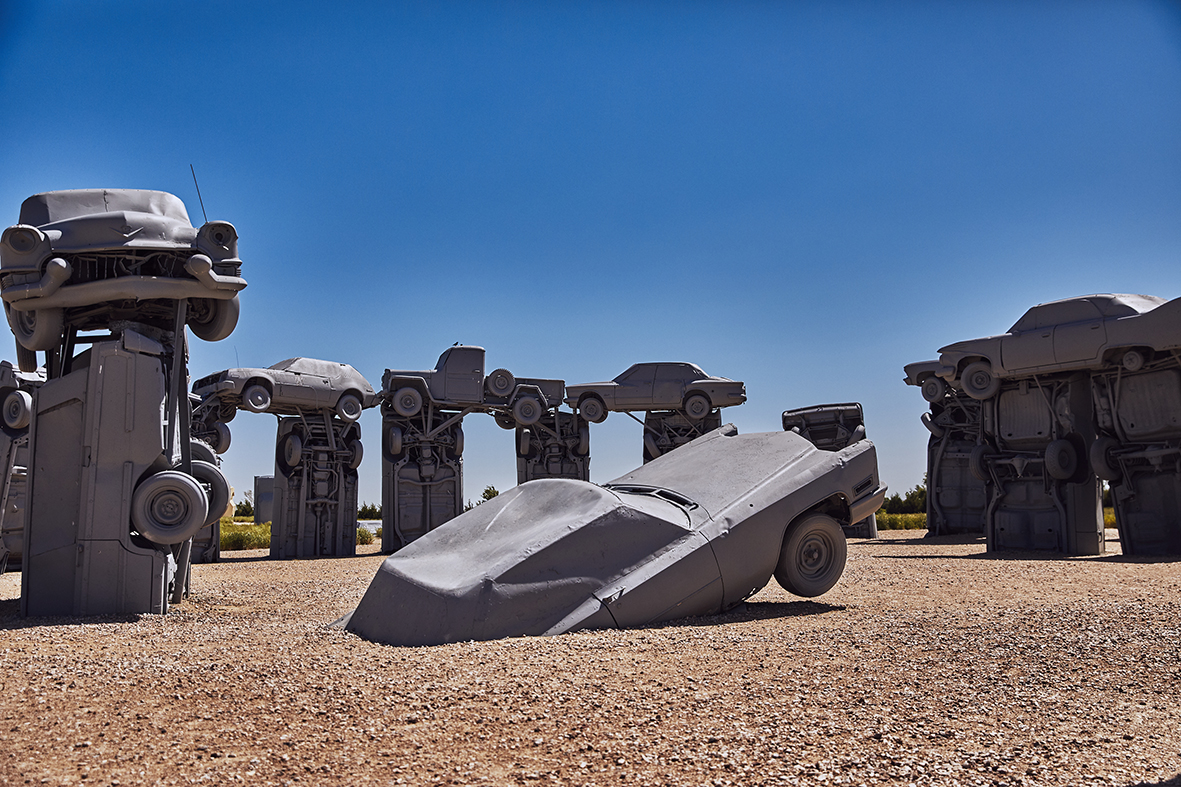
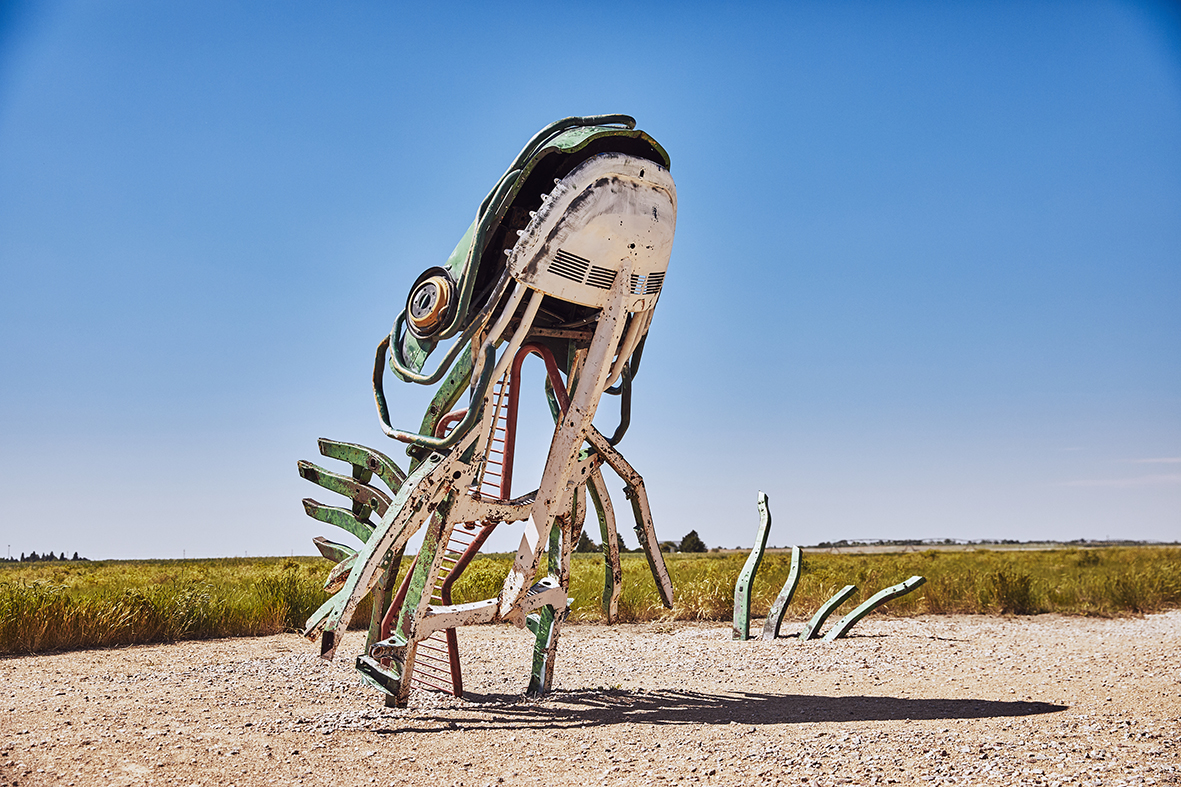
Carhenge
Reaching the South most point of our trip, we entered Nebraska in search of Carhenge. Carhenge is, as the name suggests, a replica of England’s Stonehenge made from cars. It was built by Jim Reinders in 1987 and car lovers will find there’s some classic gems amongst the building blocks. The site has since had more artworks made from cars added to its grounds and is a great stop off where you can get up close to the art in the open air.
Carhenge
Socially distanced road trip tips!
Make sure you have what you need on board, snacks, drinks and of course the loo – our TouRig has the Dometic portable toilet
Bring your mask – Many states require you to wear a mask.
Have cash available in small notes – Campgrounds and parks are leaving it up to the honour box system so make sure you have cash ready to leave your payment.