Home Blog Page 100

TemboTusk

tembotusk, over land, overlanding, off-road, off-roading, vehicle supported adventure,, skottle, adventure,

The Adventure Portal crew have been using the TemboTusk standard front fridge slide for years.  I recently spoke with owner and creator  Jerry L’Ecuyer, a seasoned overland adventurer, Here is what he told me about his company, products and what motivated him to design his own gear.

“The TemboTusk business is centered on building heavy duty, durable gear for overland travel and car camping. We design and manufacture almost all of our products locally in Southern California.”

tembotusk, over land, overlanding, off-road, off-roading, vehicle supported adventure,, skottle, adventure,
TEMBO TUSK displays fridge slides

“TemboTusk services the camping/overland accessory market. If you have a fridge or cooler in your vehicle, we supply the slide to help access the fridge.  If you Tembo_Wine_Tote_the_adventure_portalcamp outside, we supply camp tables and lantern hangers that are compact. If you liketo cook on the trail, we supply a Dutch Oven Table and a South African inspired skottle grill and if you enjoy a beverage or two, TemboTusk offers a most useful canvas wine/beverage tote. Our clientele is very self-sufficient, independent and discriminating. Anybody can buy cheap throwaway mass-produced gear. TemboTusk clients buy gear that will last a lifetime. We have been in business since 2010 and have grown every year since. TemboTusk started with only one product and we now fabricate almost a dozen.”

“The motivation for starting the business came out of frustration! I had a drawer system to help me keep organized while camping, and I strapped my Engle fridge to the top of the drawers. Great use of space! However, I hated lifting the fridge in and out of the vehicle every time I needed to get into it. I needed a way to easily get the fridge from top of the drawer system down onto the tailgate of my vehicle and back up again without straining my back. A fully loaded fridge is very heavy. It took two years of thinking about it and a year of prototyping the design before I came out with my patented LoadSpotter slide. The slide allowed me to store my fridge up and out of the way and with a moment’s notice, I could pull it out and swing the fridge down and out of the vehicle. We debuted the prototype at the 2010 Overland Expo and had our first sale! TemboTusk was on the map!  Another frustration was a lack of a good quality robust flat slides for the ever increasing popularity of the 12 volt camping fridge. TemboTusk set about to design a better flat slide. Equipt Expedition Outfitters and Adventure Trailer took notice and they are now major customers.”

tembotusk, over land, overlanding, off-road, off-roading, vehicle supported adventure,, skottle, adventure,
TEMBO TUSK displays their camping tables

“Most of our current products were designed because a good alternative was not available on the market. I could not find a good quality, compact camp table; we now produce a very robust table that will fit in a drawer system. I have been using a South African skottle style grill for 20 years and guarded that grill with my life! Everyone one wanted to buy it or take it! When I could not find a replacement anywhere, I designed the Tembo Tusk Skottle grill. The Skottle grill is quickly becoming a runaway hit, we are barely keeping up with production!”

“We believe what makes our company stand out is our philosophy that a good product should be bought once and be good enough to be used for a lifetime.”tembotusk_logo

Jerry@TemboTusk.com

www.TemboTusk.com

www.facebook.com/TemboTusk

Interview and photos courtesy of  Jerry L’Ecuyer, owner of Tembo Tusk
written by: Lori Palmer  TAP Editor

Leitner’s Off – Road Trailer Build

Leitner 4x4 trailer 4

Why build his own trailer? Bernhard Leitner of Leitner Designs has a passion for adventure, off-roading and camping. With all the wilderness and beauty Alaska has to offer it was the perfect place to plan a trip to. The decision on what vehicle for this journey would be an easy one. The 1973 Pinzgauer 712. The tough part was finding a trailer on the market that not only looked good with the “Pinzy”, but one that supported all the functions Bernhard wanted. A place to sleep, kitchen facility and plenty of storage. Being a mechanical engineer, owner and creator of Leitner Designs, maker of the Active Cargo System, he had the vision, skills and desire to take on the build himself. Working his normal hours of his day job, Bernhard would spend 6-10 hours every day in the evenings and weekends for 6 months straight to finish in time for the trip to Alaska.

Important custom trailer components:- Bernhard was looking for a trailer that matched the specifications of his tow vehicle, track width, wheel base, and ground clearance that was as high as or higher than the Pinzgauer. When he couldn’t find it on the market he set out to build his own. First he did some hand sketches that encompassed the basic overall design, and later the design was refined and modeled in 3D using Solidworks CAD software. One big consideration in building the trailer was that everything was ergonomically correct. Something he had not found on other trailers on the market. He made all working/cooking areas at 32 inches high, same as a standard kitchen. He created all the slides (refrigerator/stove/silverware) so that everything was within easy reach. He fit all components together like a jigsaw taking into account the fact that he would likely hit some trails that could roll his trailer.  Bernhard designed everything down to the hinges and screws. This process took him three months to complete and he was meticulous.
trailer behind pinzgaeur

We spoke with Bernhard about the process involved in planning and building his custom 4×4 trailer. Here are some segments of our conversation:

LP: How did the building process go?
BL: As smoothly as expected for a custom build of this complexity. I expected it to be really hard and a lot of work. It was, even more so than I thought. When I created the 3D plan, I put myself into it. I wanted to be sure that everything I planned to include in the trailer could be reached, lifted etc. I micro-planned then chunked the project in order to get through it. I literally broke this project down into the smallest detail and tackled one thing at a time. It was the only way I could do it without becoming overwhelmed. For example, after the planning stage, I needed to start building. I had no tools.  Nothing but an empty garage. So, I went out and bought a welder, a grinder, some sheet metal and a press break. That was the first “to do” item on my list. I’m not kidding when I say that I broke this project down to the smallest detail and then took it in small chunks.  It would have been too overwhelming had I done it any other way. The most time consuming part was all the sheet metal work. There are over 100 individual panels that needed to fit together. I did not have a lot of experience with sheet metal, so I purchased a Sheer and Press break and taught myself how to use them. I wanted the finished trailer to look like it was one smooth piece of steel, so every joint was seam welded and ground flush.   I have to say, even though I micro-planned this build, the fact that it works as well as it does, I consider pure luck.

Leitner_4x4_trailerbuild_2

LP: Tell me about the frame build.
BL: I built the main frame from 3 x 2 X .125 mild steel. I reinforced all the corners with 3/8 steel gussets. The trailer tongue is especially over built. Where most trailers would use a C channel, I went with a 3” square tube that runs over ½ the length of the frame. This design allows for a telescoping tongue with an adjustment range of 36”. The length adjustment has come in handy numerous times, on many boat ferry’s they charge by the length of the vehicle. By shortening the trailer the full 36” I was able to save a few hundred dollars!

LP: The next steps?
BL: Once the main frame was complete I started work on the body of the trailer. Although when assembled the trailer looks like one piece, it is actually several components that are bolted together. The kitchen side is the most elaborate, containing the slide out for the refrigerator, trash can and silverware drawer. My plan from the start was to ensure everything would stay in place even in the event of a complete rollover. I did this by securing everything with rubber straps and having the doors of the trailers close so tight that items could not shift. Unfortunately, I have had to put this design to the test on several occasions!

Leitner 4x4 trailer_trailer_roll_12

Here is a list of Bernhard Leitner’s Off-Road custom camping trailer’s components and specs:

-Year built: 2011
-Weight empty 1800#
-Weight fully loaded 2500#
-Tongue weight 500#
-Dexter Torflex axle with electric breaks
-80 quart 12 volt fridge
-2X deep cycle batteries/charge from tow vehicle or from 110 power
-2 burner propane stove/ 2X 20# propane tanks
-Full kitchen with table settings for 4
-140 cubic feet of storage space
-Sink with hot and cold water/backup hand pump in case of power failure
-1.8gpm water pump with .5 micron water filter/ can be reversed to fill tank from streams and rivers
-Full Led lighting in all compartments with 4 Vision X Floods for outside lighting/Red night vision Led lighting
-Eezy awn awning with 3 walls on kitchen side
-Instant hot water heater/ with shower tent
-25 Gallon main water tank/ 4 gallon reserve tank
-King size roof top tent with led interior lighting

LP: What’s the best, most memorable time you’ve had in your trailer? 
BL: Finally arriving at the Top of the World Highway in Alaska.  We had driven 4,000 miles and it felt so good to get there! All the hard work I had done on the trailer paid off. I built it specifically to go to Alaska and it turned out really well!
4x4_custom_trailer_Alaska


Watch Leitner’s trailer in action:

Photos and interview courtesy of Bernard Leitner of Leitner Designs. Check out his Active Cargo System here.
Written by: Lori Palmer, TAP Editor

Maggiolina AirLand Roof Top Tent

maggiolina1
maggiolina1

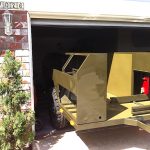
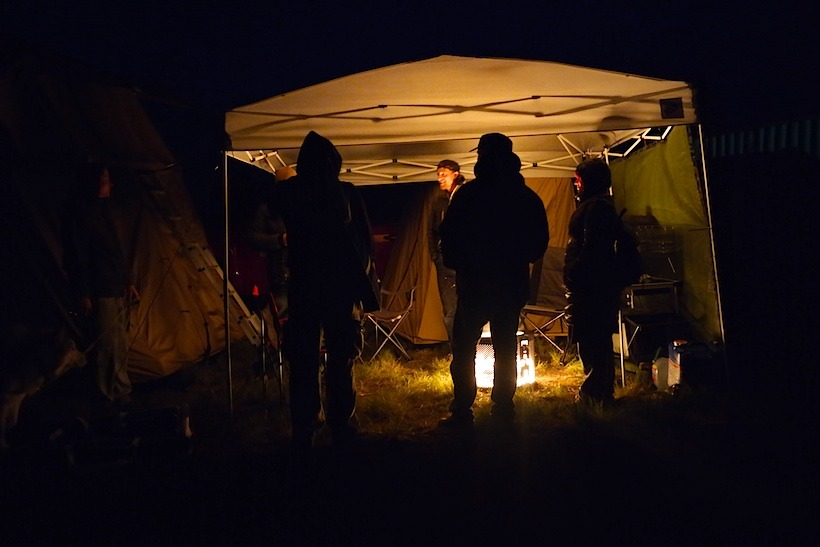
Here’s the scenario: You pull in late, you’re exhausted but you’ve got set up camp. You dig through a mountain of gear to find your tent. Then you fumble around with shock-corded poles and tiny clips (blinding your camp buddy, in the process with your headlamp beam). You blow up your air mattresses and unpack the sleeping bags.  All you want to do is lay down and go to sleep. What’s your option? Read on….
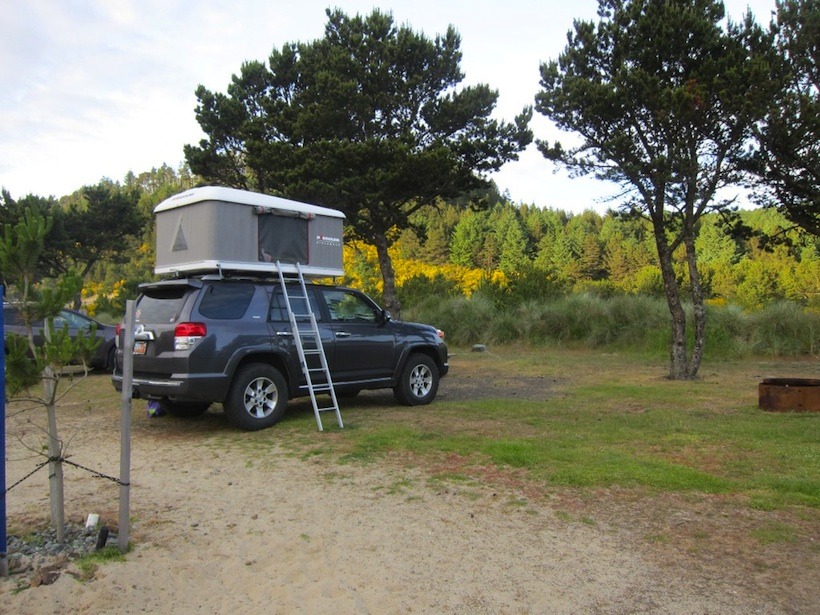
Roof top tents have been popular with the overlanding crowd for years. Recently they’ve been gaining in popularity amongst more mortal folks who don’t have the luxury of spending months at a time off-roading their way around the globe. Several varieties exist from nearly a dozen manufacturers ranging in price from about $800 to over $5,000 for high-end carbon fiber models. After much research we settled on the Maggiolina AirLand tent, size medium, to sleep me, my wife Melissa and our 2 year old son, Jackson. After using it for almost two weeks on a road trip around Oregon I’ve had enough time with it to decide whether I like it, or if we threw away a not insignificant chunk of change.”

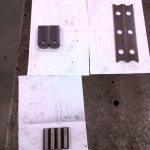
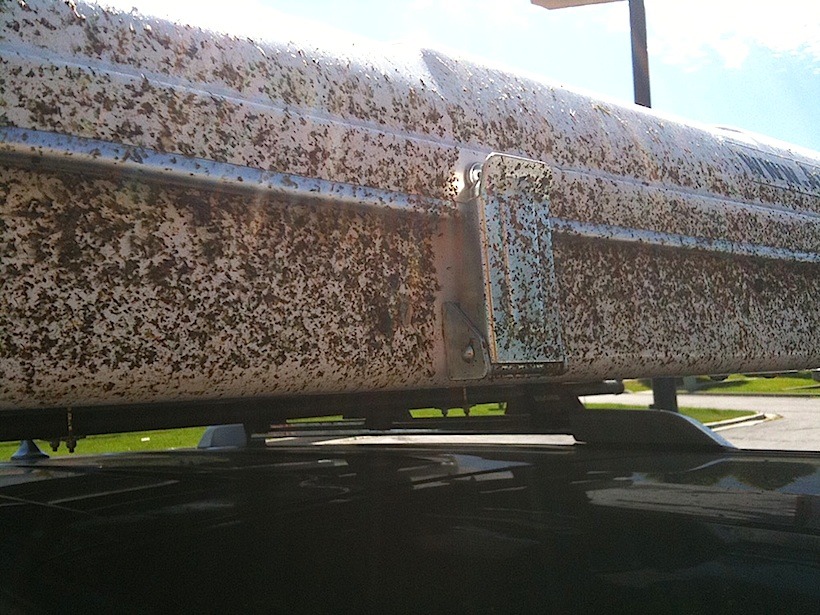
“I usually prefer to start with what I like about a product. This time, I’m going to start with one thing I really, really didn’t like. In fact, I’ve even got a photo to share with you to demonstrate my point (see below). While you’re looking at the photo I’d like you to imagine operating those latches without getting bug guts all over your hands. Yeah, it’s impossible.”
maggiolina_2_gear review the adventure portal
The Good
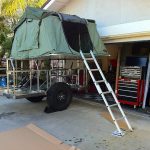
“Now let’s move on to the good. The tent installs directly to your roof rack with four U-bolts. Installation is simple, but there isn’t much room to tighten the bolts between the bottom of the tent and roof of your car. A self-ratcheting wrench works well. Once installed, deploying the tent upon arrival at camp takes about 1 minute and is easily managed as a solo effort. You simply unfasten two latches at the front and one at the rear, insert the hand crank and start cranking. The roof of the tent rises up on two scissor style arms until the fabric is stretched taut. Remove the ladder from inside the tent, extend it and secure it to the lip of the tent, climb inside and crawl into your sleeping bag for some shut-eye. That’s right, your sleeping bag and pillows stay inside the tent, on top of the comfortable 3.5″ mattress. This saves time in set-up and saves precious cargo space inside your vehicle.”

“The tent has two large doors on either side and two small, triangular shaped windows at the front and rear. Ventilation was excellent and the interior never felt muggy, even in the humidity of the Oregon Coast. Often times good ventilation comes at the expense of reduced water resistance, but a full night of persistent rain never penetrated the fabric. While on the topic of rain, you can store the tent when wet, and it is much easier to do than trying to disassemble and pack up a regular tent in the rain.”

“Packing the tent away requires a little bit more effort and about 5 minutes of your time. Still, less than it typically takes to break down a typical backpacking or car camping tent set-up. The two most challenging aspects of packing up the tent are keeping the fabric tucked inside as the roof lowers and figuring out the best way to position your sleeping bag and pillows inside the tent for stowage. If you don’t do it right, you won’t be able to secure the latches. On the bright side, once you learn how to configure your sleeping bag and pillows you’ll be able to pack away the tent much quicker.”

“I expected a significant hit to our gas mileage and was pleasantly surprised to see that we only lost about 1 mile per gallon at 85 MPH. Yeah, we didn’t always obey the speed limits.

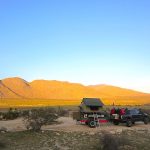
“The footprint is quite small. If you can find a reasonably level place to park, you can find a place to set up the tent.”

“The mattress is quite comfortable. It’s firm but not harsh and is plenty long enough for my 5’9″ frame, with a few inches left over.”

“You don’t have to search for ground that isn’t rocky, or wet or muddy or covered in thorns. You’re somewhat better protected from animals and insects (ants, scorpions, etc.) although you’re still game for large predators, like bears.”

The Bad

“The tent ain’t cheap. Retailing at $2,899 for a size medium, it’s a lot of money for four canvas walls and some fiberglass.”

“The ladder is sturdy but the rungs are painful on bare feet. Speaking of bare feet and the ladder, middle of the night bathroom breaks require a bit of effort. I determined that if I wasn’t in pain, I didn’t need to go bad enough to justify the effort.”

“We had a couple windy nights and the tent performed fine but I don’t think I’d want to test it in major gusts. I’ve read elsewhere that none of the Maggiolina roof top tents handle big wind very well and after using ours for a couple of weeks, I agree.”

“This model has no storage pockets inside. I had to hang my glasses from a gap in the door, put my wallet and phone in a small cavity next to the mattress and my clothes at the foot of the bed. Some models come with pockets along the walls and a net attached to the ceiling, and I think all of their tents should ship with these storage solutions – especially at $3,000 a pop”.

“All Maggiolina roof top tents have a small light inside, which is cool, except that the light is powered by a cord that you have to plug into your cigarette lighter. That’s just silly. Put a battery powered LED light in the tent and I’m a happy camper (literally).”

“This may be a personal beef, but I’m not crazy about the door closure. There is no zipper on the bottom of the mosquito net door, which means you have to tuck it in to the mattress to keep the nasty little blood suckers out. The outer door has an extra long flap that hangs down a couple inches past the bottom of the tent, which could be a bit drafty in cold weather as there is no way to seal it.”

maggiolina_3_gear review the adventure portal
The Verdict

“All said, I think the Maggiolina AirLand roof top tent is a quality product that definitely makes setting up and tearing down camp a less time consuming task. It’s convenient, well made and a nice addition to our growing collection of tents.”

Some Random Tips:  If you decide to buy a Maggiolina roof top tent, here are some tips to help get you through the learning process a bit faster.

“First, read the instructions before you mount and/or deploy the tent. Seriously. I didn’t, and doing so would have made things much easier and significantly reduce the risk of damaging the tent.”

“As you deploy the tent, it is critically important not to let the roof slide forward or backward while cranking the roof into the up position. Use one hand to crank and one hand to keep the roof parallel with the front and rear of the bottom section. Failure to do so can result in bent scissor arms and a non-functioning tent.”

“When packing away the tent, we found that it is easiest to lower it approximately 2/3 of the way before tucking in the fabric. There are two straps that tend to fall out just as you’ve almost got the tent closed and they can be easily pushed back inside if you notice it before the roof is all the way down.”

“Be sure to remove the hand crank before you hit the highway. I left it in and noticed it in the rear view mirror a few miles down the road. Luckily, it hadn’t fallen out or we’d have had no way to deploy the tent. After that, I started doing a walk-around to make sure all latches were closed, all fabric tucked inside and no crank was left in place.”

Author: landscape and adventure photographer, Bret Edge.
Courtesy of: Melissa Edge, founder of Adventure Tykes
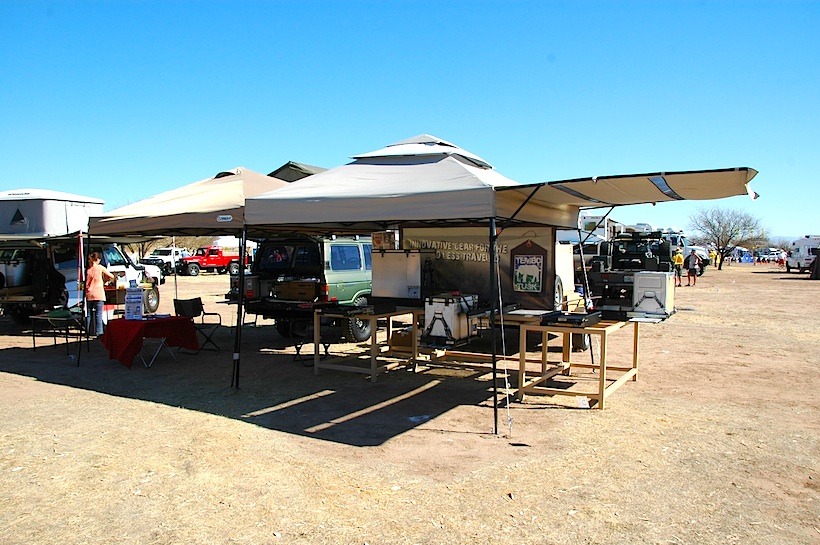
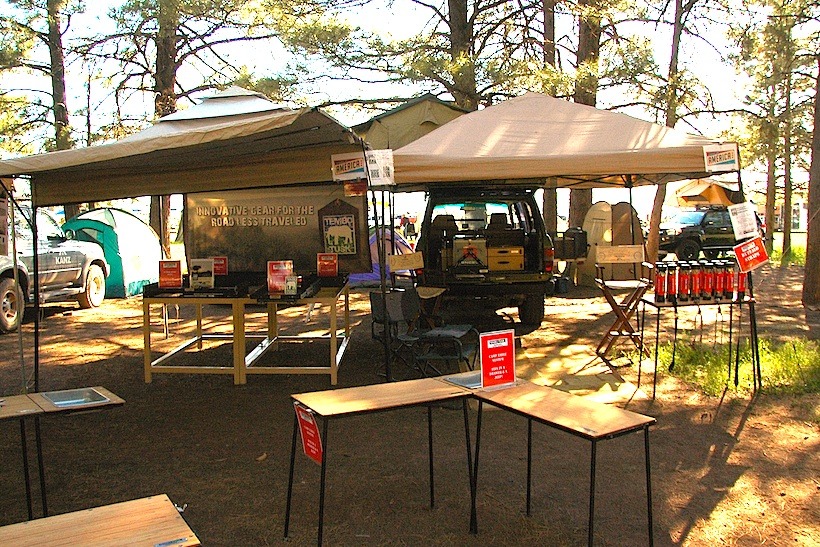
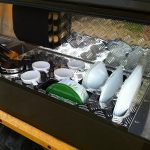
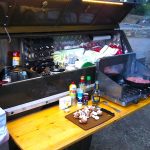
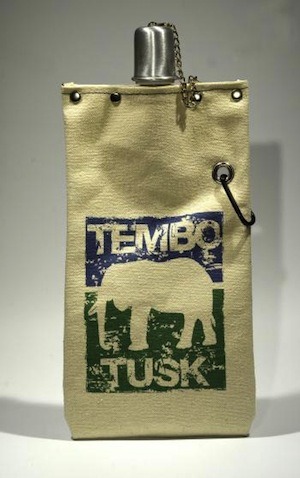
Team Overland

teamoverland, overland trails, off-road trails, overlanding trails, california overland trails, over landing, overlanding, overland, off-road, off-roading, vehicle supported adventure,

Disabled Marine Corps Veteran founds nonprofit business, Team Overland, to help combat Post Traumatic Stress

TAP recently discovered this vital outdoor adventure oriented non-profit organization called Team Overland and we had to give it a shout out.

Team Overland is a newly founded nonprofit organization that uses outdoor adventures as an outlet to overcome challenges associated with combat related Post Traumatic Stress and to help facilitate veteran’s reintegration into civilian society. CEO and Founder Matthew Havniear, a Marine Corps Veteran, believes that in order for  Team Overland to have a realistic impact on veteran reintegration the organization must have both veterans and civilians working together.

overland trails, off-road trails, overlanding trails, california overland trails, over landing, overlanding, overland, off-road, off-roading, vehicle supported adventure,

Here are some stats on our returning veterans and some input from Matthew:  5.5 million of the 21.9 million veterans in the U.S. have service-related disabilities. “Due to the quality of medical treatment on the battlefield improving, they return alive, but not always whole. Military members are trained to depend on each other. After the military, many veterans feel disconnected and alone. They experience a lack of camaraderie as they return to the civilian world.”

overland trails, off-road trails, overlanding trails, california overland trails, over landing, overlanding, overland, off-road, off-roading, vehicle supported adventure,

The Adventure Portal is based out of San Diego’s north county.  We rub shoulders with our veterans and active service members frequently as Camp Pendlton is practically in our backyard.  Service men must never be forgotten and must alway be supported. This is a TAP endorsed company that we hope our readers help support . Read on for more of Matt Havniear’s background, service, what Team Overland does and how you can help support his organization.

A Corporal in the Marine Corps, Matt Havniear served as an infantry Assaultman and Marine Raider with 2nd Battalion 7th Marines Fox Company Weapons out of Twenty-Nine Palms, CA. Matthew deployed to Now Zad, Afghanistan in 2008 in support of Operation Enduring Freedom. His company found themselves embroiled daily in heavy firefights. They were surprised to discover the town looking like a ghost town. It was like a modern-day battle of Stalingrad. The city was in ruins, mined and dangerous. The fighting went from house to house then from one plot of land to another.

Upon his return from Afghanistan in 2010, Matthew was diagnosed with service connected Post Traumatic Stress, Traumatic Brain Injury and Post Concussion Syndrome. He struggled with the symptoms and searched for healthy outlets, but only found long waits and clinical approaches from doctors. Knowing that he needed to find a better outlet for stress management, he became very active with volunteer work. Matt quickly realized that there was a benefit from being part of a team and serving the community. Matthew’s late father Dale Havniear, was an avid outdoorsman and taught Matt, at an early age, the importance of staying connected with the outdoors and nature. Being part of a team and staying connected to nature would prove to be very important in Matthew’s journey of re-integration into civilian life.

overland trails, off-road trails, overlanding trails, california overland trails, over landing, overlanding, overland, off-road, off-roading, vehicle supported adventure,

As a result of him struggling with reintegration into civilian life and the effects of Post Traumatic Stress, Matthew decided to combine his life-long passions for both the outdoors and for non-profit service to create Team Overland.  Team Overland provides guided, overland expeditions to veterans that want a healthy and natural outlet for their stress while learning stress- management techniques.  Active military members are trained to depend on each other. After the military, many veterans feel disconnected and alone. They experience a lack of camaraderie as they return to the civilian world.

Team Overland’s mission is to help vets overcome the effects of combat injuries; both physical and mental.  It provides veterans with a healthy and natural way to manage their personal stress while increasing their social network. The Team Overland experience provides veterans with camaraderie, encouragement, reintegration and a support system that has proven vital to their reintegration and healing.

_overland trails, off-road trails, overlanding trails, over landing, overlanding, overland, off-road, off-roading, vehicle supported adventure,

Matthew describes Team Overland in his own words: “We impact veteran lives by helping members tackle personal challenges. We encourage members to positively manage their stress by providing healthy social environments and by planning activities that improve cognitive coping skills. We inspire our team members, and  encourage veteran reintegration. Our approach assists in the rehabilitation process by providing members with positive reinforcement and the support of a like minded community.”

“On the trail, we work as a team to overcome the obstacles encountered on the way to our destinations. Team Overland is unique in that it is not exclusive to just military members. We want to have an impact on veteran reintegration and we believe that that  it is only possible by having an organization with veterans and civilians working together. At Team Overland, we value and lean on our non-military members. We noticed early on that  the civilians were passionate about “sharing the burden” of service. We have found that our approach builds bonds between military and non-military members through the shared interest of outdoor adventure and teamwork on the trail.”

“Team Overland has also quickly gained interest on a national level. We have secured sponsorship from Warn Industries, Snugtop, Cascadia Vehicle Tents, K&N Filters, AEM Intakes, Factor 55, Overland Solar, Diabolical Inc., Crux Off-road, M&M Paint Supply of Medford Oregon, L. T. Wright Knives, IH8Mud.com, Adventure Ready, Sign Dude of Medford Oregon,Northwest Trails Innovations, and Full Force Metalworks with more partnerships forming daily. The support of those companies has been incredible. There is a lot of gear needed to operate safely and effectively and those companies have helped us to a great start.”

overland trails, off-road trails, overlanding trails, over landing, overlanding, overland, off-road, off-roading, vehicle supported adventure,

There is still a lot the organization needs to continue. “We are hopeful that more companies that believe in our mission will come on board so that we can continue providing veterans and civilians the camaraderie, support systems and adventures that has proved so powerful. If interested in becoming a member of the team or supporting our cause please visit www.TeamOverland.org .  You can also find us on Facebook at www.facebook.com/teamoverland , and on twitter at www.twitter.com/teamoverland.”

overland trails, off-road trails, overlanding trails, over landing, overlanding, overland, off-road, off-roading, vehicle supported adventure,

Article and photos courtesy of Matthew Havniear CEO and Founder of Team Overland

Olloclip 4-in-1 Iphone Lens

iphone 4  in  1 review e1593280875876
iphone 4 in 1 review e1593280875876
The following article came to us courtesy of Bret Edge of Bret Edge Photography

“I enjoy the simple pleasures of iPhone photography. It’s uncomplicated, allowing the user to enjoy photographing a fleeting moment without fussing over aperture, shutter speed and ISO settings, among other things. As much as I appreciate the sheer simplicity of using a camera that literally requires only one action to make a photo – pressing the shutter button – there are times I wish for a little bit more flexibility.”

“The Olloclip, is an easy to use 4-in-1 clip on iPhone lens system (it works on other camera phones as well). It includes two macro lenses, one wide angle lens and one fisheye lens. The Olloclip 4-in-1 iPhone lens is compact and comes with a small bag for lens storage.”

“I spent several weeks with an Olloclip, using it on my iPhone 5S. Although all of the lenses were enjoyable to use, I found myself most interested in using the two macro lenses, which allow extremely close focus. The results were amazing. I’ve never been that interested in macro photography. Still, it didn’t take long before I was seeking out opportunities to slap one of the macro lenses on. It’s easy; you simply unscrew either the fisheye or wide-angle lens to reveal the macro lens hidden beneath. Brilliant design! In practice, I found the macro lenses challenging to use only because the focus distance is so limited that any slight movement of the camera or the subject produced out of focus images. Ideally, you’ll need to mount the phone on a tripod that you can move incrementally closer to the subject until you reach the perfect focus distance. Of course, this does somewhat kill the spontaneity of phone photography. When you get it right, though, the results are amazing, revealing beautiful little scenes that you never knew existed!”
iphone_4_ in_ 1 the adventure portal

“The other two lenses, the wide-angle and fisheye, were also fun to use. The fisheye results in a circular vignette around your subject that I preferred to crop out. The wide-angle lens provided a significantly wider field of view than the native iPhone camera lens, but at a cost. In several photographs I found pretty severe chromatic aberration, or color blur along high contrast edges. Speaking of edges, the top and bottom edges of all photographs were blurred. At first I thought that maybe I didn’t have the lens properly seated on the camera but  I’m picky. Yes, I am. I know, it’s just iPhone photography, but as a professional photographer who strives to create images that are free of any technical defects, it bugged me. Average users probably wouldn’t notice it and even if they did, they probably wouldn’t care.”

“The entire lens system is really easy to use. All four lenses are contained on one “clip” that slides over the phone camera. No special apps are needed to make images with the Olloclip. On one side is the fisheye lens, on the other is the wide-angle lens. Unscrew either one to reveal a 10X or 15X macro lens. That’s it. If you use a phone case,  you’ll need to remove the case prior to attaching the Olloclip. How frustrating you find this will depend on which case you use.  Olloclip does make the Quick-Flip Case that allows attachment of the lenses without removing the case. The Olloclip 4-in-1 lens is available on their website at www.olloclip.com/product/iphone5-4-in-1, for $69.99. Other lenses are also available, though I did not have an opportunity to test them for this review.”

Thanks to author Bret Edge of Bret Edge Photography for contributing this article and photos.

Ten Important Things to do After you’ve Driven Off – Road

4x4training
4x4training

This is the fourth in a 5 part series of safety articles written by Tom Severin of Badlands Off Road Adventures. Tom is an International 4WD Trainers Association certified professional 4WD trainer and a Wilderness First Responder (WFR). He is an instructor for the United Four Wheel Drive Association and the CA Association of 4WD Clubs.

Just as you put a lot of thought and preparation into your trip before you set off, you should also take the time afterward to ensure that your vehicle and gear survived the off -road drive and are ready for the next adventure. Even a mild off – road course can affect your vehicle.

Print this checklist and keep it in your glove compartment or other dry location. By following this list carefully, you ensure that you review every important section or component of your vehicle.

First and foremost, do a thorough inspection of your vehicle to make sure that it is in safe driving condition. You should not take the vehicle onto roads, especially the highway, if there are significant structural or other safety issues.

off_road_tire_check the adventure portal

1. Air up your tires. Don’t try to drive on pavement with your tires low on pressure. Not only will you have difficulty handling the vehicle, but you risk serious
damage to tires and rims. Check your tire pressure the following morning. It can drop 2 to 5 PSI overnight. Remember that you aired up when the tires were hot.

2. Wash and vacuum your vehicle. This will help prevent the spread of weed seeds to other areas, but also makes it easier to spot any fluid leaks and damage that needs repairing. Invasive plants are a problem all over the U.S., caused in part by people driving in multiple areas—sometimes even in different states—without cleaning their vehicles between trips. As a result, they spread noxious weeds to new locations. Be a good sport and clean your vehicle after each off-road drive.

3. Wash your engine. Drive to an appropriate facility, turn off the engine, and hose it down. With a clean engine, you can spot any leak that has developed, as well as a loose bolt, hose, clamp, or other part.

4. Check fluid levels, fan or serpentine belt, and other parts. If you do this frequently enough, you will become accustomed to your engine compartment, and it will be easier to spot a problem or potential problem when one occurs.

5. Examine the differential and transmission for cracks and the fluids for water.

6. Clean Brake Drums. Inspect and clean drum brakes, if applicable. Pull off the drums and clean out any mud or sand inside. That will wear down your brakes in a hurry. This is a good time to adjust your brakes or even replace the shoes, if need be.

off - road repair

7. Inspect CV boots, struts and shocks, and other underbody parts. Any need replacing? Take a look at joints, bearings, and other parts that may need re-greasing. What about the nuts and bolts that hold the axle and suspension together? The vehicle’s suspension system (track bar, control arm, shocks, and springs) are very susceptible to loosening and affect the drivability. Problems with any one of these items could cause damage to the drive train over time.

8. Push and pull on the suspension to see if anything is loose. Push on the side of the vehicle. Are the track bars loose? Have a friend rotate the steering wheel back and forth while you inspect the tie rod ends.

9. Inspect your tools. Are they clean, in order, and accessible?

10. Clean and restock any fluids or gear that you used or that became damaged. This includes medical supplies, spare parts, your fire extinguisher, recovery straps, etc..  Create a list of repairs and other things you will need to take care of post – trip  during the trip or on the way home while they are still fresh in your mind. Make sure you put back all the essential items, and that your vehicle is tidy and prepared for your next trip.

Happy Trails!

Sign up for our newsletter and TAP into Adventure!