Home Blog Page 101

Winching Technique-how to use a snatch block

images
images

What is a snatch block?  A snatch block is a pulley block with a side plate that swings open. Because the side plate opens, you don’t have to thread your winch cable through the opening, instead you open the side plate, fit the cable over the pulley, and then close the side plate. It’s a handy piece of equipment that can improve the function of your winch. A snatch block will increase your winch’s pulling power significantly , and will give you more options in self-recovery situations.

When do you use it?  In a recovery situation, ideally you would have an anchor point located directly in front of your vehicle, so that you don’t have to angle your winch cable. When this isn’t possible,  you can use a snatch block to set up an angled, single-line pull. This involves running the winch cable through the snatch block to an  anchor point that is off at an angle. Then you need to  identify a second anchor point that’s angled in the opposite direction as the first anchor point. Attach the snatch block to the second anchor point with a choke chain. Then use the tension from the two off-set anchor points to position the block directly in front of your vehicle.

A winching essential for safety and effectiveness. One of the rules of winching is to make sure your cable spools up on the winch drum evenly. This is easiest when you are winching straight forward. If you pull at an angle, the cable is more likely to bunch up on one side of the winch drum.

When dual pull action is needed-When you are recovering a rig that is significantly heavier than yours or if you’re not sure your winch will have the power to recover your vehicle, you can use a snatch block to create a double-line pull.  A double-line pull is created by using the snatch block to redirect the winch cable back to the winch.

If you are moving another vehicle,the stuck vehicle is attached to the snatch block. The winch cable goes through the snatch block and back to an anchor point that’s next to your vehicle. This anchor point takes some of the strain off your vehicle, which is important when you are recovering a heavier rig.  In self-recovery, the cable is run through the snatch block then back to your vehicle.  Connect the snatch block to an anchor point directly in front of the vehicle.  Remember that when you use the double-pull set up it will not only double the pulling power of your winch but, it will cut the pull speed in half.

Author: Expert Advice- Warn

Safety notes when winching:
Wear leather gloves
Do not straddle the cable when in use
In case of line breakage or kick back, put a coat or blanket over the line
Don’t us a hook on the end of a cable, use an anchor shackle

Rock-Crawling 4×4 Sprinter

rock crawling with the Sprinter web e1438711109149

Fellow adventurer, blogger  and author of the book 2013 Sprinter RV Buyer’s Guide and Sprinter RV Conversion Sourcebook, Greg Keith interviewed Doug Chase who converted his Mercedes Sprinter Van into an off-road, rock crawling machine.

“In Europe, there are plenty of 4×4 Sprinter vans, but her in the U.S. we have had to subsist mostly on a diet of rumors and aftermarket conversions.  Doug Chase was determined to build an off-road, rock-crawling Spinter that would be able to conquer any terrain.”  The following is an interview between Greg and Doug:

What What were your reasons for doing this conversion on a Sprinter, and a 144″ regular-roof Sprinter 2500 at that?

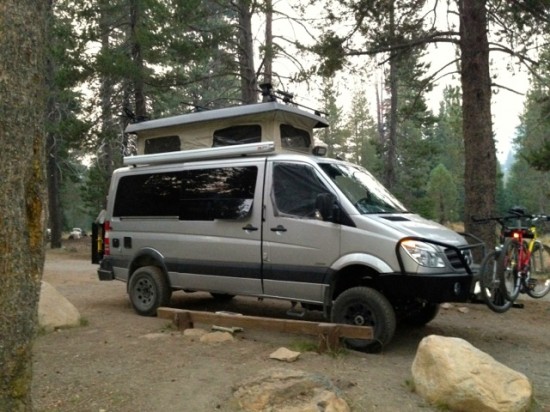
DC: “Well, we chose the Sprinter over other vans because of its great gas mileage, great resale value, and great performance with the turbo at altitude. That said, we chose the short/low Sprinter model because it fits in the tent area of campgrounds, the 144″ wheelbase fits in normal parking spots in town, the short Sprinter works better for maneuvering on narrow 4WD trails, and the low-roof model is the only roof that Sportsmobile will do a popup on. So we ended up ordering a 2010 Sprinter 2500 144″ wheelbase regular-roof Sprinter.”

new-Sprinter_the_adventure_portal

How did you learn about the Sprinter van?

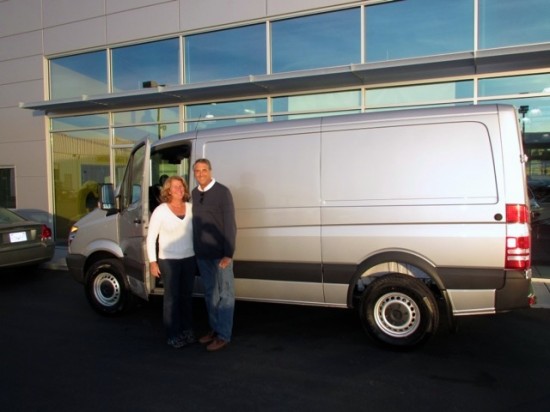
DC: “We saw a Sprinter conversion at Sportsmobile and were impressed, but they would not convert it to a 4X4, so we bought a Sprinter locally and had that done by Whitefeather 4×4 Conversions.”

Were there particular things that attracted you to the type of Sprinter van you chose?

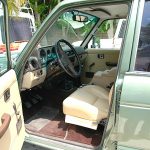
DC: “Sure – better head clearance to start, better room for your feet on the front passenger side, and great visibility when driving with the larger window format, compared to an Econoline or any of the domestic vans.”
completed sprinter the adventure portal
Did you consider any other vehicles?

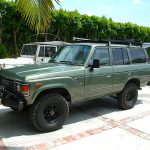
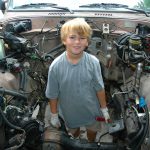
DC: “We started out wanting the Ford Econoline, but then noted the major problems: the resale value is terrible, the engines are typically trashed after so many miles, visibility from the van is poor, and the fuel mileage is terrible. ”

What were your major design goals? Did you have specific needs that weren’t met by commercial 4×4 Sprinter conversions?

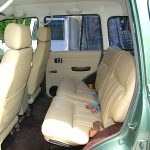
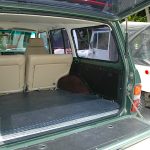
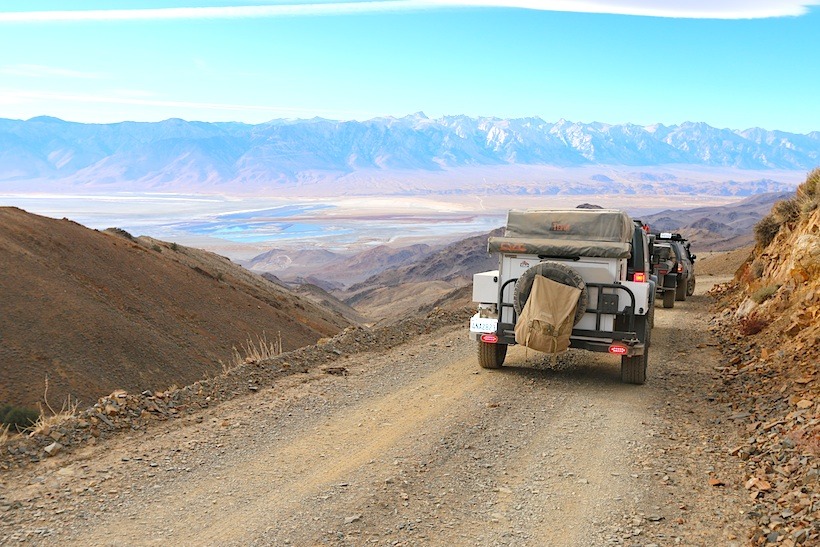
DC: “We wanted a basic hauler for camping/kayaking/skiing/snowshoeing/backpacking and day trips with the dogs. We also really wanted to have just one fuel source for both heating and cooking. We didn’t feel we needed a bathroom in the van, but we did want an outdoor shower (more for the dogs than for us!), large sturdy bumpers for 4X4 trails, good storage, pivoting seats, and the ability to sleep either in the airy top in summer or inside the van body in poor weather.”
4x4 sprinter conversion the adventure portal

“We also wanted four-wheel-drive with good clearance, an easy entrance with flip-up stairs, a side door cabinet for the times we do camp from it (ours converts to a table for outside), a nice GPS system with bread crumb capability, and of course a good sound system since we often travel some distance to get to where we want to go.”

Did you end up doing several designs, or just one?

DC: “Just one, based on my research and the advice of our builder, GTRV.”

About how long did the 4×4 Sprinter conversion take to design and build?

DC: “From the point of ordering the Sprinter straight from the factory in Germany to actually finishing the whole conversion, one year. The cabinets took about three months to complete, and the 4X4 conversion took about two months.”
4x4 sprinter conversion cabinets the adventure portal

What are the features of the design that you feel turned out the best?

DC: “It is all really cool. The GoLight remote spotlight is expensive, but I love having it, it’s great for getting into camp late and packing out late in the dark or in bad weather. Also, the GPS/audio system is really nice. The diesel stove/heater is great, the popup works really well for us, and we love having the solar system to power all the LED lights in the interior.”

What are the things you wish you’d done differently?

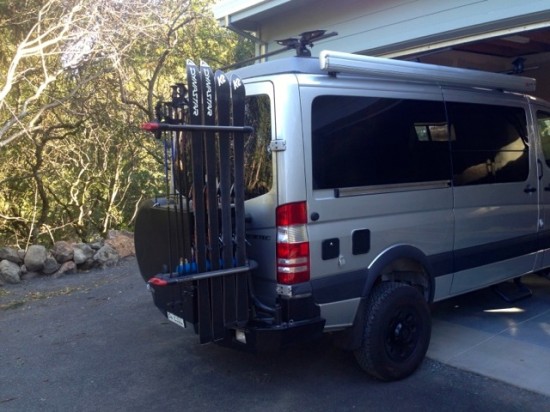
DC: “What can I say – for us, it’s perfect! The finished product is amazing…perhaps the largest difficulty has been that so much is “out of the box” that we had to go to multiple people in different cities to get it all done. We also have had to make some changes to deal with all the rock-crawling: we scraped the rear differential cover, which caused a leak, and scraped the plastic on the diesel and DEF tanks as well, so we had some steel sheeting done and beefed up the covers for all three. I feel much better taking the Sprinter into tough rocky trails now! Also we worked with Aluminess to add the ability to carry an ax & shovel in the spring/summer, then change that out to a ski rack for the winters, which has been a great addition.”

sprinter 4x4  ski racks the adventure portal

Doug Chases’s 4×4 Sprinter Conversion – Equipment List

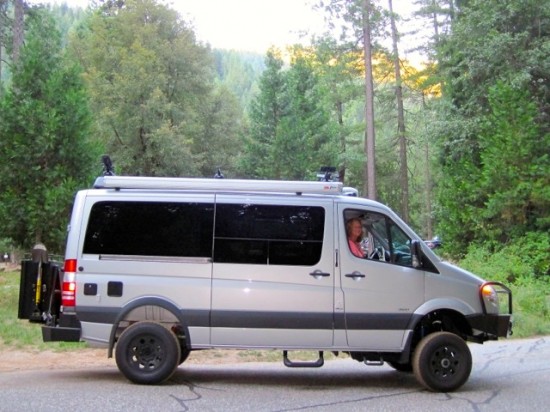
-4X4 Conversion: Whitefeather Conversions of Red Bluff, CA, did the Sprinter 4×4 conversion. This includes: 4.5 inch lift, HD-welded steel subframe constructed of box tube and high tensile steel plate to replace OE lighter weight sub frame, attaches to Mercedes-Benz body in stock location with stock bolts, manual hub locks, 6,000-lb. load rated Dana 60 Super mono-beam front axle with rear axle appropriate gear ratio, HD Rancho steering stabilizer, open front differential front disc brakes (approx. 36 % bigger than OE Sprinter), 2 speed manual shift New Venture NV271F transfer case (low gear is a crawling gear with transmission in low), oversized front and rear Roadmaster chrome-moly sway bars with poly bushings, Bilstein gas pressure front shock absorbers, Rancho gas pressure adjustable rear shock absorbers, pair billet aluminum rear wheel adaptors, set of 4 forged polished aluminum 17-inch wheels with center caps (spare tire mounted on steel wheel), BFG Rugged Trail E-rated tires, Dana Spicer front driveshaft, OE rear shaft shortened and rebalanced, steel rear lift blocks, Tri-8 rear U-bolts, Pari multileaf rear springs, Tru Trak Gear Drive front differential.
-Penthouse: The penthouse pop-up top was installed by Sportsmobile of Fresno, CA.
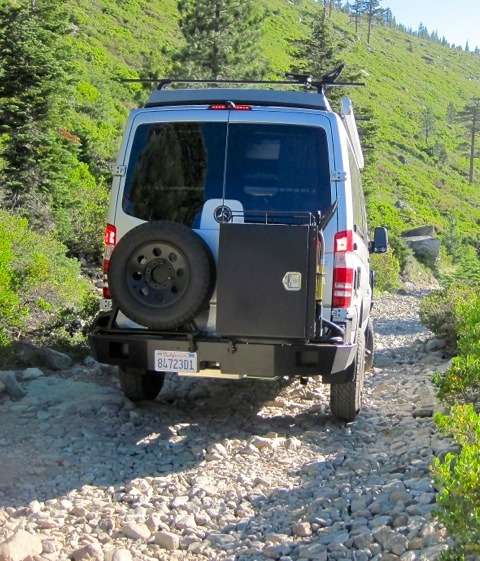
-Bumpers: Aluminess built our custom bumpers and custom underbody protection, including:
custom front bumper with grille guard and wrench compartment, 2-inch front hitch receiver, incorporating Lightforce driving lights (110,000 candlewatt).
custom rear bumper with swing away spare tire carrier and deluxe swing-away cargo box with rail on top, expedition kit, and custom ski holder attachment.
-Backup Lights: from www.4WD.com, 800913-8195 260H Series 55W
-Searchlight: GoLight/RadioRay LED 200,000 Candela beam
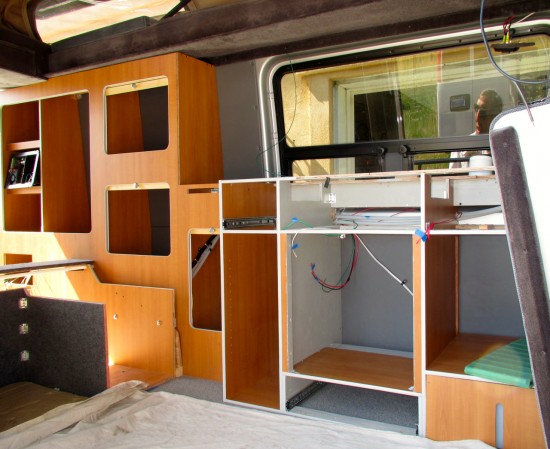
-Cabinetry: The cabinetry was done by our builder, GTRV of Sebastopol, CA, including:
Couchbed conversion, custom side cabinet with flip-down table, swiveling captain’s chairs, 3 panel solar power system, LED cabin lights, refrigerator, SMEV 7307 deep sink, Wallas 85DU diesel stove/heater, external shower, dual AGM house batteries, CR Laurence camper windows.
-Stereo/GPS/backup camera: Alpine INE-W927HD GPS Nav/Receiver
-Toilet: Thetford 550P Porta-Pottie
-Roof Racks: Thule 60” roof tracks with podium towers, square cross bars and Thule 884 Roll Model kayak carrier.
-Weather Monitor: La Crosse WS-9049U-IT
-Light Bar: Firestorm 60 with amber turn lights from Pickup Specialties.
-Basement storage: GTRV custom.

happy trails sprinter 4x4 conversion the adventure portal

Happy Trails! TAP into Adventure and share yours with us below.

[TAP note:  Factory Mercedes-Benz 4×4 Sprinters are now available. If interested see the  Sprinter website and go to “cargo van” tab]

Thanks to Greg Keith of Sprinter RV and Doug Chase for sharing this conversion with us.

The Tembo Tusk Toyota FJ60 Wagon

FJ60, TOYOTA FJ60, TEMBO TUSK fj60, Overlanding, over land, Overland, off-road, off-roading, off road, vehicle supported adventure,

This Toyota FJ60 belongs to Jerry L’Ecuyer, owner of Tembo Tusk.  Here’s his story of building his rig.

FJ60, TOYOTA FJ60, TEMBO TUSK fj60, Overlanding, over land, Overland, off-road, off-roading, off road, vehicle supported adventure,
Fj-60 with original paint job and blown engine

“When I acquired my FJ60, it came with a blown engine and original “poo” brown paint.  Both of which I planned on changing.  The idea was to source a junkyard Chevy 350 from a wrecked suburban to keep the costs down and collect all the conversion parts in preparation for the transplant. Pulling the old six cylinder engine and transmission was surprisingly easy.  Being an original California car, the bolts came apart without too much trouble.  Once the radiator was out of the way, there was no stopping and in about two hours the engine was sitting on my driveway.

FJ60, TOYOTA FJ60, TEMBO TUSK fj60, Overlanding, over land, Overland, off-road, off-roading, off road, vehicle supported adventure,
original 6 cylinder engine

Toyota was very generous with the engine compartment of the 60 series, which made fitting the V8 a pleasure.  I used a Downey bell housing to connect the 350 to the Toyota 4 speed transmission.  The hardest part of the install was building a set of cross member offsets to accommodate the new location of the transmission which shifted two inches forward.

I wanted to keep things simple on the trail, so I used an early 90s Chevy V8 with a throttle body injection system.  A throttle body system is a glorified carburetor with a simple computer for control.  It literally took connecting one wire from the original Toyota wiring harness to the Chevy computer and I had a working engine.  Not being a mechanic, I was surprised and thrilled that the engine started on the first try and what a rush it was to drive!

FJ60, TOYOTA FJ60, TEMBO TUSK fj60, Overlanding, over land, Overland, off-road, off-roading, off road, vehicle supported adventure,

Now that the heart transplant was complete on the FJ60, it was time to tackle the body and interior.  I stripped everything out of the passenger compartment, including the headliner, seats and carpet.  In retrospect, I wish I had paid a bit more attention to sound deadening.  I was so impatient to get the vehicle painted and completed, I figured the new carpet and pad would be all I needed.  Wrong!  Next time I will take the time needed to address noise in the cabin.  Between the B8, aggressive tires and the ability to drive fast, the sound levels were tolerable, but less than ideal.  I replaced my original Toyota front seats with Pro-Car seats.  Beautiful high performance contoured body hugging seats.  Great on the trail, however they left a bit to be desired on long road trips.  After about 200 miles the butt starts to get sore!  If I had to do it again, I would strongly suggest keeping the Toyota seats and just refurbishing them.  For long trips they are far more comfortable.  I sourced the headliner from Spector Off-Road and had a local auto upholstery shop do the install.  Perfect fit!  I used the same shop to do the carpeting.  Much less frustrating than doing it myself!

FJ60, TOYOTA FJ60, TEMBO TUSK fj60, Overlanding, over land, Overland, off-road, off-roading, off road, vehicle supported adventure,

Before installing the interior of the FJ60, we tackled the paint.  Toyota makes one heck of a reliable, robust get- you- there – and – back vehicle.  However, when it comes to paint colors, they have no idea!  On the other hand, Land Rover produces a beautiful, high maintenance, super model piece of art.  A Land Rover looks great whether it is running or not and they know paint colors!  So I used the best of all worlds.  The utilitarian reliability of a Toyota, the ubiquitous Chevy power plant and the beauty of the Kent Green Metallic color of a Land Rover.  It really is the best of all worlds!

FJ60, TOYOTA FJ60, TEMBO TUSK fj60, Overlanding, over land, Overland, off-road, off-roading, off road, vehicle supported adventure,

FJ60, TOYOTA FJ60, TEMBO TUSK fj60, Overlanding, over land, Overland, off-road, off-roading, off road, vehicle supported adventure,

Lessons learned from my work in bringing an FJ60 back to life?  Of paramount importance, start with a rust free vehicle.  This is more important than anything else.  Rust will come back with a vengeance.  Be careful of junk yard engines.  the crank shaft broke on my way out of Death Valley splitting the block horizontally.  You never know what trauma a junk yard engine has endured before you buy it.  I had a new 383 Stroker engine built at a local machine shop for just a bit more money than the cost of my junk yard engine and not to mention all of the labor to do the work twice!  If you have a 4-speed transmission, replace it with a 5- speed.  I did that when I pulled the engine the second time.  A 5-speed is a great upgrade and the V8 gives you the power to appreciate the extra gear.  Most importantly, don’t be afraid to work on your vehicle.  It is fun, rewarding and very Zen when it comes to knowing your truck inside and out.”

   Check our other rig write-ups at The Adventure Portal/Rig of the month.

A special thanks to Jerry L’Ecuyer owner of Tembo Tusk  and maker of innovative gear for the off-road adventurer.

For more overland and off-road ready rigs, CHECK HERE

Trashroo: Off Road Spare Tire Trash Bag

trasharooLOGO
trasharooLOGO

You know the story- You are out in the middle of an amazing nowhere.  No one to be seen, no services in sight.  Bliss.  You’ve been out for three days now and all is going well. You open the back of your rig or trailer and are hit by a horrible smell and the sight of sludge speading out from under your trashbag.  The trashbags, you doubled them of course, have sprung a leak. Now your bliss has a slight ding in it. You make due, enjoy the rest of your journey and upon returning home, dig in with the antiseptic and gloves.

trasheroo the adventure portal

TAP recommended overlanding gear- Such a simple and useful idea.  Quite frankly, the Trasheroo trash bag holder is one of our favorite pieces of overlanding gear.   We take our Trasheroos on every trip and they’re essential for primitive camping.  One thing we’ve noticed is that now we don’t have any excuses not to pick up stray trash on the trail. Pre Trasharoo, it was all too easy to be lazy and give ourselves the excuse we didn’t want someone else’s trash in our rigs.

Get down and dirty!- Be prepared, your Trasheroo trash bag holder will get covered in dust and dirt, but  they are canvas and are easy to spray down with a hose and air dry in the yard.  One issue we have had are the buckles breaking over time, due to UV exposure.  The slide-over nylon covers help significantly, but of course you have to remember to use them.  A final comment: nothing screams you’re an overlander more on the freeway than a tailgate tire mounted Trasharoo.  Ah, the simple Pleasures!
trasheroo the adventure portal

Trasharoo Specs:

– Designed to carry 50lbs of trash

-Made from high quality 900 denier canvas

– Water resistant interior coating for bad weather

-Buckles and straps are double stitched

-Built in flap zipper for storage of trash bags, gloves, straps etc.

-“X” design keeps bag secure over 1000’s of miles

-Drainage holes at the bottom for unexpected leaks

-Slide over nylon covers to protect buckles from UV rays and Dirt

-Mesh elastic pocket and Molle straps for added storage

– Fits a standard 30 gallon trash bog liner for ease of dumping

-Drawstring to keep trash secured are pevent trash flying out.

-Designed to fit up to a 40″ tire.

For more info and to order your Trasharoo go to www.trasharoo.com

Tell us about some of your favorite overlanding gear in the comments area below!

Top 10 Must – Haves for your Overland Vehicle

View from Old Dale road Joshua Tree National Park
This is the third in a 5 part series of safety articles written by Tom Severin of Badlands Off Road Adventures. Tom is an International 4WD Trainers Association certified professional 4WD trainer and a Wilderness First Responder (WFR).  He is an instructor for the United Four Wheel Drive Association and the CA Association of 4WD Clubs.

Here’s what Tom has to say about his Top 10 “Must-haves” for safety:

“You’ve heard of David Letterman’s Top 10 list.  I’ve also got one, but my list is serious.  It’s designed to prepare you and your vehicle for safe off-road driving.  While these are ranked in order of importance you should consider all recommendations to be critical to safe and successful four-wheeling.”

1.  Enroll in a training course- Everybody should take at least one basic off – road course from an International 4WD Trainer’s Association certified instructor.  The courses will cover a number of important topics including safe 4WD techniques, vehicle safety, trail etiquette, and environmental awareness.  To find a certified trainer near you, visit the International 4-Wheel Drive Trainers’ Association.

2.  Be knowledgable of complete overlanding safety- 4WD overlanding is, by nature, done in hostile environments.  At a minimum you can get some bumps and bruises.  Cuts and sprains are possible too; as are bug bites. A good first aid kit is comprised of at least four categories of products:  tools, meds, wound care, and a fracture kit all stored in a water-proof container.

-Take a 72 hour Wilderness First Responder course.  It will teach you how to deal with dislocations, severe cuts, anaphylatic shock and fractures.  Go to Wilderness Medical Associates International.

-Make sure you have a good fire extinguisher in your vehicle.  I suggest an ABC-rated 3lb rechargeable extinguisher with a gauge and a metal nose.  A plastic nose will break off.  Mount it where it’s quickly accessible, visible and securely mounted to avoid bouncing around your vehicle.

3.  Make sure you have the ability to communicate- You will need to stay in touch while on the trails. CB radios are really popular.  There are lots of brands and models to choose from, but I’ve heard good things about Cobra Brand Radios.  You could also consider getting licensed as a ham radio operator.  That would give you access to more radio frequencies, which extends your options.

-Make sure your equipment is securely mounted.  Overlanding creates a lot of vibration inside the vehicle, which can disrupt equipment.

-If you decide on CB, buy the standard 1/4-wave antenna.  Long whip-like antennas are not practical and can be dangerous off-road.

4.  Have a recovery strap and tow-point- Tow points should be integrated into the vehicle frame.  If it doesn’t already have towing hooks on the front and back.  Go to a reputable shop and make sure the two points are rated for the GVW.  The maximum operating weight/mass of a vehicle as specified by the manufacturer including the vehicle’s chassis, body, engine, engine fluids, fuel, accessories, driver, passengers and cargo but excluding that of any trailers.  An optimal recovery strap should be 20,000 lb. rated (ultimate breaking strength) with loops sewn in the ends as opposed to metal hooks.  Remember that this is a recovery strap, not a towing strap.  They are two inches wide, and available in 20 and  30ft. lengths.  Get one of each for options on distance or just use one length to start out.

5.  Get all terrain or mud terrain tires- Replace the passenger tires with a good set of all terrain or mud terrain tires suited to your vehicle.  Those provide better performance and hold up much better off road.

-Drive your vehicle for at least a year before making major modifications, such as adding traction control aides, bigger tires and other mechanical aides.  This way you will have some time to develop your driving skills without mechanized help.

6.  Invest in a good tire kit- Your kit should include:

-A good tire gauge (one that reads from 0-60 in 1lb. increments)

-a deflator

-a plug kit

Tires, as you can imagine, take a pounding on many trails, so you must be able to plug small cuts and holes.  Also, get the Trailhead Automatic Tire Deflators.  They can be set for your desired pressure and will stop automatically when they reach that pressure.

the adventure portal tire gauge
TAP publisher checking tire pressure before hitting the trail

7.  Purchase a Hi-Lift jack- These are extremely useful for off-road recovery and tire repair.  A stock jack just won’t cut it.  The only drawback is that the nose or lifting point is straight and flat, so it does not work with curved or round bumpers. There are adapters for vehicles with curved bumpers.  Here is the link to a Hi-lift on Amazon. A good alternative to a Hi-Lift is an exhaust Jack. An example of this is the BUSHRANGER X-JACK from ARB.

8.  Invest in a winch and winch kit- A winch is not absolutely necessary, but it provides peace of mind.  I prefer that you spend your money on a winch rather than on lockers, lift etc., until you’ve honed your driving skills.  Get a winch that is rated at least 1.5 times the GVW (Gross vehicle weight: maximum operating weight/mass of a vehicle as specified by the manufacturer including the vehicle’s chassis, body, engine, engine fluids, fuel, accessories, driver, passengers and cargo but excluding that of any trailers.)  Mount is so that the bumper does not obscure a clear view of the full top of the winch.   Your winch kit should include:

-a tree strap

-a pulley

-two D-rings (although 4 is better):  the pin (clevis) in the D-ring measures 3/4″.

-a pair of leather gloves

Any brand of winch kit will do; all manufacturers sell quality kits.

9.  Have an air compressor- There are many options.  Some can be taken along in a bag and others can be installed permanently.  Get one that taps directly into the vehicle battery.  Those designed to be plugged into the cigarette lighter take too long to operate.  Other alternatives are CO2 tanks and engine drive compressors.  A really neat product is the “dual force”, a combined winch and compressor from Warn.

10.  Don’t leave home without a vehicle repair tool kit- A basic kit is fine.  Be sure to include the 4-wheeler’s ultimate tool, a BFH (Big Frickin’ Hammer).

10.5 TAP suggested Must Have: We spend a lot of time in the backcountry and because of this always carry a Personal Locator Beacon and Satellite Messenger device. There are several options/brands to choose from, but our personal choice is the Delorme In-Reach (with added flight extraction service). DO NOT expect your cell phone to have coverage!

TAP Taco with hi-low jack, rotopax gas/water canisters, trasheroo

TAP sends a big thanks to: Tom Severin, President
Badlands Off Road Adventures, Inc
4-Wheel Drive School
310-374-8047
https://www.4x4training.com

Do you have a “Must Have” for overlanding that is not mentioned here?  Tell us in the comment section below.

Check out our California overland trails and points of interest and plan your overlanding adventure!

You may also be interested in Eight Essential Tools for your off-road Recovery Gear Kit

Rubi Loves Rocks – Overlanding Tag-Team

Trona copy
Trona copy
TAP Note: All of the info contained in this article is based on my subjective experience only and not meant to be taken as a generalization for entire populations. Lori Palmer: TAP editor

Pass it by the CFO- Right after I got my Jeep Wrangler Rubicon I spent a lot of time at the dealership getting her “built for overlanding adventures”. (See our Wrangler write up for components.)  One day, as I was leaving, I overheard a salesman and a customer talking.  The customer was saying that he wanted to add some components to his rig but would have to pass it by the CFO first; his wife.  The salesman smiled and nodded, understanding this dilemma perfectly.  

Rubicon turtleback trailer death valley the adventure portal
Death Valley trip 2014

Enjoying the overlanding Community- When Andy and I went to our first overlanding event we met a great group of like-minded people.  Gear heads, trail fiends; it was great fun discussing runs, sharing experiences, and learning from each other.   Getting together with a group of people that we didn’t know but who had common interests to ours, was a uniquely rewarding experience.  They had driven some of the same trails we had and had experienced some that we wanted to do and visa versa. A lot of fun.

Overlanding; she said, “No thank you”- I met some  wives there, started talking and soon saw a trend.  This was their husband’s gig, period.  They were there for their husbands but had little to no personal interest in overlanding.  Most of the guys went out with groups of their friends and when the wives went along, they were passengers.  They said that although the areas were beautiful,  the journey was bumpy, boring and uncomfortable.

the adventure portal

Get overlanding ladies!- When I asked the women if they would be interested in driving, I got a lukewarm response.  When I asked if they had tried it; most had not.  I honestly believe that if SOME, not all, but some women got behind the wheel and tried off-roading they would enjoy it. I was indifferent to  driving off-road until boredom drove me behind the wheel.   After taking turns driving my husband’s Taco off-road, I was hooked.  Also, taking an off-road driver’s training class helped build driving skill and confidence, which enhanced my off-road experience immeasurably and gave me the courage to drive trails I would not have tried before. Once again, I cannot express how much fun we have off-roading together.

Rubi at 4WD training
Rubi at Badlands 4WD training

Overlanding: Play together, stay together- I am in no way advocating that men should give up their overlanding road-trips with their buddies.  We all love our tribe time.  But, I do believe that if you invite your partner  to drive  and she “kind of”  likes it, then turn her on to  an off-road training class to help build knowledge of safety and driving techniques and then get out there and play! (A shout out here to Badlands 4×4 4WD training courses in Southern California. There are 4WD certified trainings all over the United States. )  When a couple switches off driving, navigating, and filming they can have a blast. We do and so do our friends who share this passion.  Play together, stay together and watch your CFO gladly go for purchasing that snorkel!  Ya’ all are basically roommates for life, so common adventures are key.

the adventure portal AEV training
AEV’s In-Field 4WD Training-Florence OR

Women Only overland 4WD training Info  There is potential for two different Women’s only Training courses. I am in discussion with American Expedition Vehicles (AEV) about the potential for a FREE Women’s Only Beginner Training Day in Florence, Oregon in Feb 2016. I would host the course alongside AEV trainers. Prerequisites for this course are an AEV built Jeep,or a stock Jeep.  This is an event I went to last year (I was the only woman driving with a great group of guys.) and not only did I improve my driving, safety and tread lightly skills and knowledge, I got a chance to experience driving in an amazingly beautiful place. I have also spoken with Tom Severin of Badlands Off-Road Adventures and 4WD training about a Women’s Only beginners course. Again, I would host and Tom would train. The class would take place either in Anza Borrego State Park in San Diego CA or Hungry Valley State Vehicular Recreation Area in L.A. Any style of 4×4 can be used. Price to be determined. We at TAP have taken a few of his courses and highly recommend them.

THESE CLASSES WILL ONLY HAPPEN IF ENOUGH WOMEN SIGN UP!  CONTACT ME DIRECTLY AT  lori@theadventureportal.com SPECIFY THE CLASS(ES) YOU ARE INTERESTED IN, AND LETS GET OUT THERE AND GO!!!

Happy tag-team overlanding!

Share your experiences in the comment section below.

Check out where you can go in Southern California on our Overland Trails and Points of interests write-ups.

Calcite Trail Anza Borrego

Sign up for our newsletter and TAP into Adventure!