Home Blog Page 82

Survival and Bushcraft for Overlanders Fire Building Part II

SB F 19
SB F 19

This series is for those involved in vehicle-supported adventures. The content can help anyone traveling solo survive a minor or major mishap, breakdown, or vehicle accident in the remote backcountry. The series is not, however, about “living off the land” for an endless length of time. The presented information can help you remain comfortable for several hours, a couple of days, or even a week or two in the backcountry should an off-roading adventure go bad.

In the first installment in this series, we discussed the Survival Pyramid and the Will to Live. Click here to read this article

Be sure and read Part I of Survival Fire Building before reading this article.

How to Start Your Survival Fire

There are several ways to start a fire with dry, fluffy tinder. Consider carrying at least two or three of these methods in your survival bag. When one doesn’t work, another might. In my opinion, the best two ways to start a survival fire is with a disposable fluid lighter and a ferrocerium striker.

Disposable Fluid Lighter: Every survival bag should have several disposable lighters. A stormproof-style survival butane lighter (shown below left), is best. This butane lighter, made by Ultimate Survival, is refillable and worth the investment price. This is my favorite way to light fires when overlanding.
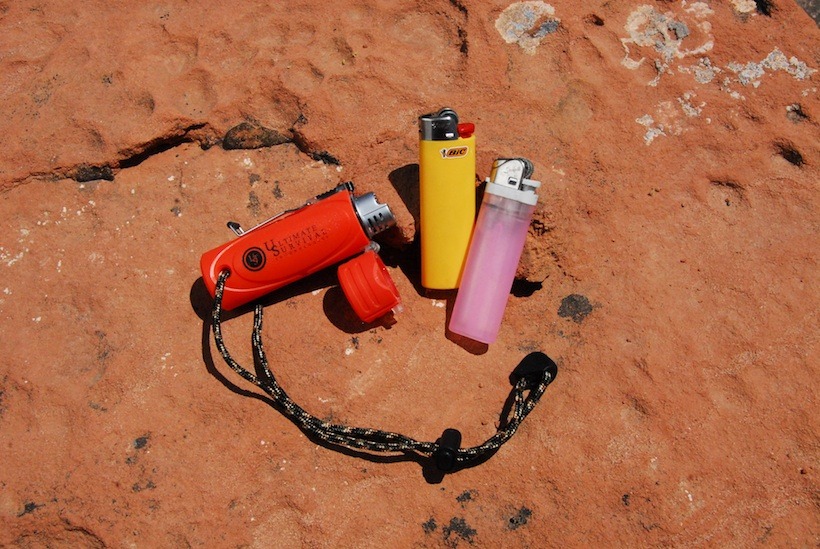
 

Survival stormproof butane lighter, Bic-Lighter, standard fluid lighter

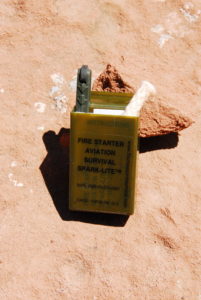
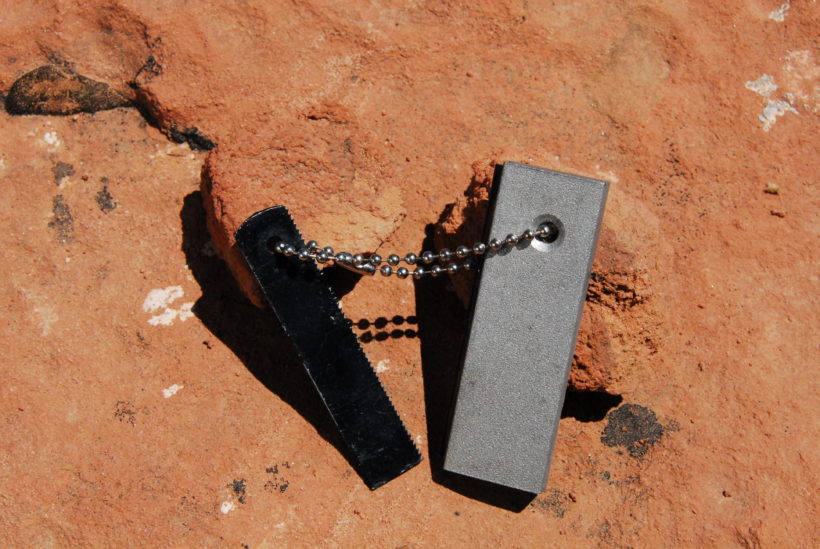
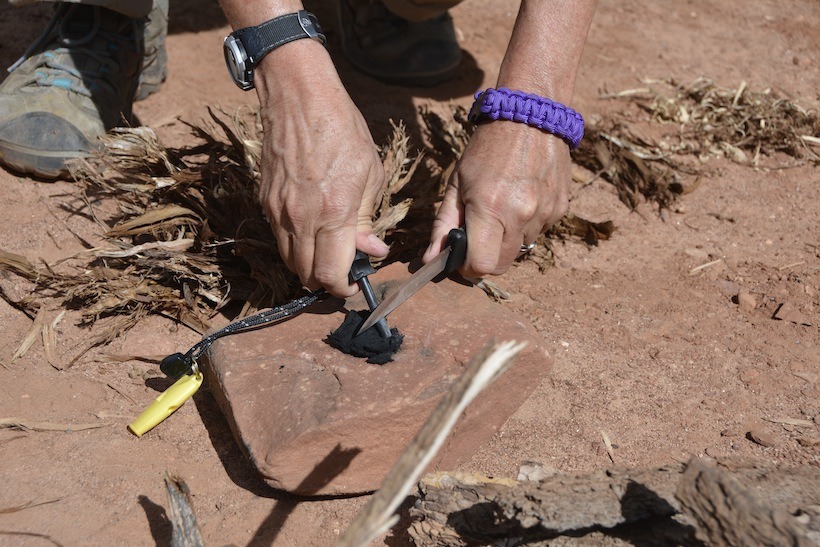
Ferrocerium Striker: There are several commercially available “sparking” survival fire-starters made from ferrocerium. Ferrocerium is a manmade metallic material that, when scraped against a rough surface, gives off sparks reaching temperatures of 1,649°C/3,000°F – perfect for starting fires with tinder.
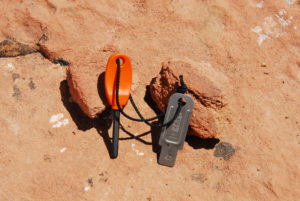
BlastMatch
FireSteel


Spark-Lite


Magnesium Ferrocerium Rod Combo: These commonly purchased fire-starting items consist of a small bar of magnesium with a ferrocerium rod embedded in one side. Typically attached is a sharp implement used to scrape fragments of magnesium and strike the ferrocerium rod. To start a fire, first scrape off a small pile of magnesium shavings surrounded by loose kindling. Use the ferro steel sparks to ignite the fast burning, high temperature magnesium.

Storm, Waterproof, or Strike-Anywhere Matches: Matches are another “must have” in your survival bag. The better ones can resist wind and water, but all are best carried in a waterproof container.
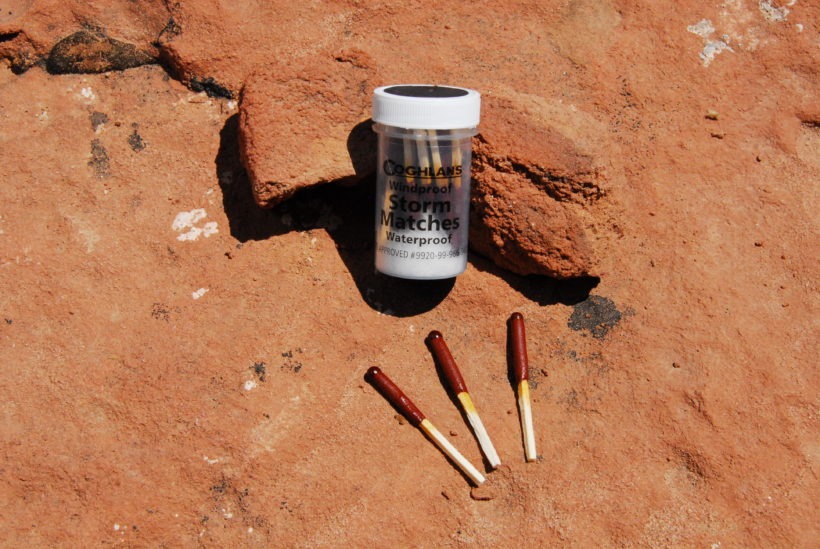
Storm and strike-anywhere matches

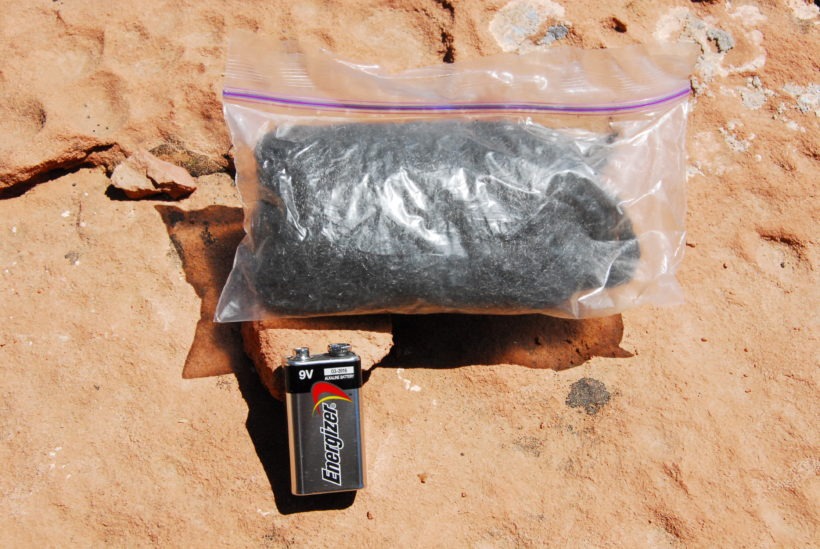
Nine-Volt Battery and Steel Wool: Touching 0000-grade (super fine) steel wool to the terminals of a nine-volt battery starts the steel wool glowing. Surround the steel wool with some tinder to get your fire going. With a bit of practice, this fire-starting technique can get fires going in short order. When storing a battery and steel wool in your survival bag, make sure they are in separate containers.

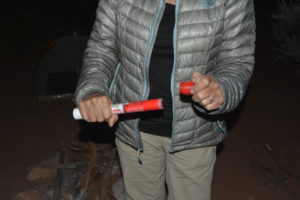
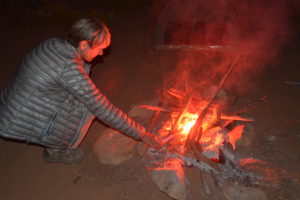
Flare: You don’t want to waste a hand-held flare that you might need to use to signal Search and Rescue personnel, but in an emergency, a flare can start a fire very quickly. If you are hypothermic and need warmth right away, use a flare to quickly start a fire, even when using moist kindling.


The Numyth Vulcan Fire Piston: This product uses air compression to start a small piece of tinder glowing. When air is compressed quickly, it heats the surrounding air to the point where a small amount of tinder, like char cloth, begins to glow. The ember is capable of starting a fire when drier tinder is added along with oxygen by blowing on the smoldering mass. I have gotten a fire to start with this device, but not without lots of work.
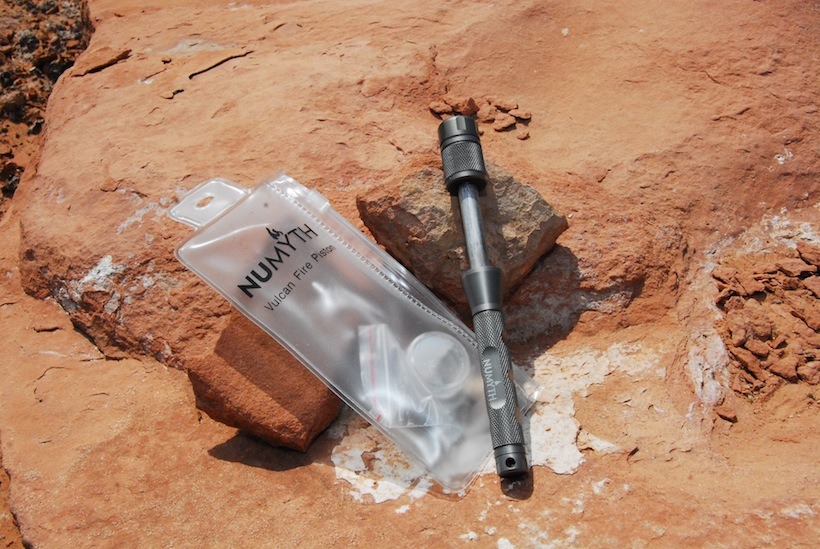
Numyth Vulcan Fire Piston

Making Your Fire

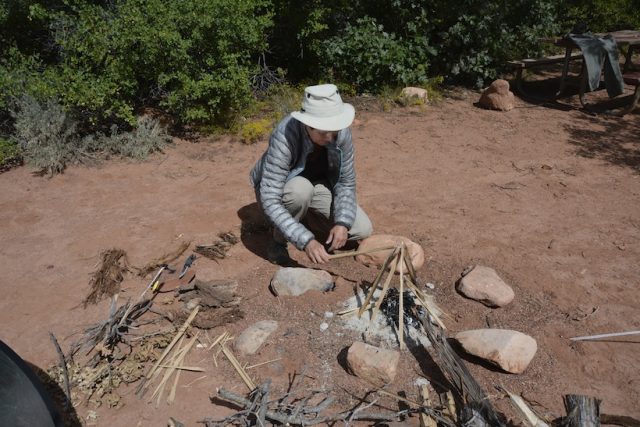
The following pictorial illustrates one way to organize and get your fire going. The method shown here is often taught in survival courses.
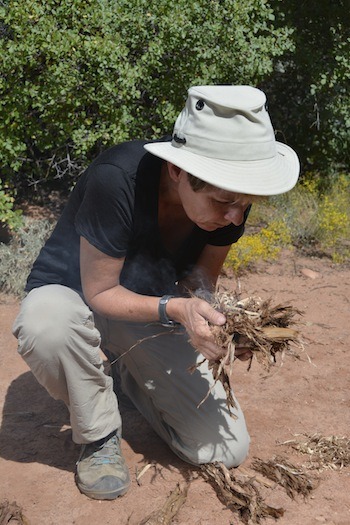
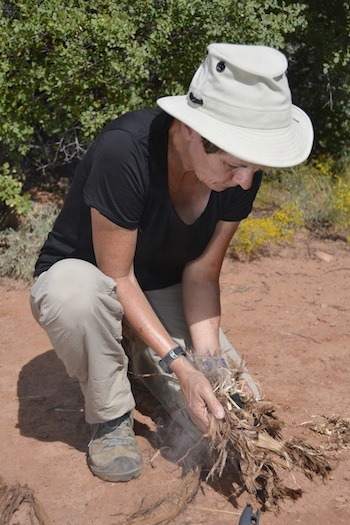
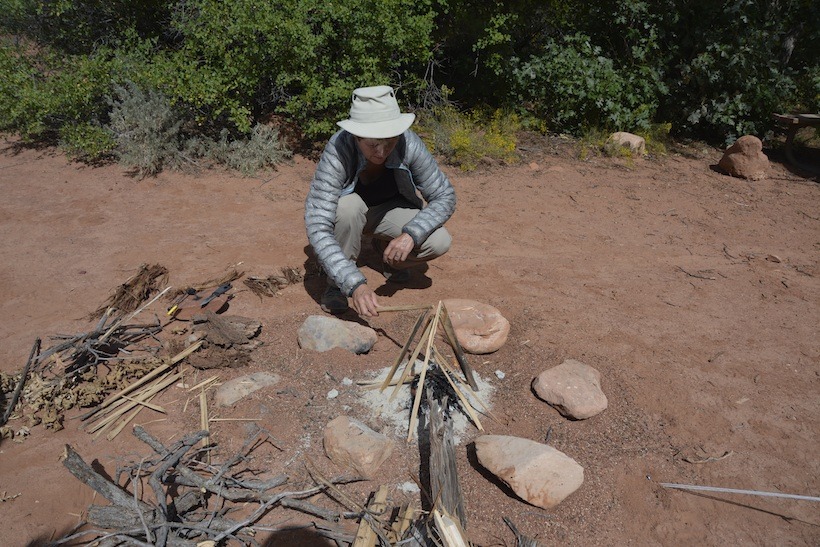
Build a bird’s nest (aka “tinder bundle”) for fire starting. Begin by laying out some organized tinder in various size piles.
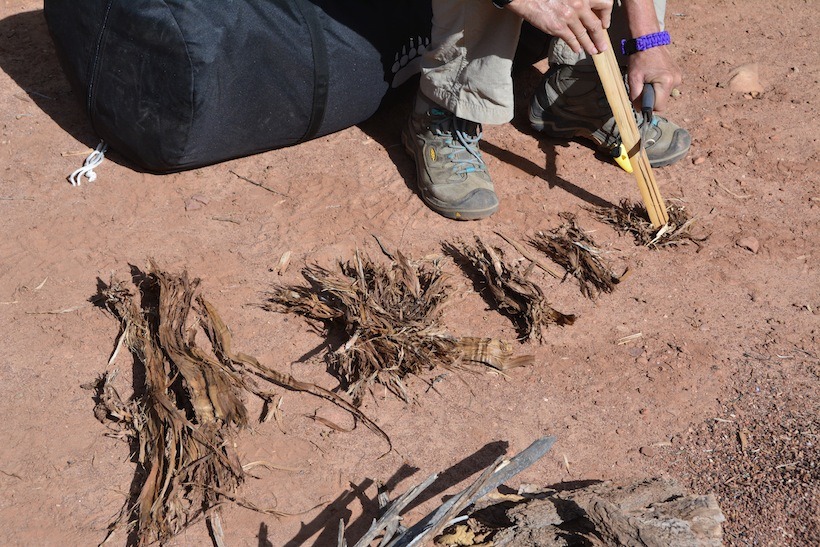
Laying out tinder for “birds nest”

Construct your bird’s nest by starting with a wide, flat base of loose bark or punkwood on which to add your finer, dry tinder. If no wide, flexible base is available, simply crisscross and weave longer tinder fibers together to build a base shell. Once the shell is made, add fine, crushed, dry material in the middle of the nest.

Once your bird’s nest is finished, you’ll need a glowing ember to place in the middle of your nest – on top of your most loose and ground-up tinder. Assuming you don’t have a lighter or match, you may use a ferrocerium striker and the backside of a knife to spark some char cloth.

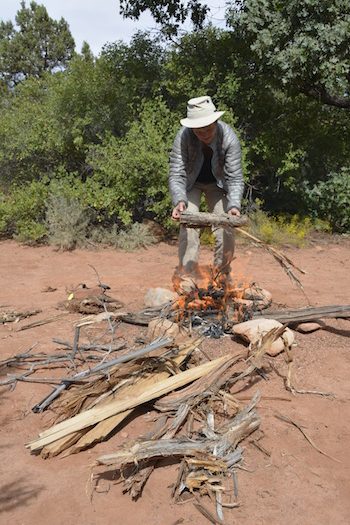
Take your time once you add an ember to your nest. Raise the nest up near your mouth. Blow gently onto the ember in the nest to add oxygen, then lower it, then raise it again and blow on it. Do this repetitively until you get lots of smoke, then finally a flame. Once you begin to get smoke, watch closely for a flame to burst from the nest.


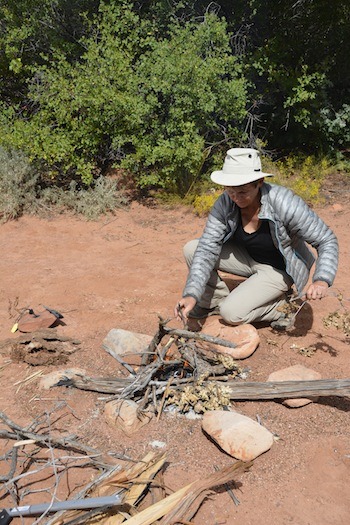
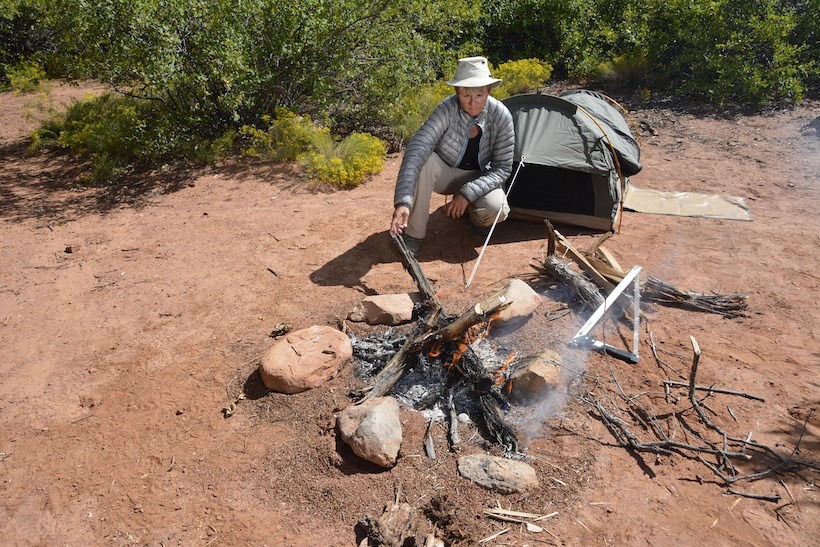
When a flame does appear, be prepared to place the nest under a kindling teepee that has lots of space between the sticks to allow oxygen to reach the new flame. Once the flame gets going robustly, continue to add your left over tinder and kindling from your readied pile. Once you have a pretty good fire going with your kindling, you may finally add fuel to your fire to sustain it over time.


The next installment of Survival and Bushcraft for Overlanders  will begin to cover the large topic of water disinfection in the field. Don’t miss this if you are thirsty. No one wants to get Giardia, Cryptosporidium, or Blastocystosis.

Words & Photos by Bob Wohlers

Bob Wohlers teaches corporate, government, and recreational off-road safety, survival, and wilderness first aid courses. Some of Bob’s corporate clients have included T-Mobile, Verizon, PG&E, and Southern California Edison. As a registered government contractor, he teaches courses for the National Park Service and BLM. Currently, Bob teaches monthly introductory and advanced recreational off-roading at Prairie City, a California State Recreational Vehicular Area (SRVA). He also organizes and leads groups on 4WD adventure tours into the remote backcountry. Find out more about his trainings and guided adventures at discoveroffroading.com.


Bob’s new book, “Live Long to Wander-Basic Survival and Bushcraft for Vehicle-Supported Adventure: To be released at the 2017 Overland Expo in May.

Survival and Bushcraft for Overlanders Fire Building Part 1

Wohlers fire 1
Wohlers fire 1

This series is for those involved in vehicle-supported adventures. The content can help anyone survive a minor or major mishap, breakdown, or vehicle accident in the remote backcountry. The series is not, however, about living off the land for an endless length of time. The presented information can help you remain comfortable for several hours, a couple of days, or even a week or two in the backcountry should an off-roading adventure go bad.

The first installment in this series discussed the Survival Pyramid and the Will to Live. Click here to read this article.

Watch any of the popular survival reality TV shows (Alone, Survivorman, etc.) and you’ll realize that fire building is very important. Even in a hot climate, fire can disinfect water, cook a meal, keep dangerous animals at bay, improve your morale, light your camp, and signal Search and Rescue (SAR) personnel. In cold climates, a fire can help you ward off extremely dangerous and deadly hypothermia.

To build a fire you need three important fuel types: tinder, kindling, and fuel.

Tinder

Tinder is any dry, loose, and fluffy material that can catch fire with a simple spark, electrical discharge, match, or directed heat from the sun.

In the natural environment, look for dry branches. Once you find some small branches, use your knife to begin shaving away thin, small, curling shards of wood. Also, look for:
-Dry pine needles
-Punk wood (the light and fluffy wood fibers found in the middle of rotten logs)
-Dry cattails
-Bark – small pieces that can be ground up by hand
-Dry moss and ground covering

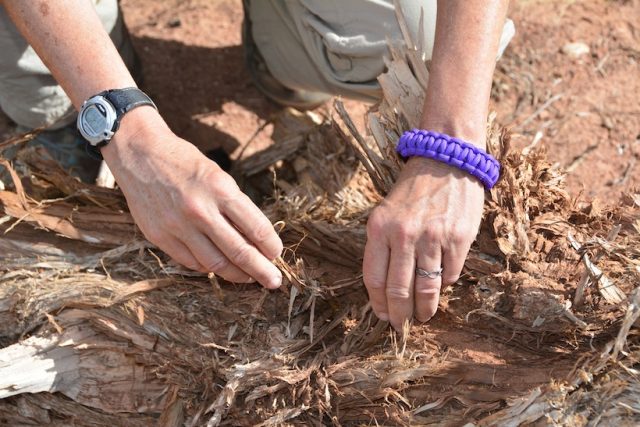
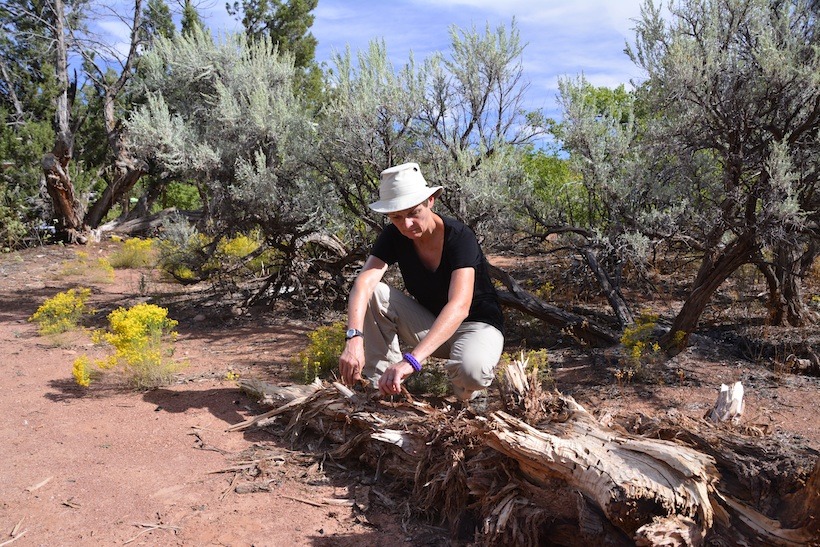
The excellent tinder being collected here is called punkwood. Punkwood is the dry and flakey wood found in decaying trees.

Some of the best tinder is brought from home. Place homemade and commercially available tinder in individual zip-lock bags and keep a selection in your survival bag. -Cotton balls impregnated with petroleum jelly (the very best home-prepared tinder)
-Char cloth
-Commercially available tinder

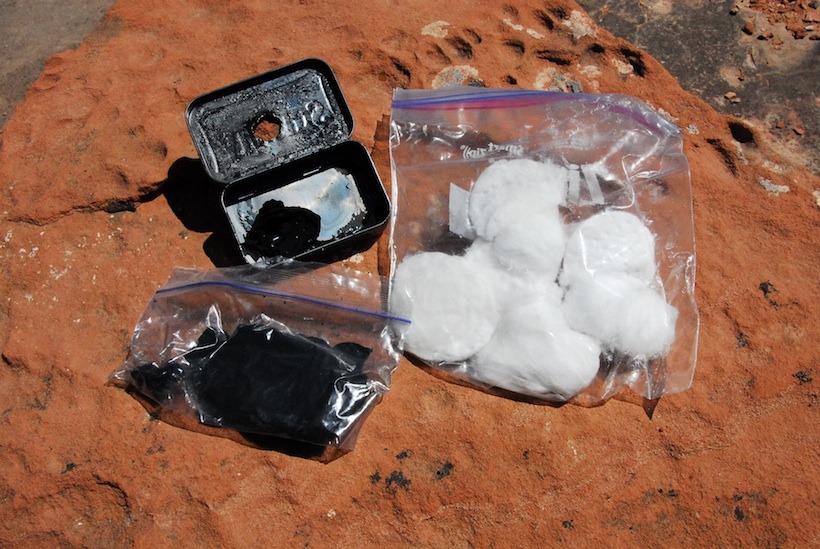
Some of the best home-prepared tinder are cotton balls impregnated with petroleum jelly. Also shown in this photo is a tin of char cloth. Although not technically natural tinder, when properly made, char cloth will burn and begin to glow with a single spark. Char cloth is used to ignite natural tinder for fire building.


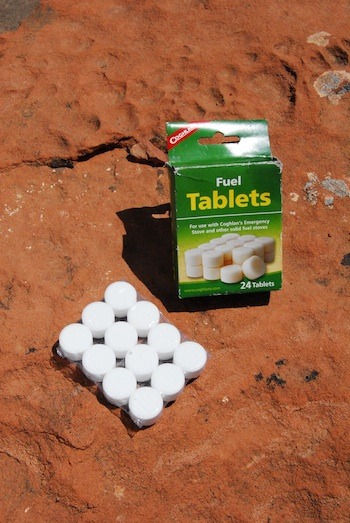
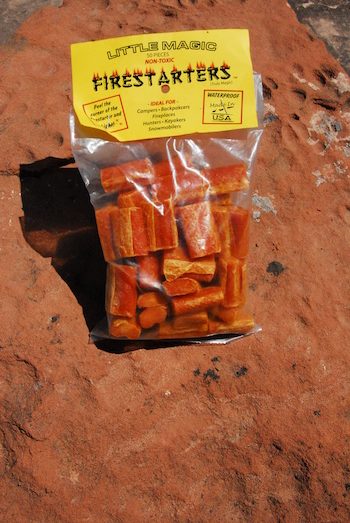
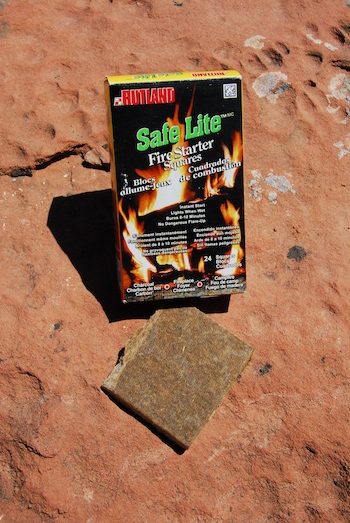
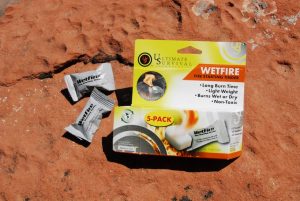
Commercially available fire starting material or compounds include hexamine tablets and fire-starter mini-logs, bricks, squares, or nuggets. WetFire was developed for military personnel and is a universal lighting material that is odorless, easy to carry, and unaffected by wind or water. In fact, WetFire can catch fire while floating on top of the water. The only down side is that it is expensive. I have several small packets of WetFire in various gear bags I always take with me when overlanding.

Kindling

Kindling is larger and thicker than natural tinder. Kindling is dry, easily combustible material such as small sticks, twigs, pinecones, cardboard, or other dry material used to enlarge and extend a fire beyond burning tinder.

The key to using kindling is to have a lot of it and only add it to tinder that contains a healthy flame. Often, kindling can be placed to form a “teepee” shape prior to lighting the tinder. This construction of kindling creates an area beneath it in which to place the flaming tinder. Once the kindling catches fire, add more and more until you have a large fire and the beginnings of hot embers.

Fuel

Moving up in size, logs and other fuels are carefully added to burning kindling to sustain and enlarge the fire.

Start with smaller logs. Smaller logs will eventually become embers that can sustain the fire over time and easily ignite larger logs. Natural items considered fuel include dry standing wood, medium to large dead branches and logs, dried animal dung, and dry grasses twisted into a tight bunch.

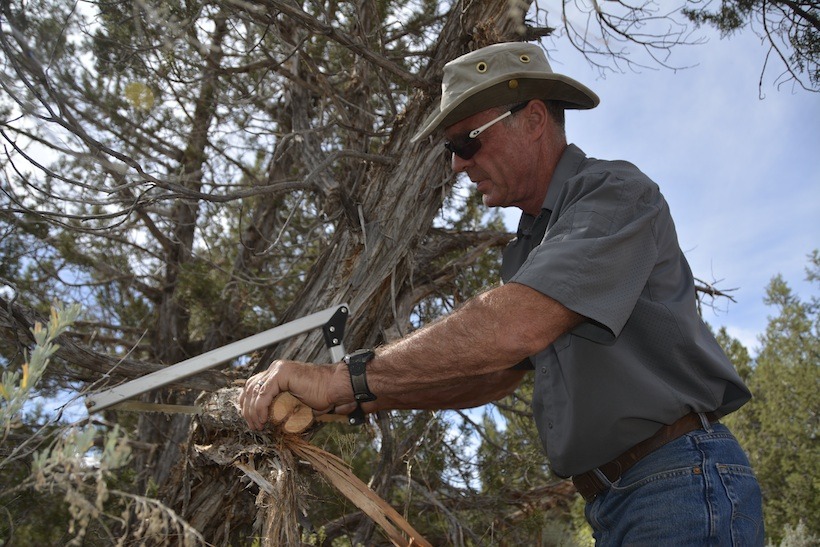
When collecting fuel, having a hand saw can be very valuable. I have a saw and hatchet mounted on my off-road trailer. When collecting fuel, collect more than you think you’ll need. To keep a fire burning through an entire night, you will need at least 10 armloads of logs (although you can never have enough).

Ideal Size and Best Location for a Survival Fire

Keep your survival fire small – just large enough to keep you warm, boil water, or cook food. There is no need to have a large fire for hours on end. The larger the fire, the more fuel you burn at a rapid rate. Large fires require lots of fuel. This causes you to expend unnecessary calories collecting or cutting wood.

Instead of maintaining a large fire, keep on hand a large pile of kindling branches and logs to quickly add to your fire when you hear rescuers approach. Thin, green branches (fresh from a live tree) added to a hot fire during the day will produce lots of whitish smoke and be visible for some distance.

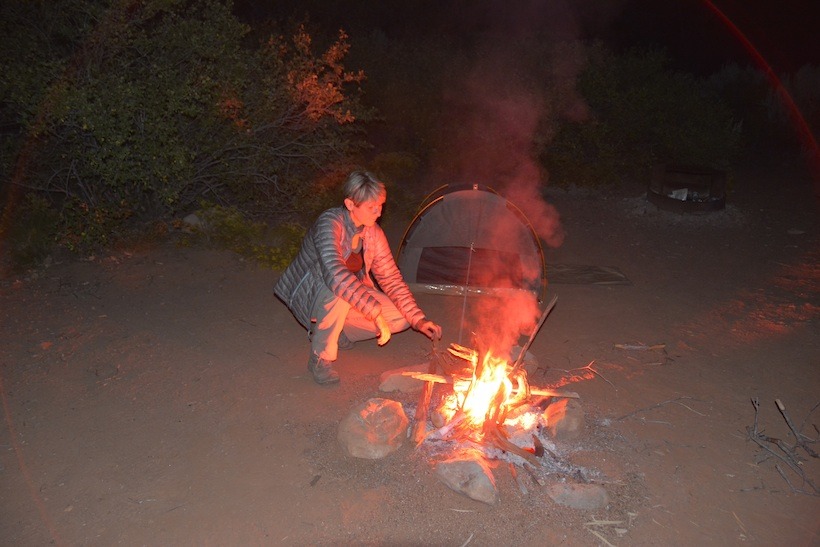
The best location for starting a survival fire is near lots of kindling and logs. The closer your fire is to ample fuel, the less effort on your part to keep the fire going. Also, consider a location that is out of the wind and elements. Consider establishing your fire next your constructed shelter. This can warm you at night in your tent and a dying fire is easily realized.


Part II of Survival Fire Building in The Adventure Portal will cover how to start a survival fire and how to make and sustain your fire. Look for it soon.

Words & Photos by Bob Wohlers:

Bob teaches corporate, government, and recreational off-road safety, survival, and wilderness first aid courses. Some of Bob’s corporate clients have included T-Mobile, Verizon, PG&E, and Southern California Edison. As a registered government contractor, he teaches courses for the National Park Service and BLM. Currently, Bob teaches monthly introductory and advanced recreational off-roading at Prairie City, a California State Recreational Vehicular Area (SRVA). He also organizes and leads groups on 4WD adventure tours into the remote backcountry. Find out more about his trainings and guided adventures at discoveroffroading.com


Bob’s new book, “Live Long to Wander-Basic Survival and Bushcraft for Vehicle-Supported Adventure: To be released at the 2017 Overland Expo in May.
 

An Off-Road Wheeling Adventure

Womens wheeling 2016 The Adventure portal 13

If you are reading this article, I’m going to assume that you are probably male (90% of our readers are) and like going overlanding and/or off-roading. Have you ever wished that your significant other was into it as well? There are ways to entice your woman to learn off-roading in a safe and welcoming environment. Hook them up with trainers in your area (we have a list on our forums page), and check out our women’s only trainings. This article, from our in-field contributor, Susan Bodnar, is about an annual event for novices as well as advanced wheelers that takes place in Tremont Pennsylvania, called Women’s Wheeling Day. Read on, see what these women got up to and TAP into Adventure…with your partner!
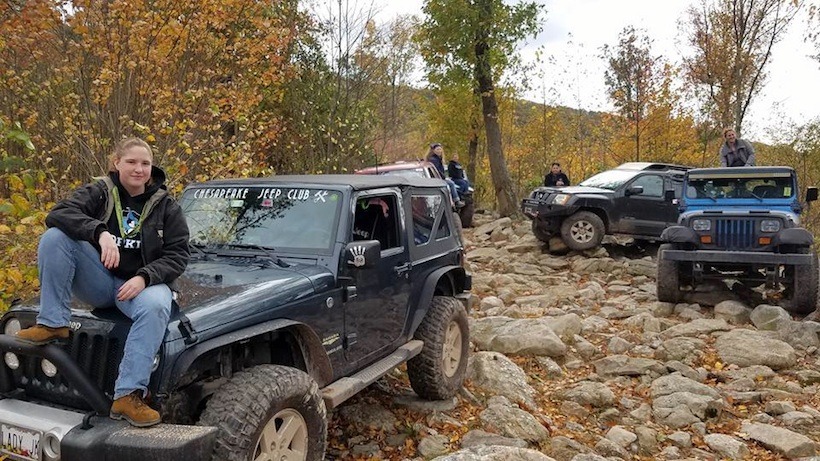
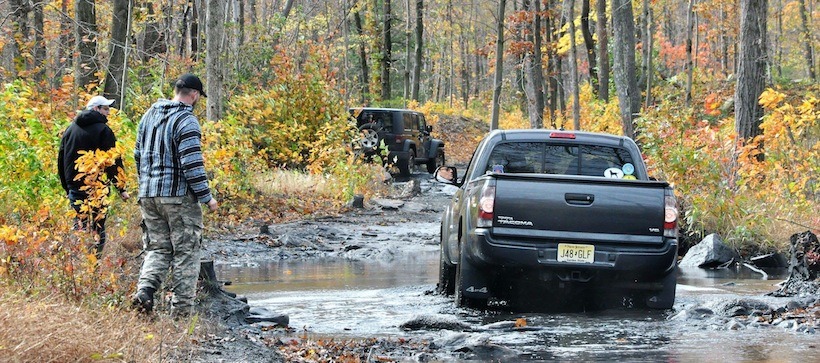
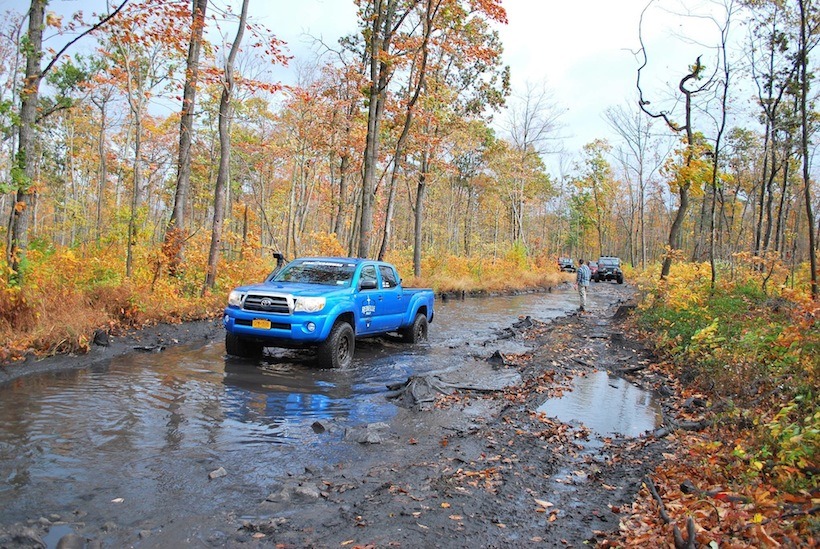
Women’s Wheeling Day is an all-inclusive, family friendly event run by coordinators Christie Vinson and Susan Bodnar (both of OK4WD). It’s held annually at Rausch Creek Off-Road Park in Tremont Pennsylvania. In 2016 it was held on October 22nd, in the midst of Autumn’s fiery beauty. The inception of this event began with a vision of creating a welcoming event where women could off-road with their peers and learn in an environment where they didn’t feel intimidated or frustrated. The inaugural event brought in 8 drivers. The following years we had 40 participants, then 100, and  this year we had over 200 drivers!
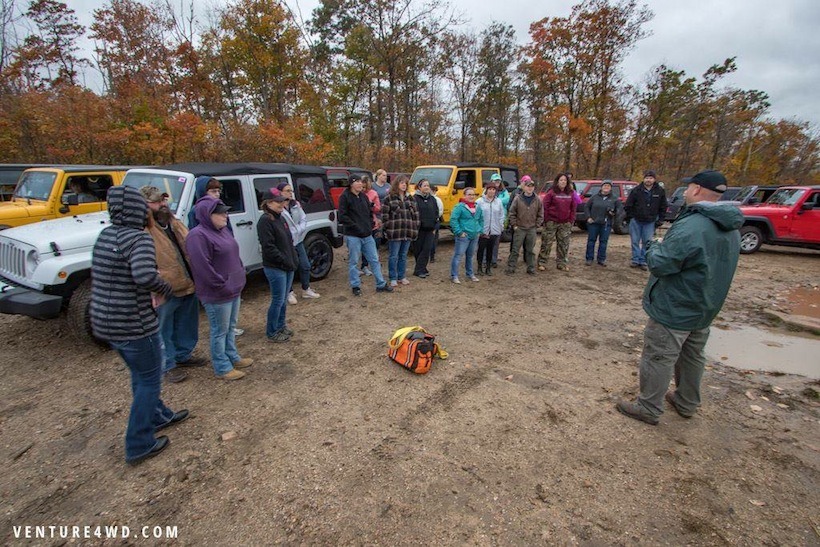
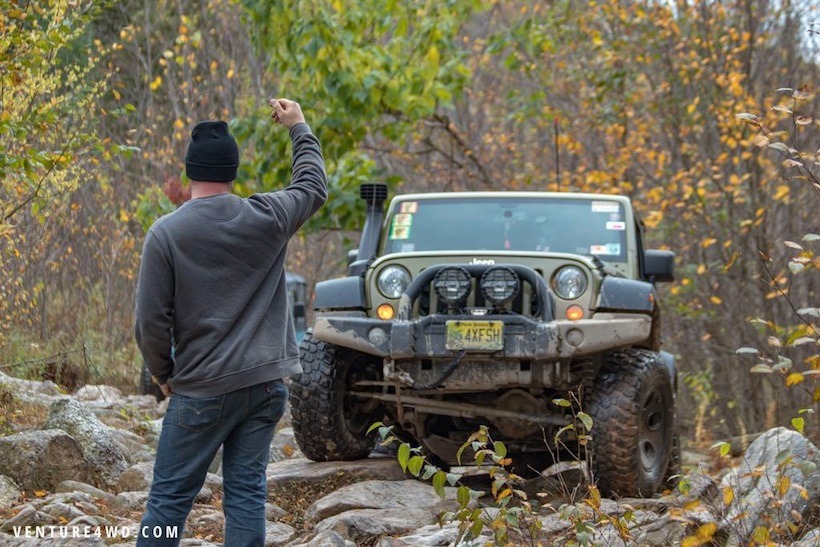
Attendees were greeted and placed in groups for the day. Groups were formed according to driver’s experience level and vehicle build. The runs range in difficulty from novice to black diamond. Each group was led by a an experienced trail guide and tail gunner who ensured that all vehicles were trail ready and reviewed trail etiquette with their group. The trail guide and gunner’s job is to make sure that everyone feels safe and has the support (spotting) they need to run a trail safely and successfully. We want everyone to complete this event feeling competent and frankly, psyched to get out and wheel some more! We have found that women who participate in this event do go out and spread the word to other drivers…hence the event’s massive growth.

Womens wheeling 2016 The Adventure portal-6
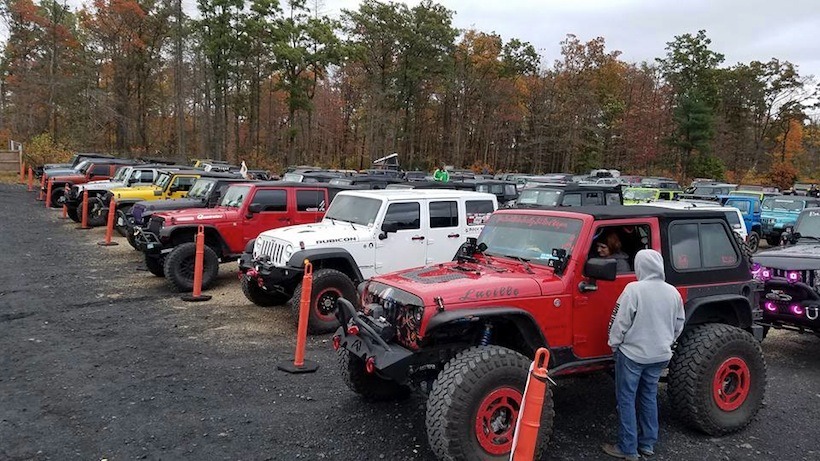
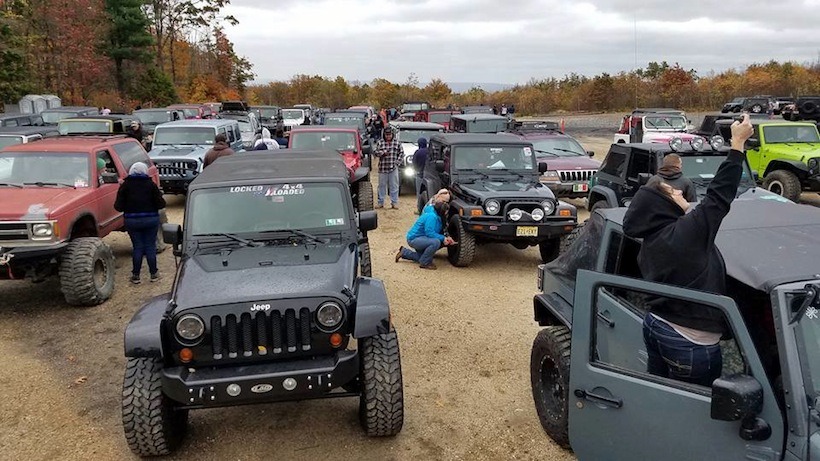
Prepping for the runs-vehicle inspections and airing down.


womens wheeling the adventure portal_1
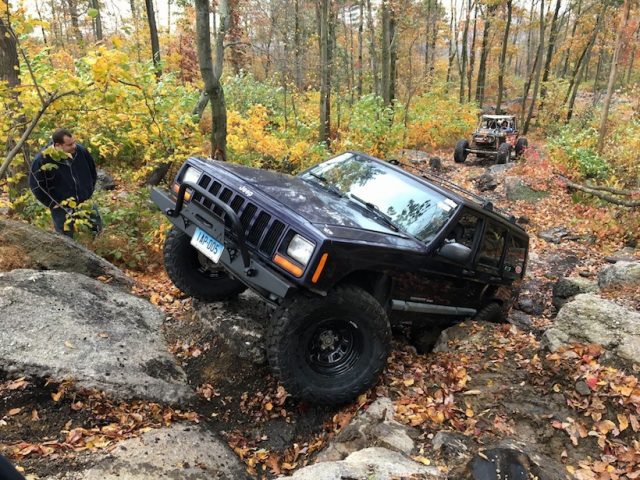
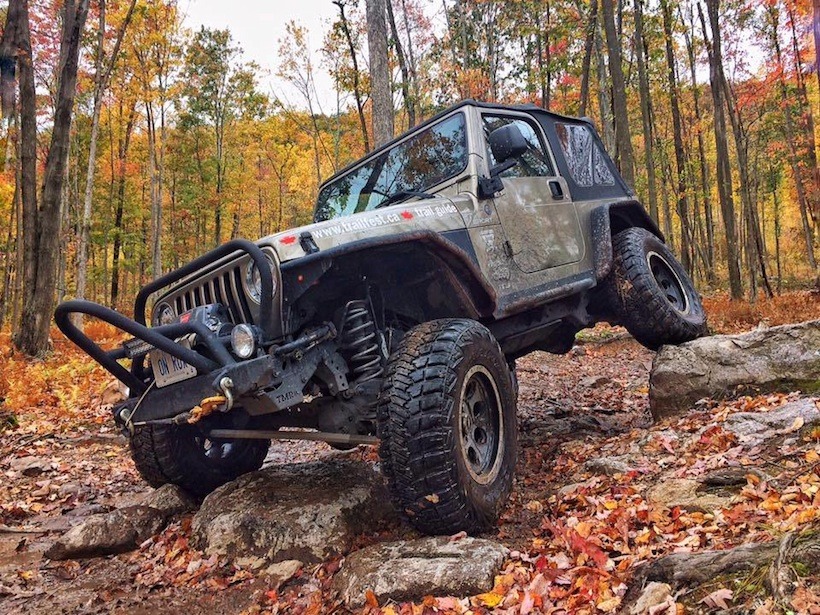
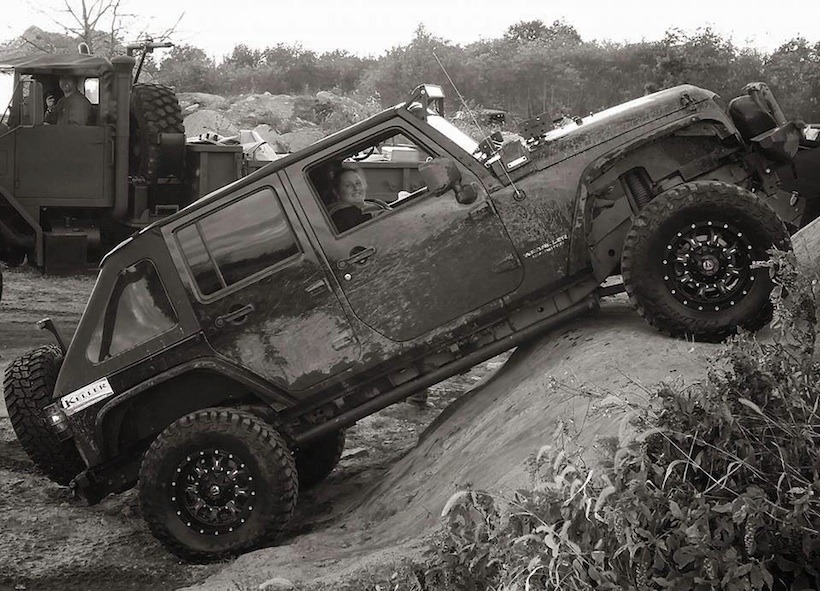
Jenna Bussard from Maryland and her 2015 Jeep Wrangler tackling a rock obstacle at Rausch Creek. This was Jenna’s first time off-roading at Rausch Creek.
womens wheeling 2016 the adventure portal
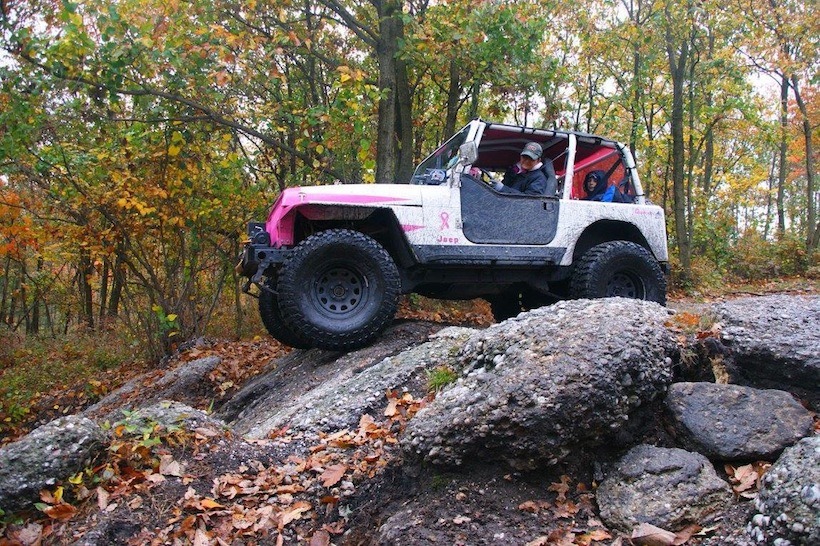
1995 Wrangler owned by Kathleen Ann. She began Off-roading in ’96 via Jeep Jamboree events and soon became a trail guide. Diagnosed with Breast Cancer her rig was custom painted pink by her husband. Her son Cory (13) and daughter Zoe (10) love going off-roading with their parents, and  rode along with Kathleen for this event.
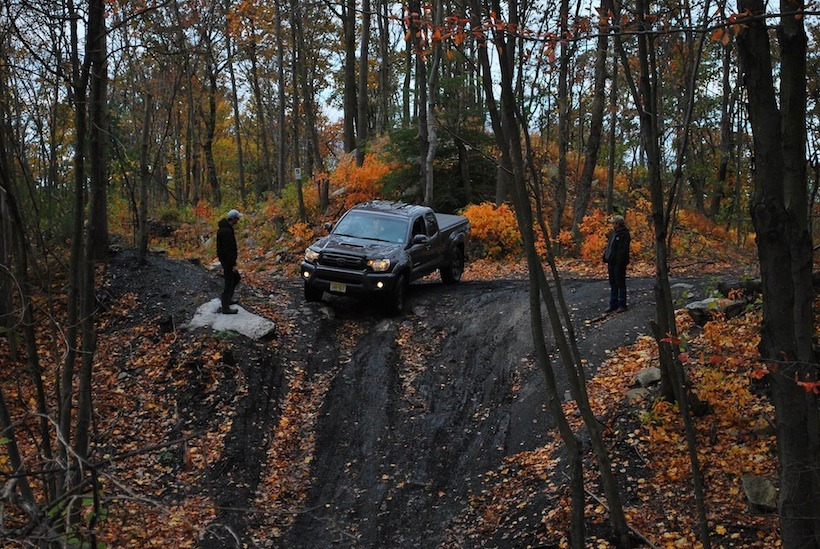
Donna Burrell in her ’12 Toyota Tacoma tackling a downward slope at Rausch Creek.

A full day on the trails was enjoyed by all. We were pleased to see the drivers band together to help each other through both easy and difficult trails and obstacles. Drivers and passengers shared a lunch break on the trails then headed back out.

Womens wheeling 2016 The Adventure portal-7
Lunch break…where’s the Pizza?

Some minor breakages occurred on the trails but were quickly fixed as the women worked together to fix any problems that arose.

While intermediate and advanced groups hit the trails early, approximately 60 beginners participated in a class taught by NorthEast Off-Road Adventures out of Ellenville, NY. Instructors Jon Mapes, Rich Brody and Owner Scott Trager, taught a three-hour “Basic 101 Off-Roading” class before heading out on the trails.

Womens wheeling 2016 The Adventure portal-5
NorthEast Off-Road Adventures out of Ellenville, NY. Instructors Jon Mapes, Rich Brody and NorthEast Off-Road Adventures owner Scott Trager taught a three-hour “Basic 101’s of Off-Roading” class.

The class included 3 Stations: A vehicle 360: teaching the drivers how their 4WD vehicle differs from an average vehicle. The instructor also taught the participants how to perform a vehicle inspection/check points to ensure that their rig is well maintained and trail ready. The second station involved education on safe driving, trail etiquette and what to expect on the trails. The third station, taught drivers the fundamentals of torque and picking a line, as well as working with a spotter. Drivers learned hand signals and practiced maneuvering over obstacles and  through tight areas. After the  class was complete, Scott Trager raffled off a free, full-day training class at their training facility in Ellenville, NY.

Womens wheeling 2016 The Adventure portal-3
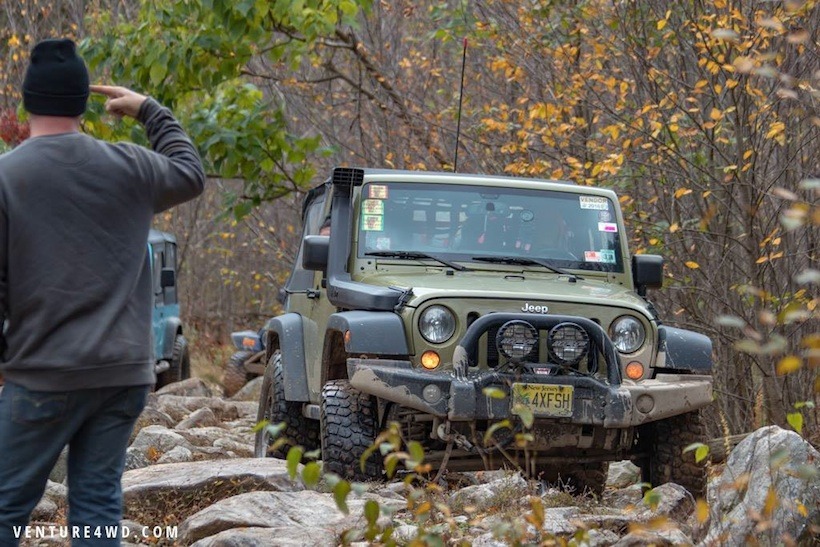
Drivers learned to maneuver through obstacles and through tight areas with the help of a spotter

Womens wheeling 2016 The Adventure portal-11

Womens wheeling 2016 The Adventure portal-8

Womens wheeling 2016 The Adventure portal-9

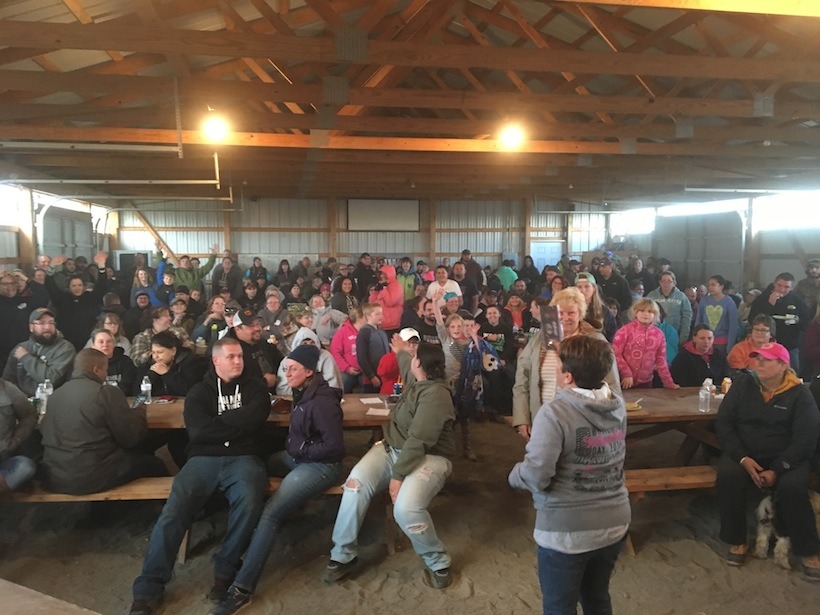
After a day on the trails, all drivers and passengers were welcomed back to the pavilion for a delicious BBQ Dinner hosted by OK4WD and Globex Performance. Dinner was followed by a very generous raffle. We are very grateful for all the sponsors (listed below) who provided amazing raffle prizes for the participants. During dinner, stories from the trails, adventures and advice was exchanged and many new friendships and bonds were created. We can’t wait for next year!!

Womens wheeling 2016 The Adventure portal-12
Christie Vinson speaking to the attendees after the event was over.

Click here for information on Women’s Wheeling Day 2017, October 21st.

Sponsors:
Rausch Creek Off Road Park
OK Auto 4WD & Tire
Outten Chrysler Jeep Dodge RAM of Hamburg, PA
Northeast Offroad Adventures Inc.
Globex Performance
Bushwacker
Rampage Products
Superwinch
TeraFlex Suspensions
Seven Slot Society
Carolina Metal Masters
Nitto Tire
SpiderWebShade
Trail Team Six
Moon Shine Camo

The Adventure Portal
Muddy Girl Country
JcrOffroad
Clayton Off Road
Wheelers, LLC
Jtopsusa
ARB 4×4 Accessories – USA Office
Krazy Beaver Tools, LLC
Forever Wave
Quadratec
ACE Engineering & Fab
Torq-Masters Industries
Mayhem Offroad LLC
Girls ‘N Garages
Jeep Momma
Daves Offroad Supply
Hyline Offroad
Fortec 4×4 – Roswell, GA
Option It Off-Road
Torqued Off-Road
Combat Jeepers
Primal Designs
Photographers:
Amy Briggs Photography
venture4wd.com Chris Shontz

Author:
Susan Bodnar

A Death Valley Off-Road Adventure

off-road, overland, overlanding, over land, off-roading, Off Road, Death Valley, Off-Road Trailer, death valley adventure, Ovelanding adventure, off-road expedition, vehicle supported adventure,

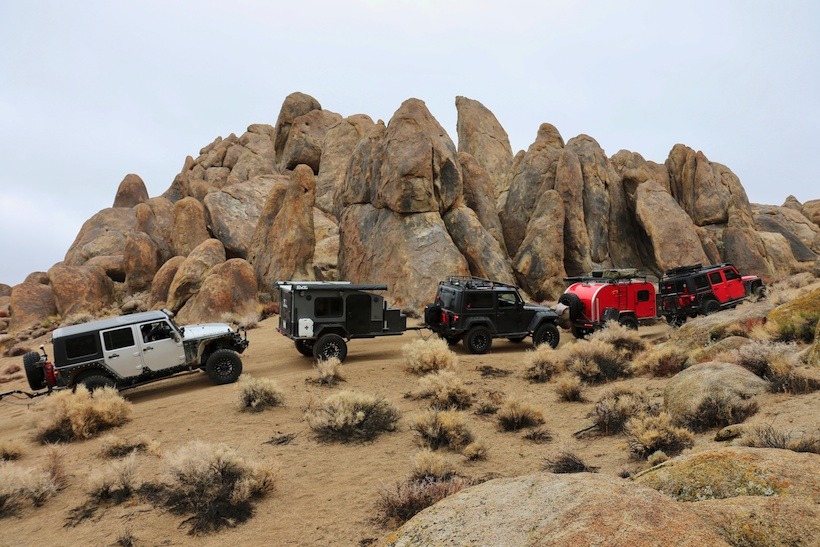
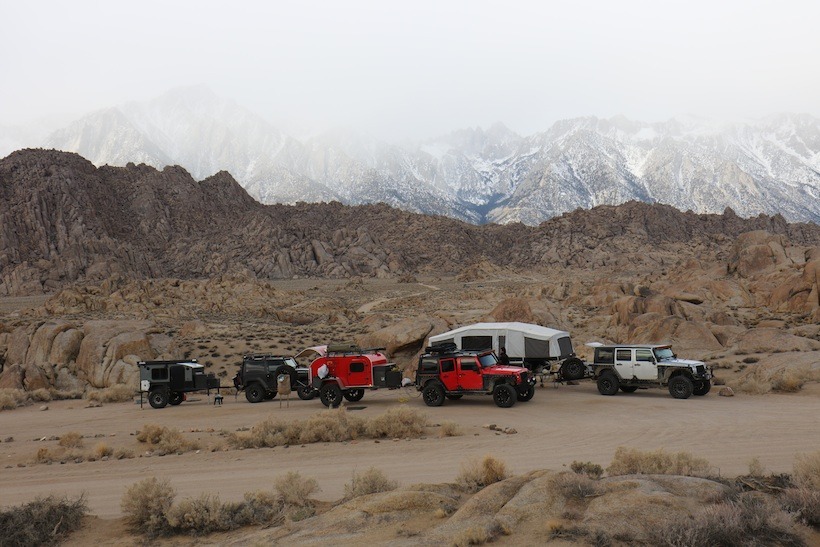
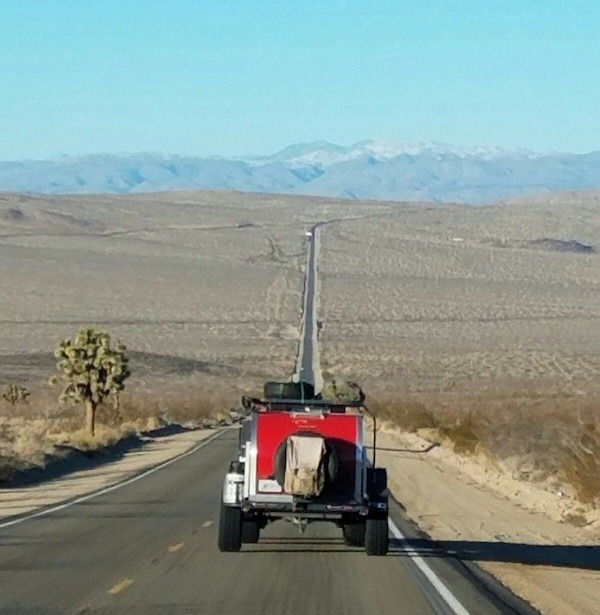
When you love to go Off-Road and have some time off what do you do? Open the Fun Treks Trail Guide and pick an offroad trail. That’s what we did for New Years and spent it with 2 other couples outfitted with a 2-door 2007 Jeep/Lead Dog Motorsports trailer, a 4-door 2015 Jeep Rubicon/ Moby 1 Camper and a 4-door 2015 Jeep Rubicon/Livin Lite Bear Cat 10.0 trailer. (Keep in mind that each Jeep and trailer are highly modified for our adventures). Five days were set aside for Vehicle Supported Adventure in Death Valley.

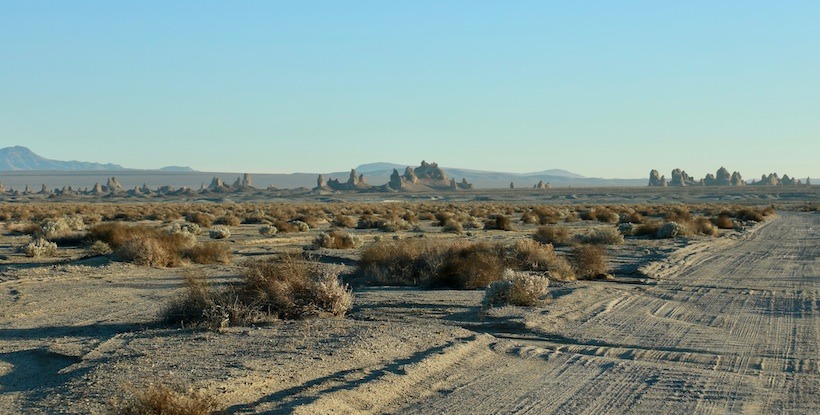
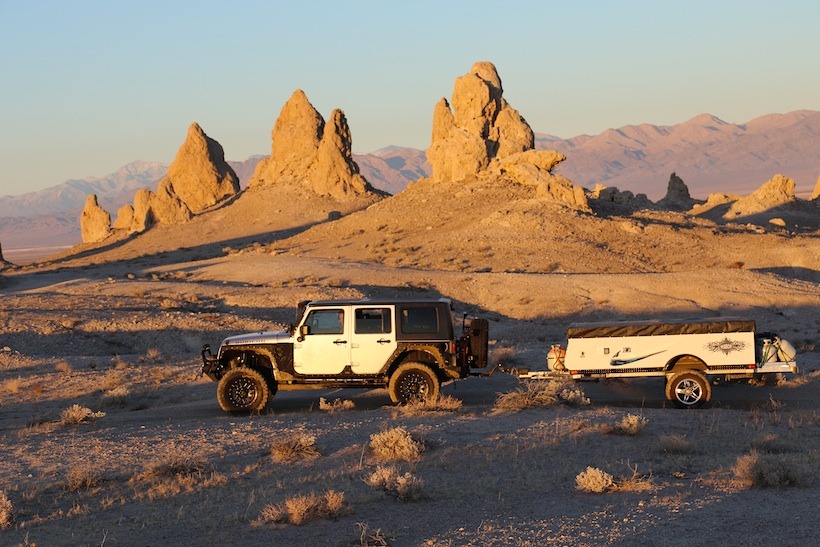
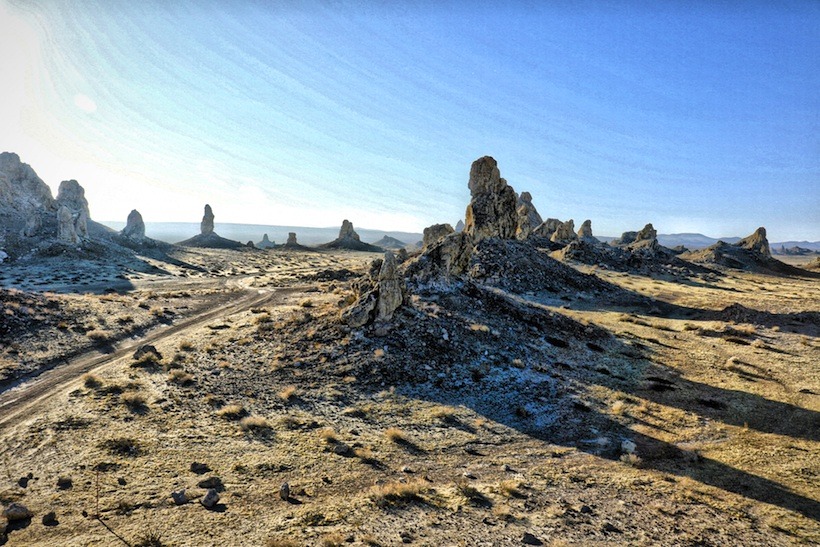
Our route began in Barstow on Hwy 178. Our first day’s destination; Trona Pinnacles. A great start to the trip since we had a 2 ½ hour drive just to get to Barstow. The Trona Pinnacles were easy to find (stock vehicles OK) and stunning to see. The pinnacles jet out of the ground while the rest of the landscape provides a stark contrast of flat, barren land. In addition to the scenery, it was fun to find out what movies and shows used this very area for their backdrops and sets. Many dispersed overland camp spots are available to choose from. Our Off-Road camp was complete just in time for the sun to set; casting the most amazing glow upon an already stunning location.

off-road, overland, overlanding, over land, off-roading, Off Road, Death Valley, Off-Road Trailer, death valley adventure, Ovelanding adventure, off-road expedition, vehicle supported adventure,
Approaching Trona Pinnacles
off-road, overland, overlanding, over land, off-roading, Off Road, Death Valley, Off-Road Trailer, death valley adventure, Ovelanding adventure, off-road expedition, vehicle supported adventure,
Trona and the Living Lite 10.0 Bear Cat trailer

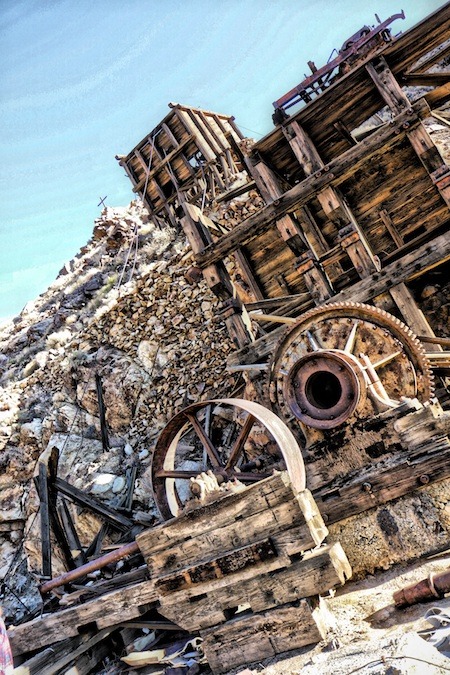
Day 2: We drove approximately 38 miles to Trail 44 (Fun Treks) called Pleasant Canyon. The first part of the trail takes you to Ballast ghost town. We stopped and looked in the cabins and saw all kinds of artifacts and history about the town, people and visitors.

off-road, overland, overlanding, over land, off-roading, Off Road, Death Valley, Off-Road Trailer, death valley adventure, Ovelanding adventure, off-road expedition, vehicle supported adventure,
Pleasant Canyon, Ballast Ghost Town

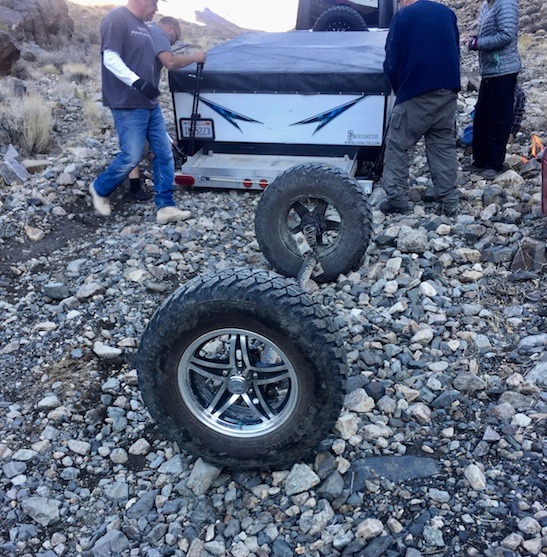
The scenery encompassed valleys and sweeping hillsides. We were pleased when we arrive at Claire’s Camp because one, it meant we were on the right track and two, it was a great place to get out, explore and eat. I was not disappointed. We have seen numerous mining towns and this one was in great condition with so many things still in tact that you could really picture what the mining camp would have been like. As we were climbing Off-Road and up hill, Jeep and trailer, to Rita’s Cabin the 2nd Jeep radioed that the Livin’ Lite Bear Cat 10.0’s axel had fallen off.

off-road, overland, overlanding, over land, off-roading, Off Road, Death Valley, Off-Road Trailer, death valley adventure, Ovelanding adventure, off-road expedition, vehicle supported adventure,
Lost the axle on the Bear Cat

We were fortunate enough to cross paths with some locals coming down the mountain who provided us with a reference for a welder in town. After some wrenching to get the trailer temporarily put together and mobile, we headed back to town. Leaving the canyon at night made for an exciting drive.

A good part of day 3 was spent addressing needed repairs. The referred welder turned out to be Tin Bender, famous King of the Hammer builder. We hung out at the shop while he graciously welded the axel so we could finish our trip. Without kind and generous off-roaders like these we would have been headed home. We made a quick change in plans due to the delay and drove up the 136 to Trail #37, Movie Road/Alabama Hills.

off-road, overland, overlanding, over land, off-roading, Off Road, Death Valley, Off-Road Trailer, death valley adventure, Ovelanding adventure, off-road expedition, vehicle supported adventure,
Movie Road Alabama Hills.

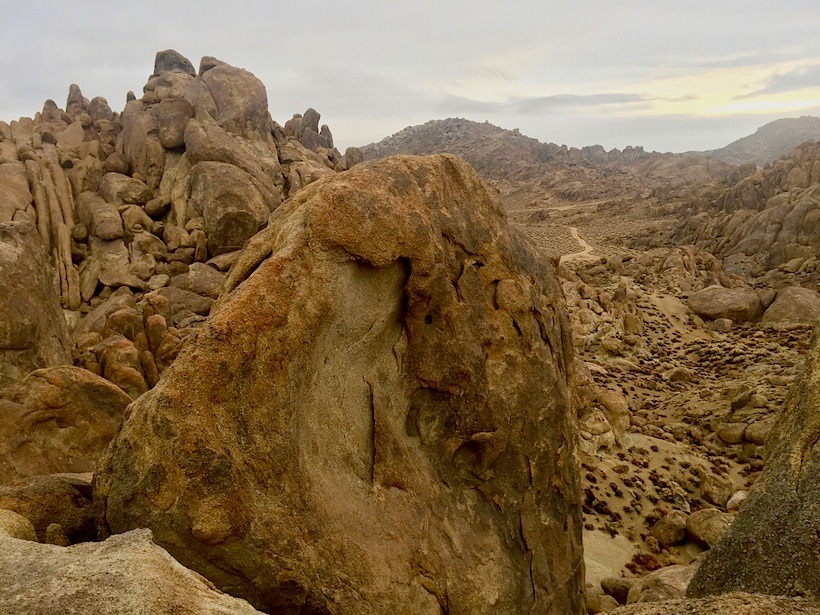
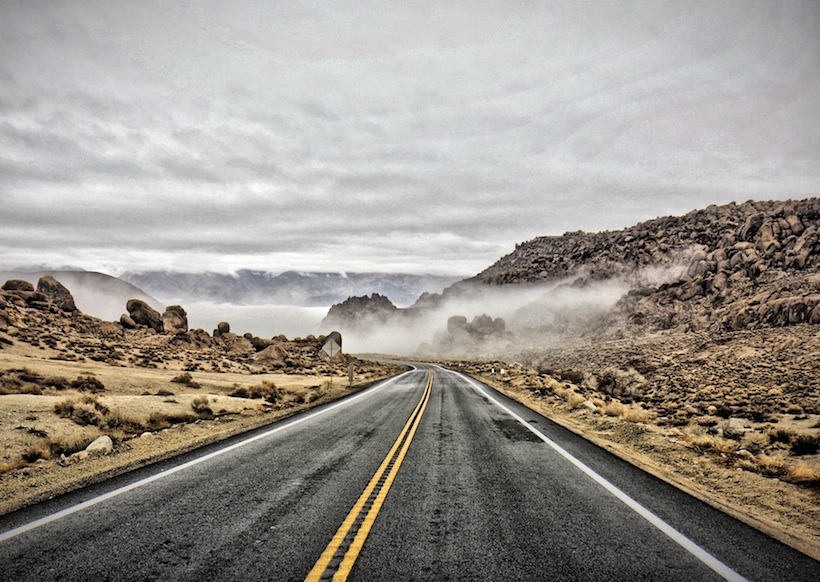
We had a couple of hours to explore before dark, so we drove around the marked trails (stock Jeeps OK). There were numerous things to look at from the snow-capped mountains in the background, to the rock formations and valleys.

off-road, overland, overlanding, over land, off-roading, Off Road, Death Valley, Off-Road Trailer, death valley adventure, Ovelanding adventure, off-road expedition, vehicle supported adventure,

off-road, overland, overlanding, over land, off-roading, Off Road, Death Valley, Off-Road Trailer, death valley adventure, Ovelanding adventure, off-road expedition, vehicle supported adventure,
Movie Road, Alabama Hills
off-road, overland, overlanding, over land, off-roading, Off Road, Death Valley, Off-Road Trailer, death valley adventure, Ovelanding adventure, off-road expedition, vehicle supported adventure,
Movie Road, Alabama Hills 
off-road, overland, overlanding, over land, off-roading, Off Road, Death Valley, Off-Road Trailer, death valley adventure, Ovelanding adventure, off-road expedition, vehicle supported adventure,
Movie Road, Alabama Hills

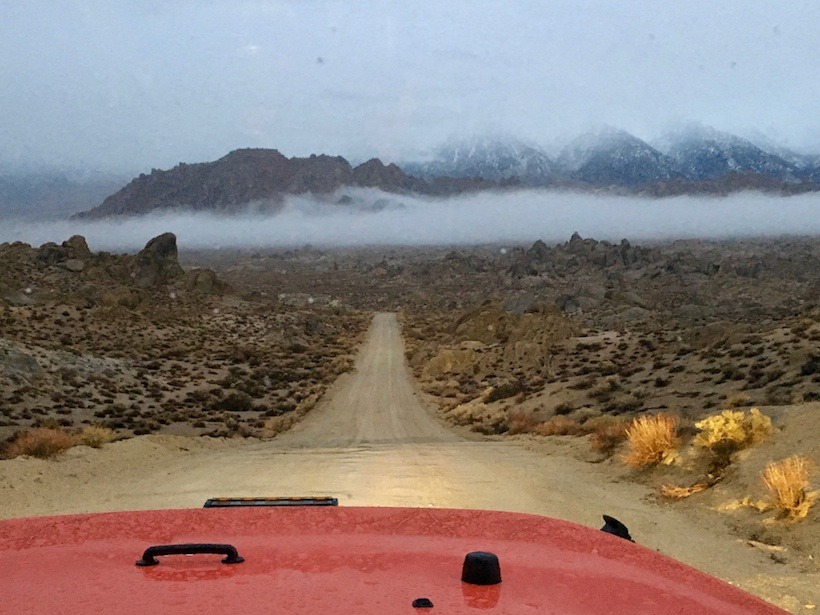
As we were searching for the perfect camping spot, a heavy fog rolled in making for dramatic photos. This area has more traffic and campers due to the tourist attraction of Movie Flats Road, so although there are many spots, you might want to mark yours before dark. My only regret on this trail was not stopping at the Film Museum in town and picking up the Movie Road Self Guided Tour.

off-road, overland, overlanding, over land, off-roading, Off Road, Death Valley, Off-Road Trailer, death valley adventure, Ovelanding adventure, off-road expedition, vehicle supported adventure,
Movie Road, Alabama Hills

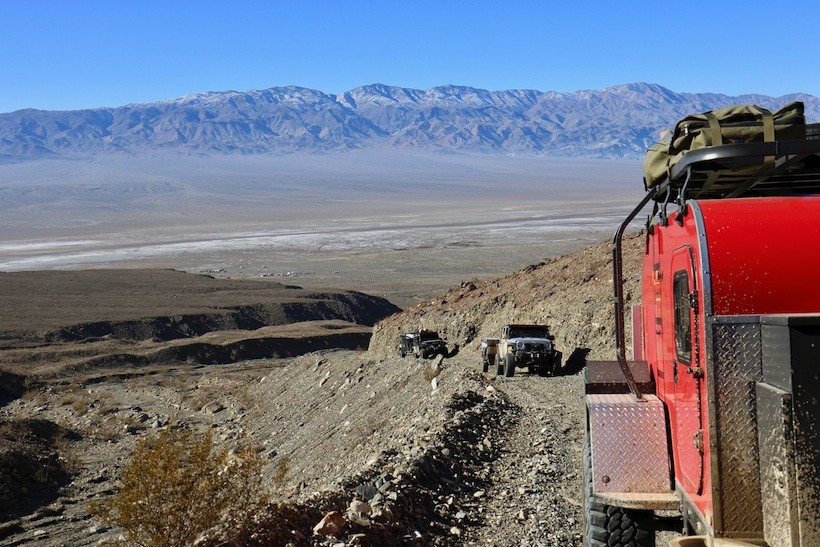
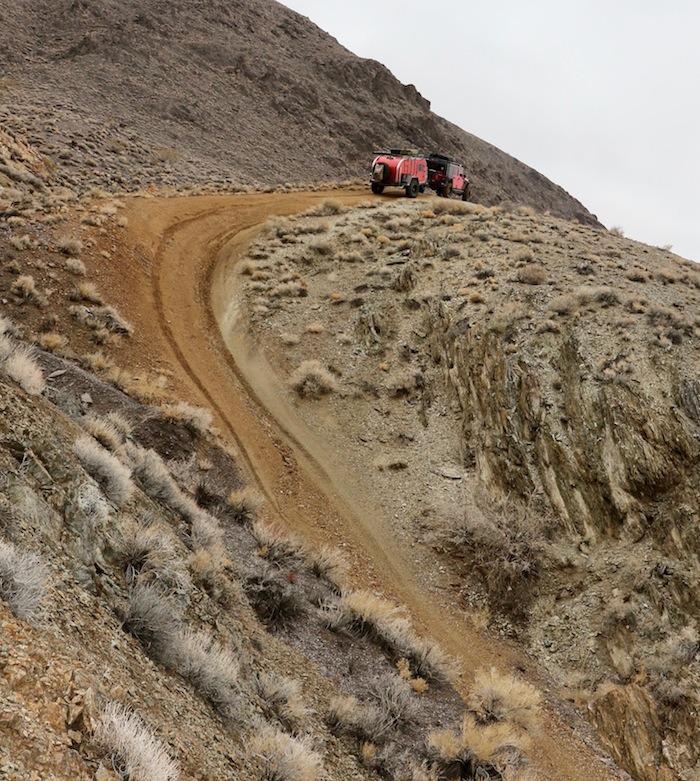
Day 4: We were up and on our way to Trail #38, Swansea-Cerro Gordo Rd. This trail was supposed to be more challenging; however nothing that the Jeeps couldn’t do. We slowly worked our way up the mountainside. There was a short part of the trail that had a fairly narrow cliff-side climb. This portion of the trail makes for magnificent views, but may not be your favorite if cliffs and heights are unsettling to you. At 4,000 feet, the plants were dusted with snow, which made the scenery majestic.

off-road, overland, overlanding, over land, off-roading, Off Road, Death Valley, Off-Road Trailer, death valley adventure, Ovelanding adventure, off-road expedition, vehicle supported adventure,
Swansea-Cerro Gordo Road
off-road, overland, overlanding, over land, off-roading, Off Road, Death Valley, Off-Road Trailer, death valley adventure, Ovelanding adventure, off-road expedition, vehicle supported adventure,
Jeep and Moby 1 on Swansea Cerro Gordo Road
off-road, overland, overlanding, over land, off-roading, Off Road, Death Valley, Off-Road Trailer, death valley adventure, Ovelanding adventure, off-road expedition, vehicle supported adventure,
Swansea-Cerro Gordo Road

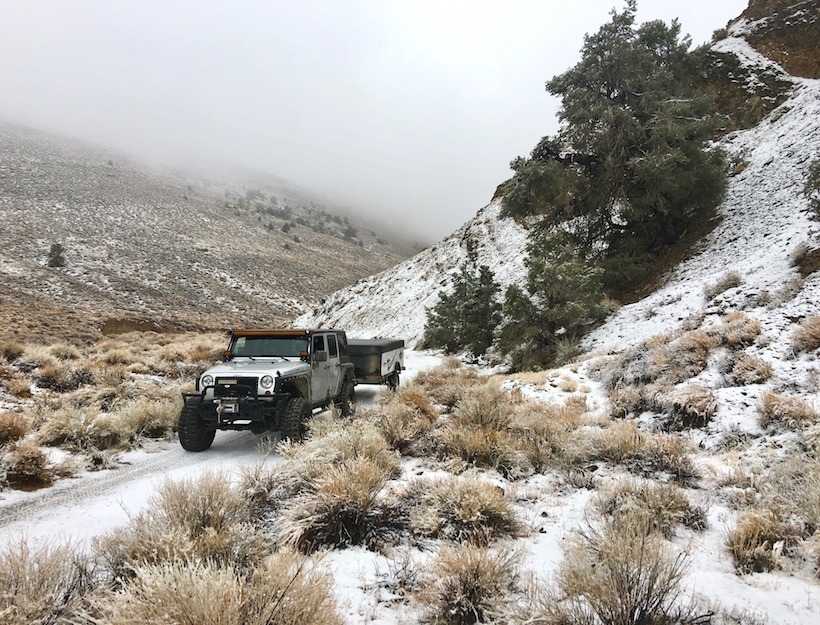
At approximately 7,000 feet, we were off-road driving in a winter wonderland. The snow was not a deterrent and the views took our breath away.

off-road, overland, overlanding, over land, off-roading, Off Road, Death Valley, Off-Road Trailer, death valley adventure, Ovelanding adventure, off-road expedition, vehicle supported adventure,
Just getting to the snow, Swansea-Cerro Gordo Road

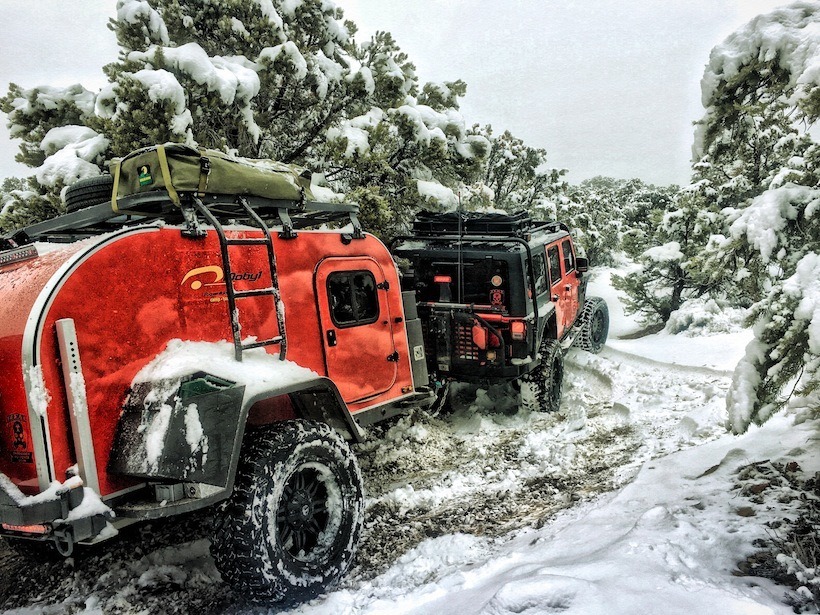
Soon after hitting that elevation, the trail began to climb at a much steeper grade. This proved a challenging climb on the icy and snowy trail as the ratings and guides are intended for Jeeps, not necessarily Jeeps towing trailers.

off-road, overland, overlanding, over land, off-roading, Off Road, Death Valley, Off-Road Trailer, death valley adventure, Ovelanding adventure, off-road expedition, vehicle supported adventure,
Climbing up the top on Swansea-Cerro Gordo Rd

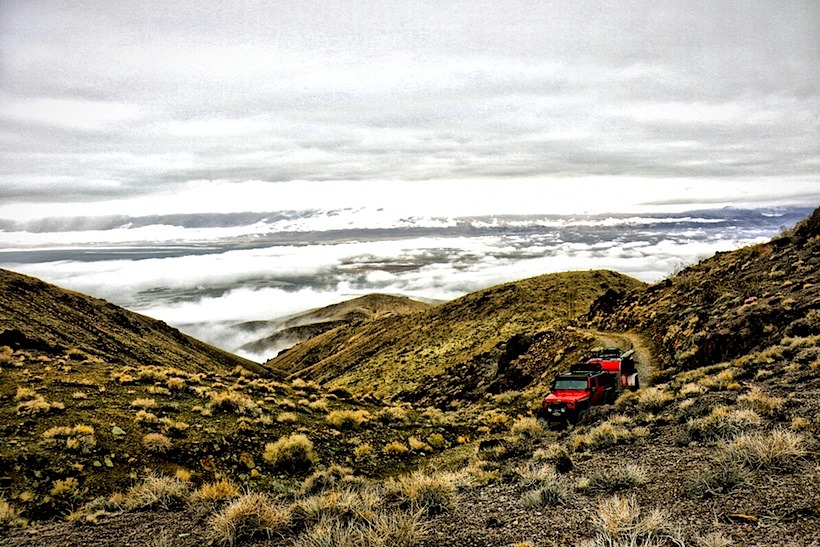
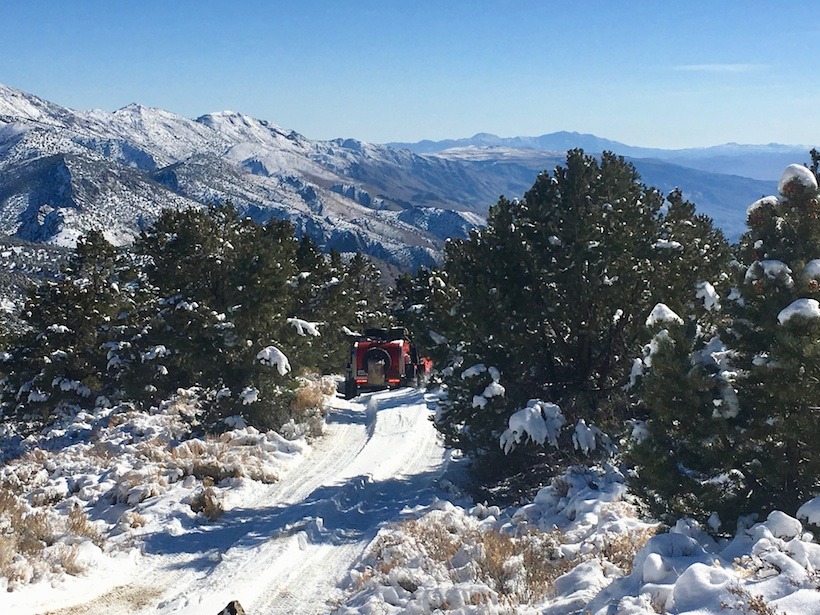
The Moby1 and Lead Dog trailers performed as expected Off-Road, even in low temperatures and more extreme weather. Not knowing the trail first hand, we made calls to the rangers to assess the upcoming trail conditions. We were losing daylight and needed flat land to camp and time to make some decisions. After a long day of trampling through the snow and winching vehicles up the steep grade to ensure everyone’s safety, we made it to 9,000 feet and camped for the night. The next morning we woke up to breathtaking blue skies and sunshine. We disconnected our trailer and scouted ahead. What we found were conditions worse than what we had already experienced. An executive decision was made to turn around and go back down the mountain the way we came. Up until this point there really hadn’t been anywhere to turn around; especially with the Jeep and trailer set up. We were also a bit nervous about going down the hill. Keep in mind, we had winched ourselves up just hours ago. After a brief discussion, we figured that the devil we knew was better than the one we didn’t. We all made it back down the mountain safely and with all our equipment in tact. Another amazing day of Jeeping.

off-road, overland, overlanding, over land, off-roading, Off Road, Death Valley, Off-Road Trailer, death valley adventure, Ovelanding adventure, off-road expedition, vehicle supported adventure,
Coming down Swansea-Cerro Gordo Road

Our saving grace on this trip was that we prepared for the worst and, for that, I give all the credit to my amazing partner in crime. Our MaxTrax rescue boards (that we thought we would never need) got us out of some bad spots. They sustained some damage, but MaxTrax replaced them under warranty. This was our first trip with our 2-way air system installed by Wild Boar Off Road. The system performed well in each situation and made the road transitions easy and quick. When we came home, we installed them on all of our Jeeps. The only thing we were missing this trip were snow boots!

On our last night, we spent the night laughing and joking about the conditions we had survived and the adventure we had the pleasure of participating in. It was not the adventure we planned, but it turned out even better as the challenges and adversity tested our overlanding abilities and skills. If you are looking for a sight-seeing trip and gentle meandering trails my advice, NEVER follow us!

off-road, overland, overlanding, over land, off-roading, Off Road, Death Valley, Off-Road Trailer, death valley adventure, Ovelanding adventure, off-road expedition, vehicle supported adventure,

Author- Jaime Moore
Photos- Jim Miller
Fellow Adventurers-David and Dawn Fekete
James and Lacie Moretti

For more Overlanding and Off-Road Vehicle Supported Adventures, CHECK HERE

Momentum-The Double Edged Sword

Momentum 2
Momentum 2

The following article is from Jim Allen’s “Four Wheeler’s Bible” 2nd edition. Printed with permission from Jim.  The info contained in this article is tried and true. Give it a read as a reminder or to sharpen your off-roading skills.

Momentum is defined as “the impetus of movement” and a “complex mixture of mass and velocity.” Inertia is another word that fits.  For our purposes, the definition of inertia, ” a body in motion tends to stay in motion”,  is the most useful definition.  The weight of your vehicle carries it along until friction, air resistance, and other factors slow it down.  That inertia/momentum is a useful tool for four-wheeling, but it must be used wisely.

It takes a certain amount of traction to put your vehicle in motion.  When circumstances don’t make that traction available, a little momentum can carry your through.  Sometimes that just means a steady speed over a problem area, and other times it means gaining a little speed on good ground before you encounter the obstacle.  Emphasis is on the “little”, at least at first.

Momentum 6
Keep a steady foot on the throttle for the incline then give a little “bump” to get you over an obstacle.

Always try going easy the first time and increase the level of intensity gradually until you reach the no-go point and abort the attempt.

Momentum in mud, Sand, and Snow

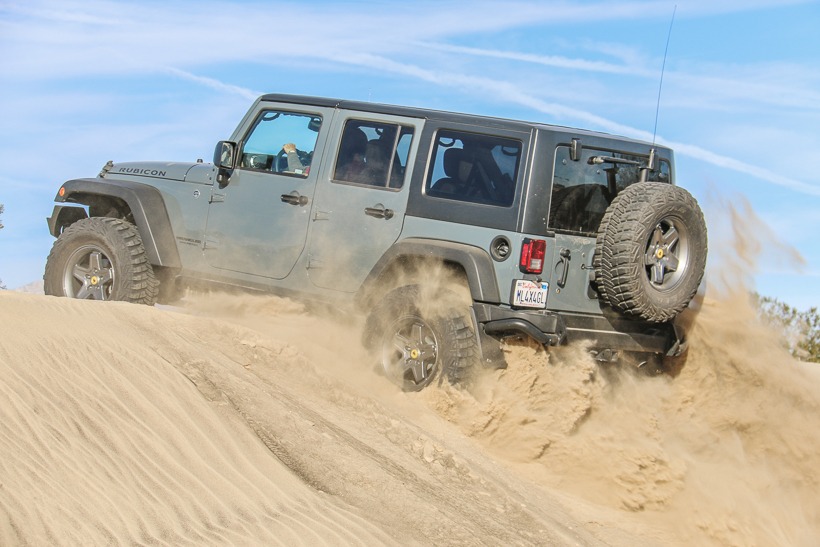
All three of these ground conditions are similar in that they combine low surface strength and low shear strength.  Not only do you sink, but you have no traction.  Momentum can launch you completely across some soft areas or provide you with just enough help to claw your way across with the minimal traction available.  With enough speed you can actually hydroplane across a soft surface, but control is just about impossible.  Using momentum across soft ground requires that you evaluate the surroundings along with the obstacle.  Are you going to end up sideways or lose it completely and slam into a tree or rock?

Momentum 3
If she keeps giving it gas, her wheels will likely dig in. Best to back up and try again.

Momentum on Hill climbs

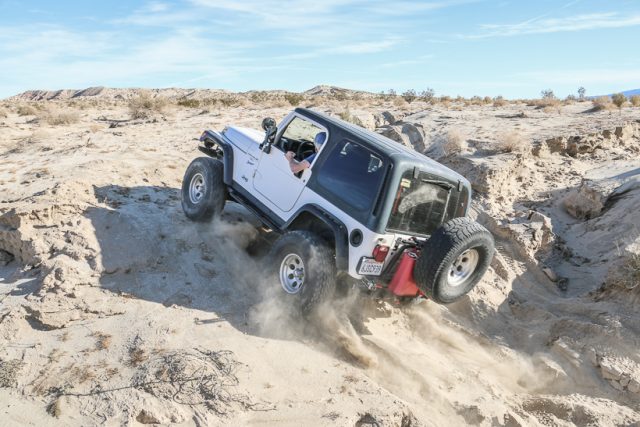
There are many hills on which you could not start from a dead stop, but if you have a little motion, you can keep going.  That means a steady speed on a hill.  You may encounter spots of lesser traction, or a steeper slope, and momentum may be enough to carry you past it.  If not, you must be ready to respond instantly before you come to a stop.  Sometimes that means a little more throttle; other times it means backing off for torque control.  Momentum can also be used at the start of a low-traction climb to help you up.  The momentum is built up on flat ground.  On a short hill without enough traction to climb slowly, this may take you up without spinning a tire.  On a long hill, safe and sane levels of momentum may just carry you halfway and leave you perched with spinning tires and a failed-climb maneuver to perform.  The approach to a hill also may limit your momentum options with a sharp transition from horizontal to vertical.  In other cases, you may be able to build up quite a head of steam but, just as with soft ground, you can have control problems with too much speed.

They got themselves high centered because of lack of throttle on the incline.

Momentum for Rockcrawling

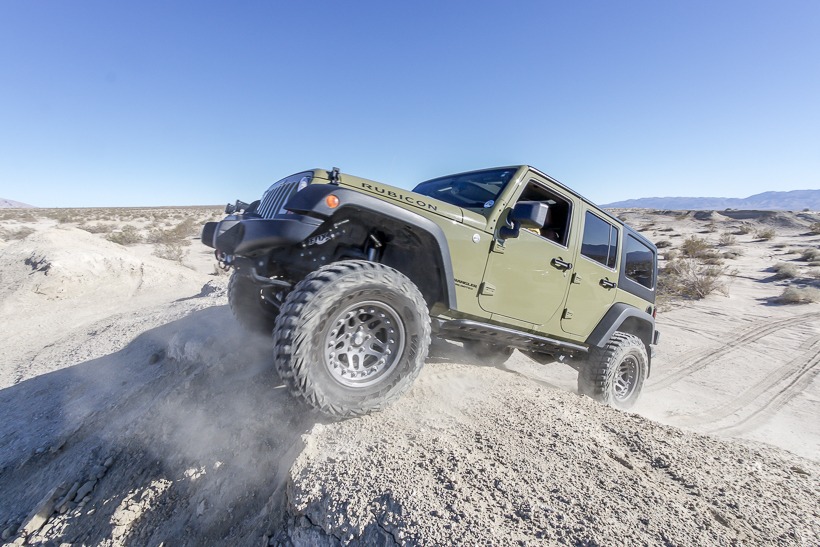
Momentum is as useful in rocks as anywhere else, but because rocks are unyielding by nature, contact usually results in the vehicle getting the short straw.  As often as not, momentum fo rocky terrain comes into play when weight transfer unloads one axle and overloads the other.  This can happen on a straight climb, usually a very steep one if a highly tractive rock face is involved, or on ledges.  On a straight climb on rock faces, such as slickrock, play the game much like you would elsewhere;  maintain a steady speed and react appropriately if needed.  On a boulder-strewn landscape, your speed potential will be severely limited, but keep the momentum imparted and speeds as low as 1/mile per hour can be useful.  Again, try to maintain whatever movement you can rather than starting and stopping.  Climbing in loose rocks may require momentum, just as with soft ground, but too much speed can result in bouncing, slamming, cut tires, or a loss of control.

Momentum 4

The ledge scenario involves the use of a “bump”.  Usually the front axle is up, though unloaded by weight transfer, and it’s the rear axle that can’t make the climb.  The bump combines momentum with a judicious stab of throttle at just the right time. If the driver applies a stab of throttle just as the rear tires hit the ledge, the momentum has the effect of momentarily “gluing” the tires to the rock by increasing ground pressure.  This can make the rig hop up that ledge like a jack-rabbit.  As you can imagine, the forces acting on the tire, suspension, and drivetrain are great, so the amount of momentum used, the amount of throttle, and the duration of the throttle, and the duration of the throttle application must be carefully chosen.  On a typical ledge, a “roll” of just a couple of feet is enough momentum for the bump.

Momentum 1
I4WD Trainer Tom Severin leading the pack

You can buy a copy of Jim Allen’s Four-Wheeler’s Bible on Amazon.com

Photos courtesy of Lisa VanRynsoever, TAP, and Bernard Leitner


Napier Sportz Cove Vehicle Tent

Napier

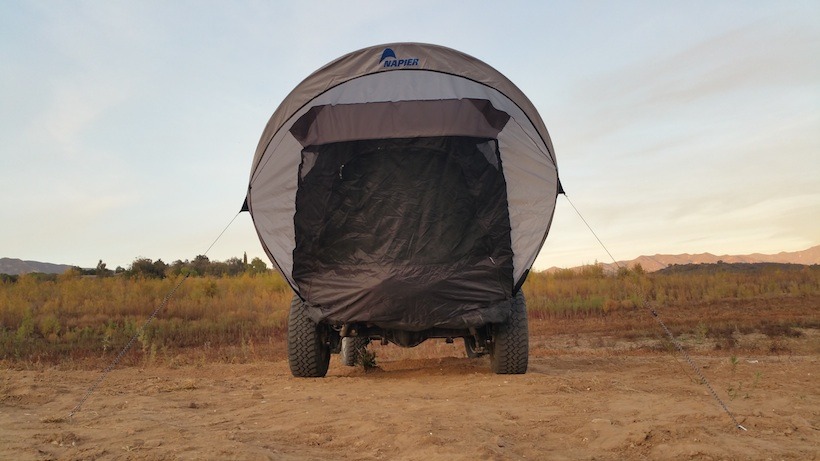
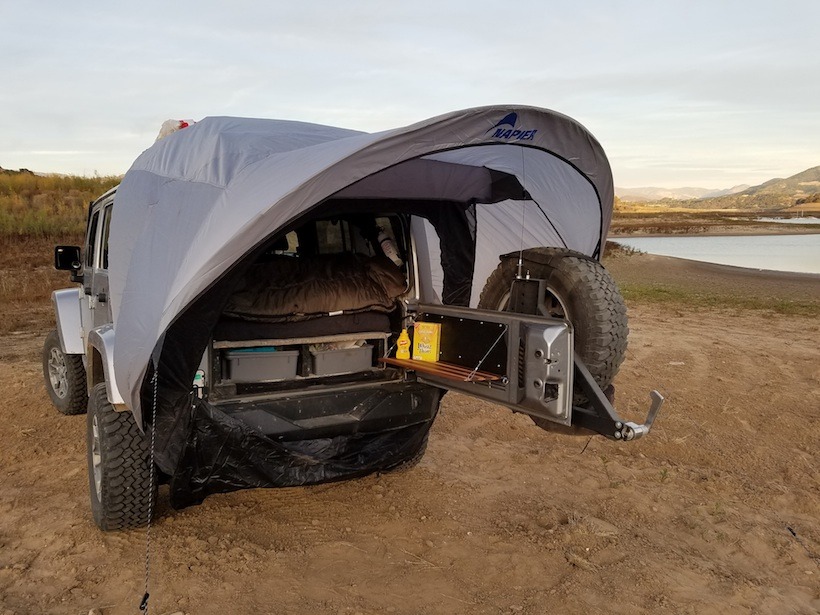
Even though roof top tents are all the rage in the overlanding world, I found that they just don’t work for me. My Jeep build is unique because I designed my sleeping and storage space inside the cab. One of my challenges with this type of build is cab ventilation and maintaining a comfortable cabin temp. I also want an awning to shield me when utilizing space outside the back of the Jeep. My rear door opens and is equipped with a small utility table that I use as a meal prep area. I have searched to find a suitable shade or canopy to extend off the back, but haven’t found one that works on my roof rack until now.

Napier recently released the new Sportz Cove 61500 at the 2016 SEMA show and it caught my attention. I have and use their Sportz Truck 57  Series tent on my Ford F150 for camping. It has held up in some tuff weather conditions over the years, so when they released the Sportz Cove, I had to try it out.
Now, my truck tent is designed specifically for my truck bed size etc. The Sportz Cove is made to fit on a variety of hatchback style vehicles, so my concern was that it wouldn’t be diverse enough to fit right. One size does not always fit all.  We have two Jeep JKU set ups, one with an aftermarket build and one stock. My questions going into this product review were, would the Sportz Cove fit both of our rigs and would the awning provide sufficient coverage?

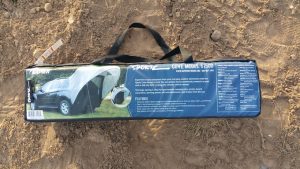
I was pleased when my package arrived, it was small, lightweight and could store easily, but the real test would be out on the trail.

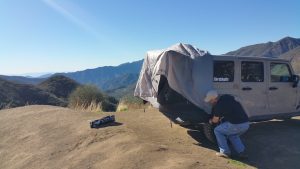
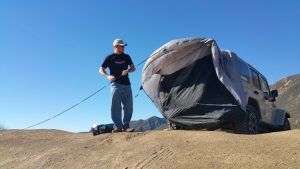
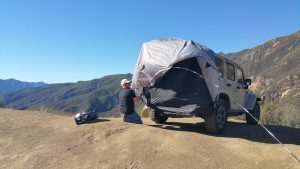
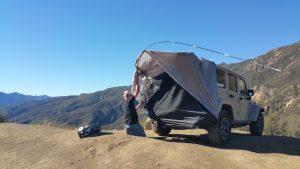
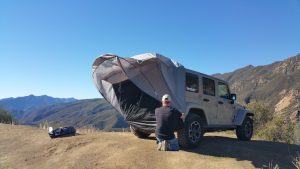
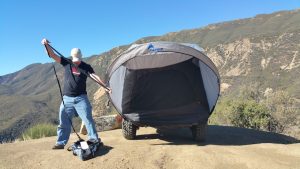
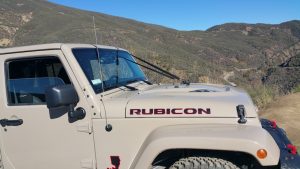
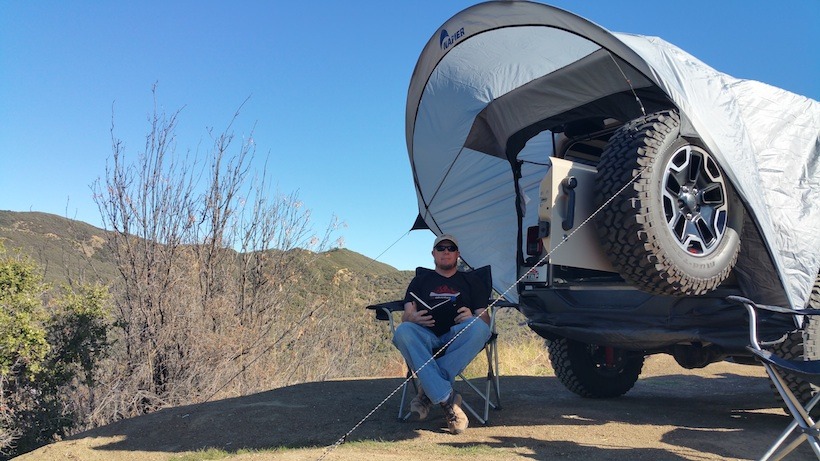
We decided to take the Sportz Cove on a short photography trip with our stock 2016 JKU. Our plan was to set up and work out the back, testing the Sportz Cove canopy coverage. The tent unpacked easily and quickly. Thankfully, it doesn’t have a million pieces to assemble, just the tent, the collapsible frame, tie down ropes and stakes. The directions are very easy, and set up did not take long at all. Probably about ten minutes.


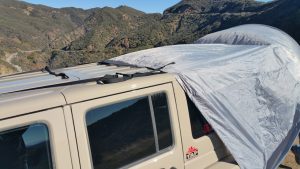
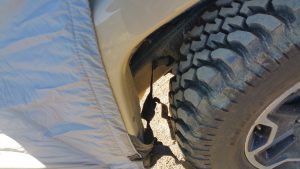
Thankfully, with a Jeep, if the attachment areas on the directions don’t exist, they have many standard frame, recovery mount notches and tie down points. These served well to secure the Sportz Cove.


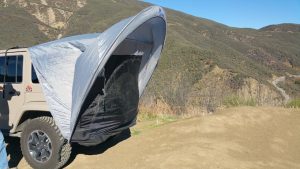
Having the rear canopy was extremely helpful, giving me a place to get out of the sun and wind to review my work, rest and enjoy the view.


So, the Sportz Cove passed the first test run on the stock JKU.  It was easy to set up, withstood a long day of light to medium winds up on the mountain peak, provided ample shade off the back and was easy to take down and pack up.  Next, I was eager to see if  the tent set up would work on my modified rig as a tent. The following week I was invited on a nearby camping trip….perfect!

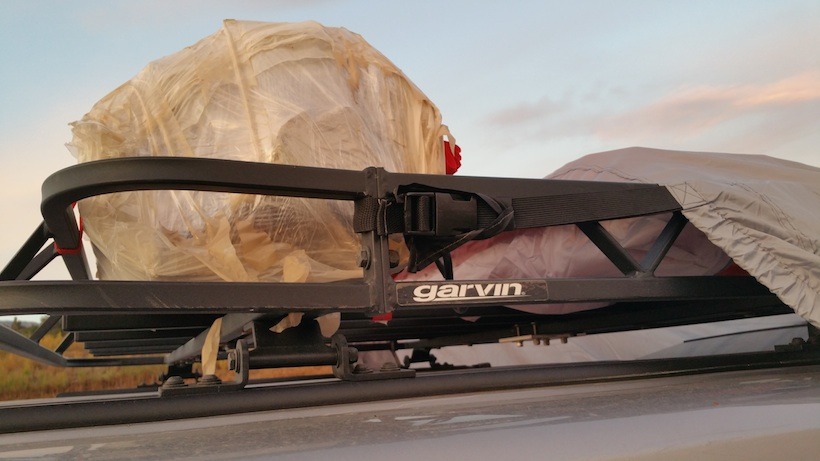
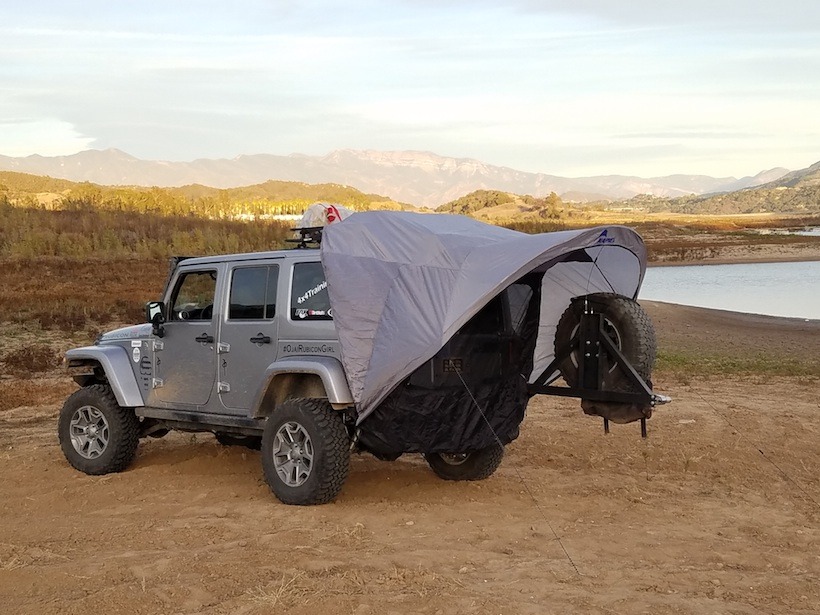
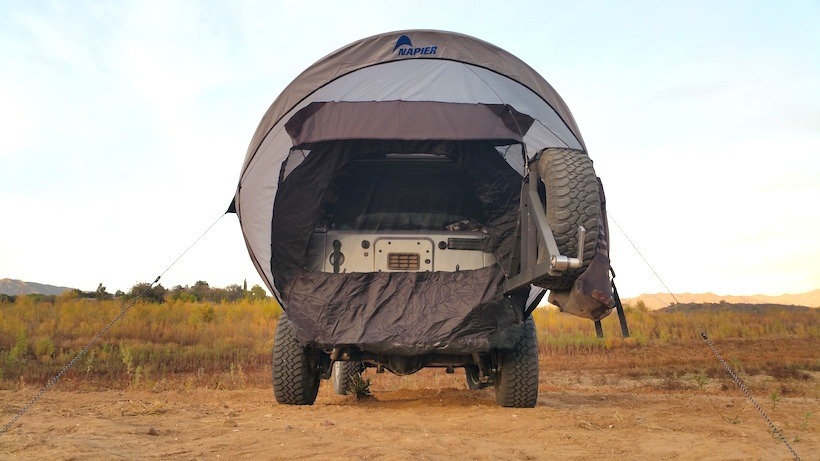
Again, the  set up was very easy. My concern was, whether or not it would fit over my aftermarket rear bumper, tire carrier and roof rack. I was pleasantly surprised that the Sportz Cove was able to snugly fit over all my aftermarket upgrades!

Napier Sports Cove 6

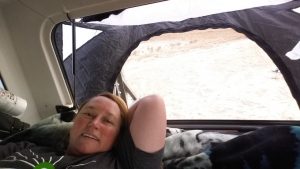
Since I sleep in the cab, in the summer it’s always too hot and in the winter, too cold. I like to keep the windows cracked a little for fresh air to try to maintain a comfortable temperature, but the bugs can be a pain. Now, when using the Sportz Cove in warmer months I can leave my back window up and use  the tent’s bug netting to keep critters out and fresh air coming in.

Napier Sports Cove 5
Here, I have the netting up for a “bug-free” spring/summer camping experience.

I can also zip up the second layer to block out sun and wind enabling me to better control the in cab temperature. That evening I slept comfortably and bug free.

Napier_The_Adventure_Portal_17
All closed ready for the evening.

The Napier Sportz Cove vehicle tent worked out really well. I use this rig year round for all  my overlanding trips and really needed a car tent that would help me manage cab  temp, ventilation, and again, provide a good sized awning out the back. The Sportz Cove gives me all of that. So now I get to camp almost in a tent, (Without being on the cold, lumpy ground.) have awning coverage out the back and the bonus…..it’s super easy to set up.

Napier Sports Cove 4
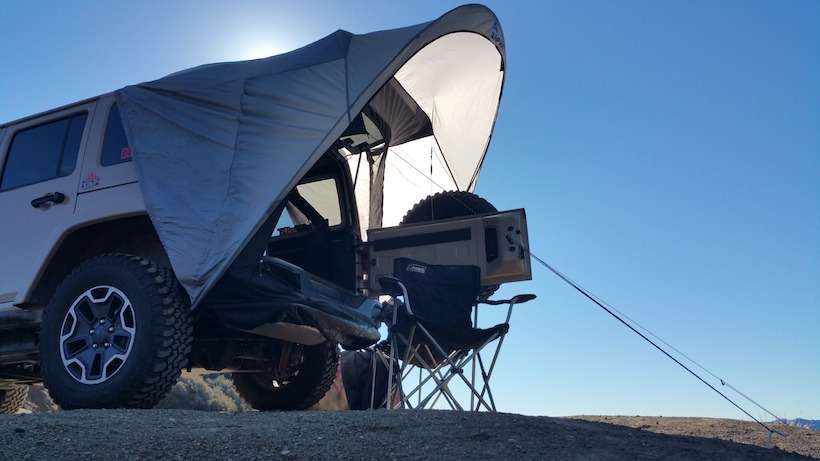
The awning provides enough coverage to keep my cooking area out of the sun or rain.

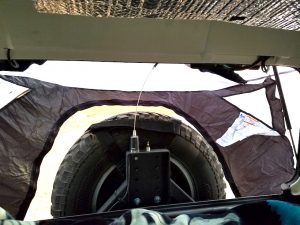
This tent will help me maintain cabin comfort year round and the canopy provides abundant protection from the elements even with the larger rear tire carrier.

Napier Sports Cove 2

Napier Sports Cove 1
The insect netting helps keep the bugs out so I can enjoy the sleeping cabin area.


So, the search for an affordable, unique, and easy solution to my aftermarket, overlanding vehicle was easier than I expected.  I like it’s ability to fit on a diverse set of vehicles, as well as it’s easy set up, take down and compact storage size.


Check out napieroutdoors.com and get out there and TAP into Adventure!

Napier Sports Cove

Napier listed features of the Sportz Cove 61500

-Universal vehicle sleeve designed to accomodate all mid to full-size SUB’s, CUB’s and Minivans

-Over 2 ft. of awning coverage

-Entrance includes built in storm flap for weather protection and privacy

-Mesh screen door provide bug-free views

-Rear vehicle access offers convenience and storage solutions.

Article and Photos by Lisa VanRijnsoever

Sign up for our newsletter and TAP into Adventure!