Off-Road Recovery Gear Guide

Whether overlanding or rock crawling, being prepared for vehicle recovery situations is essential. TAP has put together this Recovery Gear Guide as a reference for what type of products are available to add to your safety gear list. TAP uses some of the brands in this gear guide, but not all of them. The guide is not meant to be a brand specific endorsement, but an item endorsement. In other words , you choose your brand, we simply give you the product info. Our final recommendation is that it’s not just about having the gear. Make sure you fully understand how to use it and don’t wait to discover how, when you’re stuck and stressed. That’s when things can go badly wrong! Here at TAP we always recommend taking training courses from qualified trainers who are I4WDTA certified. TAP into Adventure…. with the ability to get out of a mishap!
Bubba Rope Recovery Ropes and Soft Shackle 
Bubba Rope® is a recovery rope developed from military specs for safely pulling off-road vehicles out of mud, sand or snow. It is the only snatch rope with a polymer coating. The Double braid has good resistance to abrasion, sunlight and chemicals. With extended immersion in water, nylon rope products will lose up to 10% of their strength. Bubba Rope’s polymer coating, gives the added water resistance property to maintain specified breaking strengths.
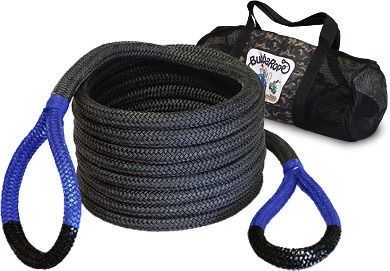
Specs
-100% double braided nylon rope
-Urethane Polymer coating
-Commercially spliced and seized at both ends
-Water proof, UV and abrasive resistant
-Highest breaking strengths available
Bubba Rope® has the strength and durability beyond typical recovery ropes, snatch straps and chains with all the kinetic characteristics of a superior snatch rope.
Stretch
Nylon Double Braid is the preferred choice for applications requiring high strength with excellent shock absorbing properties.
Strength
-Lil’ Bubba – 1/2″ diameter – 7,400 lbs
-Bubba – 7/8″ diameter – 28,600 lbs
-Big Bubba – 1-1/4″ diameter – 52,300 lbs
-Jumbo Bubba – 1-1/2″ diameter – 74,000 lbs
-Extreme Bubba – 2″ diameter – 131,500 lbs
Each Bubba Rope is hand crafted and built in their factory in Tampa, Florida. The eyes or loops of ropes are specified to be longer and stronger than other recovery ropes. To add to the strength of the eye we use 50% more material in our splicing and add a strong seizing derived from actual Military specifications. All ropes are dipped in a polymer base giving the ropes a protective covering and impregnating the nylon fibers, leaving them strong yet flexible.
BubbaRope Gator-Jaw Soft Shackle
Gator-Jaw® soft shackles are made from Plasma® rope which is the highest strength synthetic rope available. These tow rope connectors are stronger than comparable steel shackles. Gator-Jaw® shackles won’t rust and are so light they float. Towing applications include: 4×4 off-road, agriculture & mining equipment and various marine uses.
Advantages Over Steel Shackles:
-Stronger than steel – 32,000 lb. breaking strength! 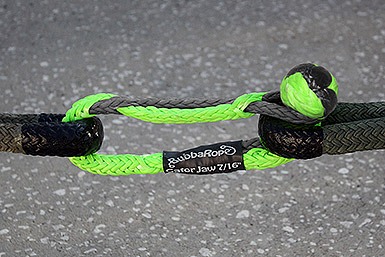
-It floats – no more losing shackles in the water or muck!
-Flexible – easily wraps around the most difficult pulling points!
-One piece construction – no pins to fasten!
_____________________________________________
ComeUp Winch- Seal Gen2 RS
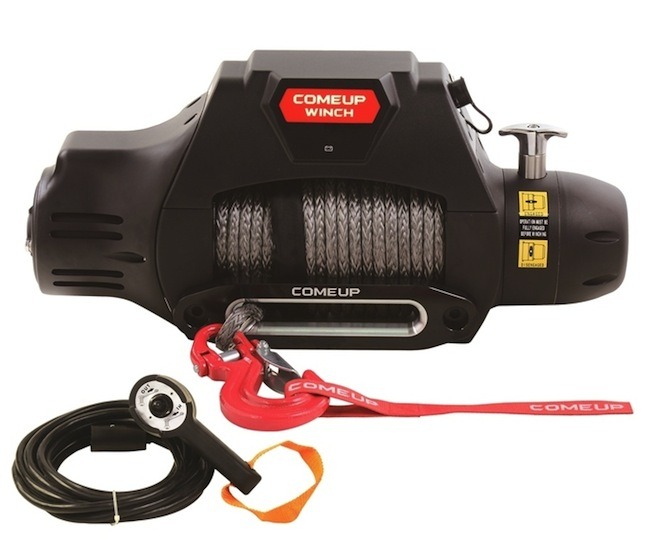
Specifications:
-12V DC severe duty winch rated at 9,500 lb pulling
-Heavy duty series wound motor equipped with thermal switch, alters when motor over-heating.
-Water-proof remote control with thermometric LED indicator w/5 m cord
-New Intelligence Dashboard (IDB) and Power Cutout Switch
-Aluminum die cast housings withstand strength of 2 times the rated load of the winch
-The patented mechanical cone brake outside the drum expedites heat dispersion.
-The greater the load on the rope, the greater amount of braking is generated by the mechanism.
| Rated Line Pull | 9,500 lbs. single line |
| Motor | 5.0 bp/3,730w 12V Series Wound |
| Gear Ratio | 3-Stage Planetary 159:1 |
| Clutch (freespooling) | Rotating Ring Gear |
| Brake (outside the drum) | Automatic, full load CBS (Cone Break Structure) |
| Winch Construction | Aluminum Die Cast Housing with Steel Drum |
| Drum Size | 2.5″ x 9″ |
| Control | Waterproof remote with thermometric indicator LED w/17′ cord |
| Rope Type | Synthetic SK-75 |
| Mounting Bolt Pattern | 10″ x 4.5″ |
| Winch Weight | 70.5 lbs |
| Gross Weight | 97.6 lbs |
| Warrenty | Lifetime for mechanical components, 3 yr for electrical components |
| Box Dimensions | 26.9″ x 8.2″ x 16.9″ |
_____________________________________________
FACTOR 55-Flatlink and ProLink
Closed System Winching is a winching technique using rigging comprised entirely of closed link hardware. The non-closable opening of common winch hooks prevent hooks from qualifying as secure closed links. The poorly constructed sheet metal safety latches of hooks do not qualify as a secure means to contain loads. They are prone to failure, especially during momentary slack conditions where winch loads often shift and apply high forces to these weak non-structural latches. Hooks often come loose during vehicle recovery operations due to hook safety latch failures.
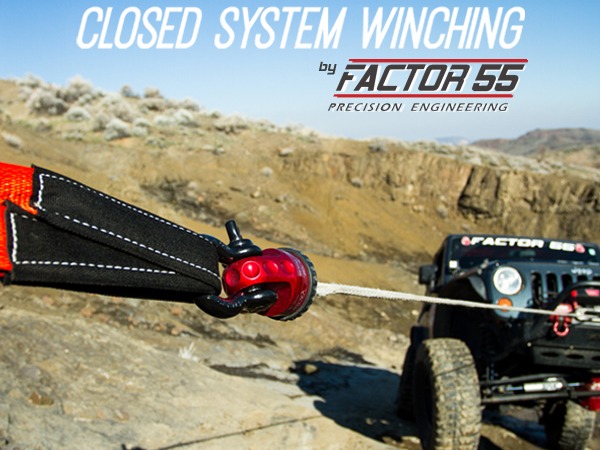
Replace conventional winch hooks with Factor 55 ProLink shackle mount.
Factor 55’s ProLink shackle mount for winch cables and synthetic ropes is made from lightweight billet 6061 aluminum. The ProLink provides a safe means to easily attach a standard 3/4″ screw pin shackle to existing winch cable and rope eyes. The cable or rope eye is captured into the body of the ProLink by a removable oversized 5/8″ double shear pin. The front of the ProLink provides a shackle mounting hole and 1.2″ thick mounting tab. The ProLink is compatible with both Hawse and Roller fairleads and snugs neatly against both versions. Made in the USA.
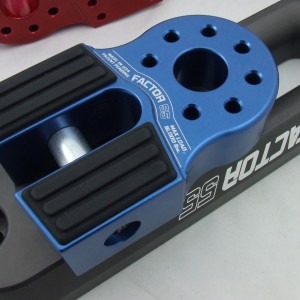
The FlatLink shackle mount is the Industry’s first folding shackle mount for recovery winches. With less than 1.75 inches of thickness, the Flatlink will work with all roller fairlead license plate mounting brackets. Conventional winch hooks can cut and fray recovery straps and often allow strap ends to escape during momentary slack cycles of a typical winching recovery. Screw pin shackles do not allow strap loops to escape due to the secure screw pin attachment. The FlatLink does not require splicing and is compatible with steel cables or synthetic ropes up to 3/8 inches in diameter. The cable eye is retained in the FlatLink by a 5/8 inch diameter grade 5 steel double shear pin and internal snap ring. It is installed easily in minutes. The EPDM Rubber Guards protect alloy fairleads and are securely attached to the FlatLink with 4 barbed tips. The FlatLink stows neatly against either roller or Hawse type fairleads and is designed to be used with common 3/4 inch shackles. The FlatLink is constructed of 6000 series billet aluminum and is anodized/powder coated in 5 different colors.
_____________________________________________
MasterPull Tree Saver Strap and Snatch Block
- Large double wrapped eyes with heavy duty chafe protection
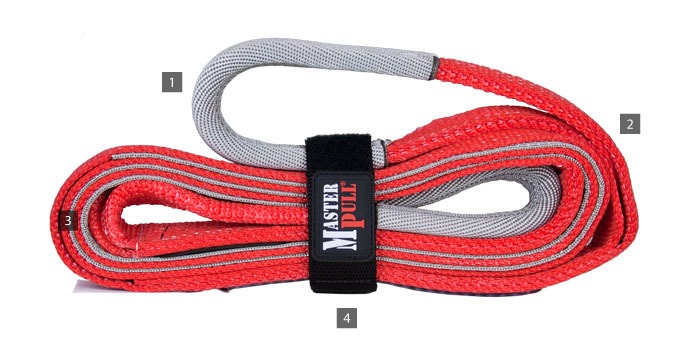
- Bright red polyester for easy visibility
- Additional center chafe protection protects from abrasion damage
- Velcro rope strap for easy storage
Master Pull Tree Saver allows you to winch from a wide variety of anchor points. Made in the USA from 2” wide polyester, our Tree Saver is designed to protect trees from damage that occurs from improperly wrapping a winch line or wire rope around a live tree trunk. The MP Tree Saver packs small and includes a velcro strap for easy storage.
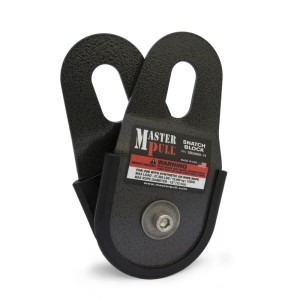
Master Pull Snatch Block
 Highlights
-Lightweight for easy rigging
-Compact size saves space
-Corrosion free stainless steel sheave
-Maintenance free Kevlar bearing
-Plastic side plate guards protect synthetic rope
from metal edges
-Durable black hammered powder coat finish
-Use with steel or synthetic cable
-Made in the USA
Although this snatch block can be used with steel wire cable, it was specifically designed for use with synthetic winch lines. Shrink fitted nylon protector plates prevent synthetic rope from contacting any sharp, metal edges of the block and a stainless steel sheave provides a smooth contact surface for synthetic rope up to 9/16” (14 mm) diameter.
The stainless steel sheave rides on a maintenance free, Kevlar bearing, so no greasing is required with this block. For durability, the side plates are powder coated with a black hammered finish. masterpull.com
_____________________________________________
MAXTRAX Vehicle Recovery Boards

MAXTRAX is a lightweight, easy-to-use vehicle recovery and extraction device. Their large cleats sink their teeth into the tire tread and the terrain under your 4WD vehicle to prevent it from slipping back into mud, snow, or sand. Measuring 45 inches long X 13 inches wide, each set of MAXTRAX stacks together at a height of 3.5 inches.
Maxtrax are made of UV-stabilized, flexible, engineering-grade reinforced nylon to provide traction and a firm base to get your vehicle quickly back on track. They have been tested at the University of Queensland to wrap completely around a 33-inch tire without breaking.
Each MAXTRAX weighs just 8 pounds, has six built-in handles, and keyhole accessory points to allow you to securely mount them to your vehicle.
________________________________________________________
Bushranger Exhaust Jack and On-Board Compressor from ARB

Distributed in the USA by ARB, this jack is particularly well suited to use in sand, mud and snow. It’s got a lifting capacity of 4400lb, the exhaust operated X-Jack is an invaluable recovery tool, providing up to 31″ of vehicle lift.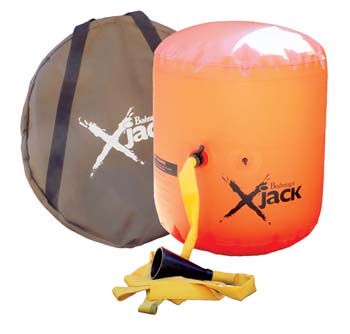
-Inflate through vehicle exhaust or with 12V compressor
-Stable design for safe inflation on unstable surfaces. Base of Xjack designed
with unique triangular grip feet
-Solid hard plate integrated into the top of Xjack to protect from punctures.
-Heavy duty material with welded seams and additional side curtains to assist in puncture prevention
Xjack Kit includes: Heavy duty carrying bag, puncture repair kit, ground mat, exhaust connection kit, one pair of gloves
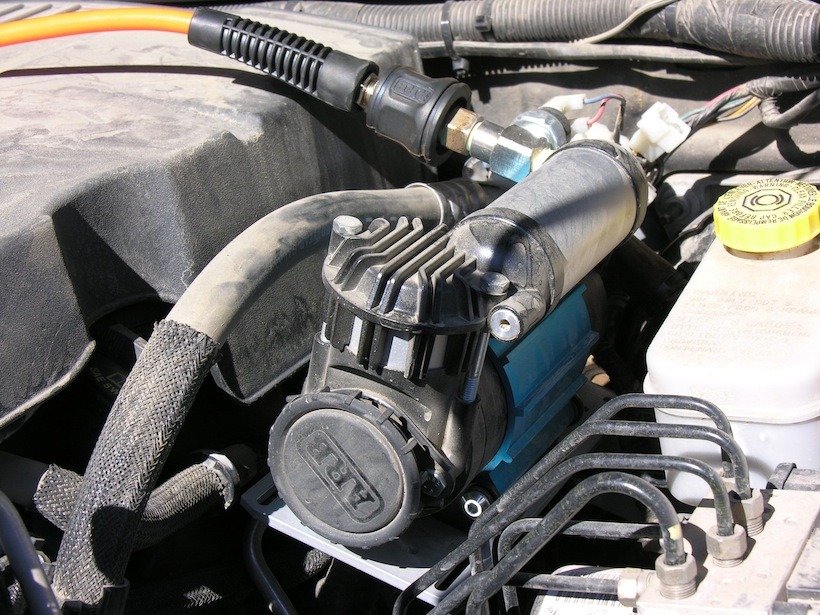
ARB On-Board Compressor
This permanently mounted compressor is installed into your rig and includes a full wiring loom with air locker solenoid pug in contacts, mounting hardware with reinforcing bracket and quality compressor isolating switch. This compressor, with the addition of ARB Pump-Up Kit can be used to activate air lockers, inflate camping gear and it’s got enough output to air up four 35″-37″ tires. It’s been tested in freezing conditions, blazing hot conditions and sandy, silty desert conditions for ultimate performance quality. Last but not least, it’s small. It can fit into the smallest space and it’s quiet enough to mount in the cab.
The Kit includes: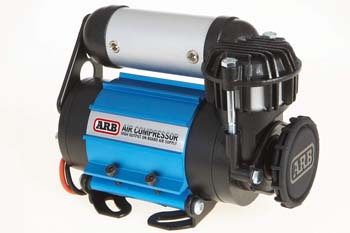
-fully assembled compressor
-Wiring loom with Air Locker solenoid plug-in contacts
-OEM quality compressor isolating switch
-Air Locker supply rated pressure switch
-Relocatable splash resistant air filter with washable high-flow sintered bronze filter cartridge
-Mounting hardware with reinforcing backing plate
-Comprehensive photo illustrated installation guide
_____________________________________________
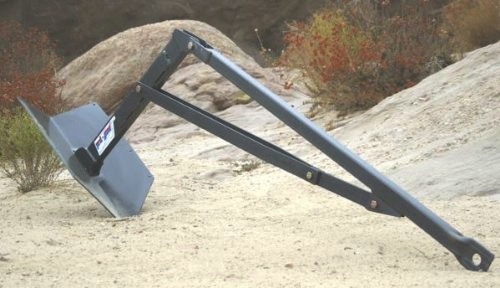
The Pull Pal is an anchoring tool that is both portable and well-suited for a wide range of environments. Intended as a tool for winching through sand and mud, Pull Pal’s design relies on useful rules of physics. Its plow blade sets firmly and safely into sand, clay, mud, hardpan soil and snow. As the winch cable tightens, the point embeds itself deeply and firmly into the ground and frees your rig with the assistance of the wheels in motion. Pull Pal folds compactly to the size of an ordinary bumper jack for easy storage. Pull Pall is designed for winch-quipped Jeeps, buggies, campers, 2 wheel drive, 4WD SUVs, Trucks and Hummers.
___________________________________________
Hi Lift Jack
![]()
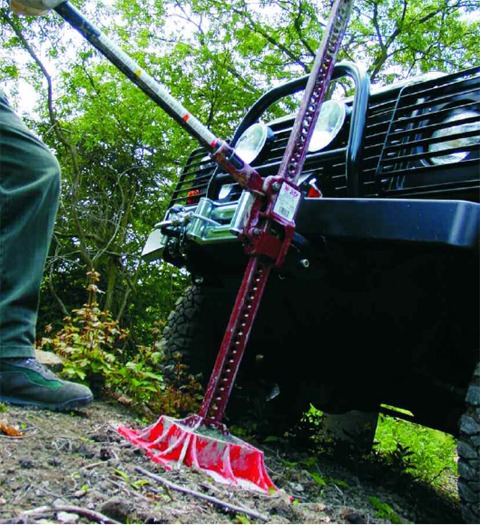
The Hi-Lift Jack Company offers the only all-cast jack manufactured in the world today. Our casting jack is manufactured from high yield and tensile strength iron castings, the same durable metal that we have used for over 100 years.
-All-Cast Construction.
-7000lb (3175.14kg) Tested Capacity.
-Available in 42″, 48″, & 60″ Heights. (107, 122, & 152cm)
-Lifts, Winches, Clamps, & More.
-Most Durable Design.
____________________________________________________________
Clevis D-Rings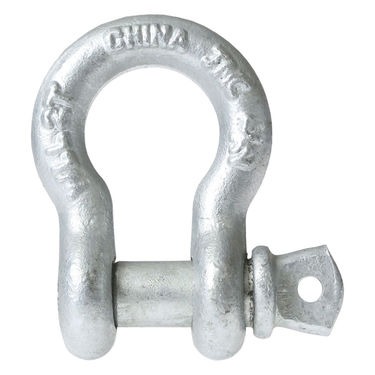
A galvanized D ring shackle is excellent for towing, recovery and hitch applications, so it’s also known in the industry as a clevis shackle, hitch shackle, or tow shackle.
It’s important to remember that D ring shackles are intended for straight line pulling as side pulls can twist or bend a D-shaped shackles.
Galvanized shackles vs. stainless steel shackles
Galvanized metal and stainless steel both offer excellent protection from rust and corrosion, making either a great choice.
The screw pin mechanism makes screw pin anchor shackles a good choice for temporary lifting jobs or those that require frequent connects and disconnects because the quick-release pin action is faster to attach and detach than a shackle with a round pin.
If you’re unsure if galvanized or stainless steel is right for your job, base your decision on the possibility of water exposure. While galvanized shackles do have a thin coating of zinc oxide to protect the steel from elements that lead to corrosion and oxidation, stainless steel offers more corrosion resistance, so it’s best for marine applications and other jobs where there’s a high concentration of water or moisture. However, a galvanized anchor shackle with screw pin is generally more cost-effective than a comparable stainless steel shackle.
Load limit is usually stamped on the shackles
uscargocontrol.com
_____________________________________________________________
SPYDURA Synthetic Rope
![]()
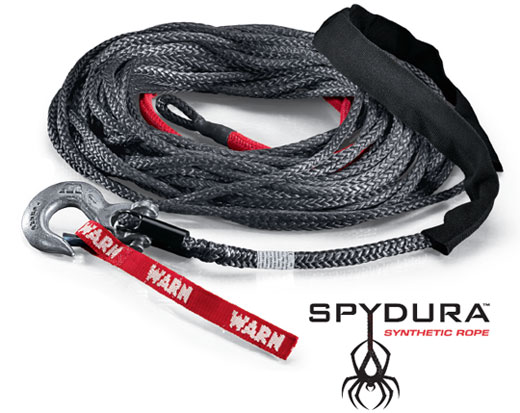 Spydura synthetic winch rope is constucted of an ultra high molecular weight polyethylene material and offers high abrasion resistance and tremendous tensile strength. It is coated with high temperature urethane, equipped with a temperature resistant sleeve on the first layer and a ballistic nylon sliding sleeve. This is done to ensure that Spydura synthetic winch rope provides extreme protection against wear and abrasion. The self-tightening rope attachment is designed to hold the rope secure on the winch drum. For use on winches with 10,000 lb. pull rating of less.
Note: rope must be used with stanard black or polished aluminum hawse fairlead.
warn.com
_______________________________________________________
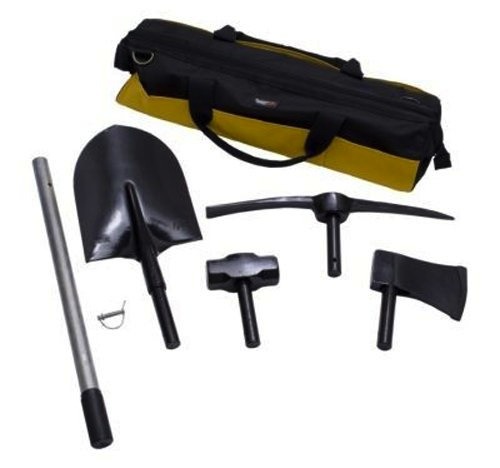
Rugged Ridge All Terrain Recovery Tool
![]()