The Ultimate Off Road Trailer Buyer’s Guide 2019
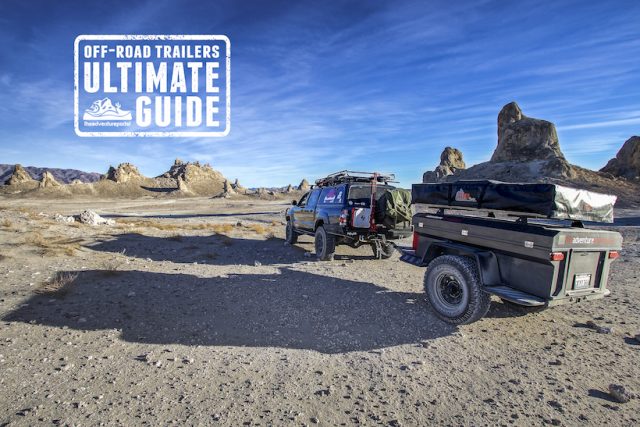
Welcome to TAP’s Ultimate Off Road Trailer Buyer’s Guide. Below you will find listings for a variety of off road trailers. All the information in this guide is accurate as of Winter 2019, but prices, designs, and options may vary at any time. This information comes directly from the trailer manufacturers and is not the result of TAP’s personal testing or opinion.
The tables contained within the guide list all of the manufacturers off road trailer models as well as their prices, weights, whether or not a kitchen comes standard and they are roof top tent compatible. There is also a space noting options, as many manufacturers provide a “menu” of add ons for the prospective buyer. So, enjoy the guide and TAP into Adventure!
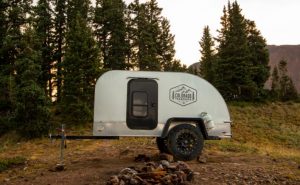
Designed and built by Into The Wild Overland in Colorado, the Boreas Campers are a true off-road and off-grid camper. With heavy duty Timbren Axel-Less Suspension, steel frame, oversized all terrain tires and not a sliver of wood thanks to our in-house composite panel system, these trailers are hungry for exploration. Here is a link to all Boreas XT Options/Specs
itwoverland.com, info@itwoverland.com, (720)-515-2762, Located in Arvada CO
| Model | Type | Price: Fully Loaded with specs listed above | Weight | Kitchen Standard | Options | RTT Compatible |
| Boreas XT | Teardrop | $27,200.00 | 1,950 lb | Yes | Yes | Yes |
Manufactured in the USA
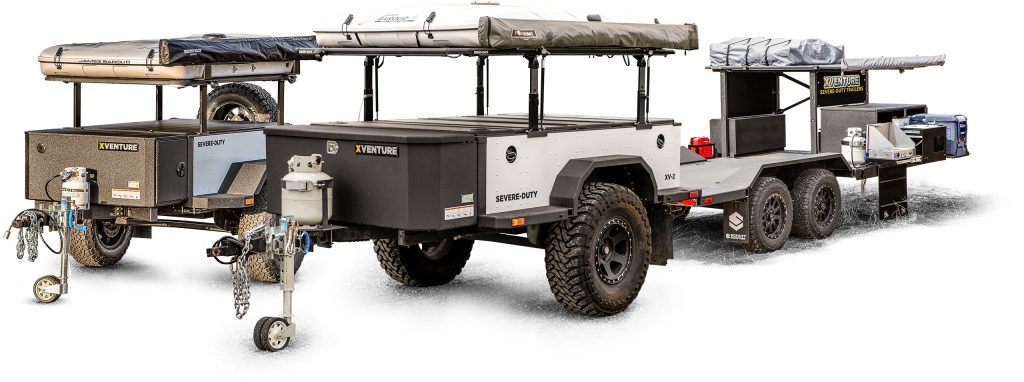
Schutt Industries is America’s leading manufacturer of industrial and military grade cargo handling equipment. It’s long history of engineering high-quality sophisticated solutions for the most demanding military implementation has earned Schutt Industries a prestigious brand name as the go-to source for its world-class products used by every military branch. XVENTURE is simply the finest product of its type ever to hit the consumer market. From toy hauling to a full-slide out galley system XVENTURE has you covered. We have different sized trailers depending on your needs so go explore our models today to find the right trailer for you. All of our trailers are backed with a USA-made 10 year factory warranty. This is a no compromise must-have piece of equipment for the overlanding off-road professional and enthusiast alike. Be part of the legend today. Xventure is built in Clintonville, WI at the Schutt Industries headquarters.
goxventure.com, sales@schuttindustries.com, (715)-823-8025, located in Clintonville, WI
| Model | Type | Base Price | Weight | Kitchen Standard | Options | RTT Compatible |
| XVenture-XV2 | Cargo | $14,995.00 | 1200 lbs | No | Yes | Yes |
| XVenture-XV3 | Cargo | $9,995.00 | 850 lbs | No | Yes | Yes |
| XVenture-XVF | Cargo | 19,995.00 | 2,500 lbs | No | Yes | Yes |
Manufactured in the USA
At turtleback we put a lot of time, effort, testing and care into our builds in order to give you the ultimate off-road trailer. Whether it be for a single individual or a family-sized group, customize your pop-up trailer and enjoy a wide-range of home amenities on your next adventure. Speaking of adventure….one of the great perks of creating a camping trailer business is the chance to create a community of folks with similar interests. Turtleback Trailers is excited about our camp outs and our “Herd of Turtle Gatherings”. These events are for present Turtleback Trailer Owners or for those who are considering becoming part of the “Herd”. We’ll be putting on outings every few months to experience a few nights out under the stars in fabulous locations. At these events we can reconnect with friends, share our exploits from past adventures and have new experiences to create new tales. Once again, we offer the finest crafted camp trailers in the USA. Turtleback Trailers are made for North America and all it has to offer. They are well equipped for both four season usage and for durability. Pride of craftsmanship and engineering are proven in every trailer, today and for years to come. (Financing available.)
turtlebacktrailers.com, info@turtlebacktrailers.com, (855) 732-2383, located in Phoenix AZ
| Model | Type | Base Price | Weight | Kitchen | Options | RTT Compatible |
| Expedition | Box Frame/Expo | $26,995.00 | 1,850 lbs | Yes | Yes | Yes |
| Adventure Trail | Box Frame/Expo | $17,495.00 | 1,300 lbs | Yes | Yes | Built In |
| Turtleback Adventure | Box Frame/Expo | $11,995.00 | 1,050 lbs | No | Yes | Built in |
| Getaway Trail | Box Frame/Expo | $15,995.00 | 1,300 lbs | Yes | Yes | Yes |
| Getaway | Box Frame/Expo | $10,495.00 | 1,100 lbs | No | Yes | Yes |
Click on the models below for Downloadable Brochures:
Expedition
Adventure Trail
Turtleback Adventure
Getaway Trail
Getaway
Manufactured in the USA
Camping made simple and comfortable for the whole family. Instead of tent camping, enjoy the comfort and convenience of camping in a four season Teardrop Trailer. Its compact size and welded structural aluminum cabin is designed to last generations. The welded steel frame, with steel skid plate can support a torsion axle or upgrade to independent suspension with Timbren. With our articulative hitch option you’ll be able to go up and through those ravines and over the rough terrain.
A Colorado Teardrop Trailer is a perfect choice for camping with kids, too. The interior is designed for maximum storage and spacious sleeping for the whole family – even the family dog. The galley is well-planned and contains enough space for gear, cooking, ice cooler and all the amenities you need to get a good meal before your good night’s sleep. Colorado Teardrops is a family-owned business, born out of our love for camping and adventure. We craft our amazing trailers from the finest materials in Boulder, Colorado. We want your trailer to last through decades of adventure for you and your family. Colorado Teardrops’ new designs are unique and formed from the lightest, strongest, longest lasting materials with thick insulation for Moab summers and Colorado winters.
Please inquire for used models for sale.
coloradoteardropcamper.com, (720)-432-6817, contact form on site, located in Boulder CO
| Model | Type | Base Price | Weight | Kitchen Standard | Options | RTT Compatible |
| Basedrop | Teardrop | $11,300.00 | 955 lb | No | Yes | Yes |
| Canyonland | Teardrop | $13,500.00 | 1100 lb | No | Yes | Yes |
| Mount Massive | Teardrop | $18,000.oo | 1,629 lb | galley | Yes | Yes |
| The Summit | Teardrop | $21,500 | 1850 lb | galley | Yes | Yes |
Manufactured in the USA
Are you tired of tent camping? Does the idea of climbing up and down the ladder of a roof-top tent in the middle of the night give you pause? Do you want a custom expedition teardrop at a fair price and within a reasonable timeframe? If the answer to any of these questions is YES, then the smart choice is the BRX1 from Blue Ridge Expedition Trailers.
Our BRX1 Expedition Teardrop is handcrafted in the USA and built from the ground up with utility and quality in mind. We are proud members of the National Association of Trailer Manufacturers (NATM) and have an average delivery time of less than six months from down-payment to delivery.
We offer the BRX1 in three different models, the A4, Limited & Platinum. Each of our models come standard with many features that are often either paid options by other manufactures or not offered at all. Our standard features include:
- Powder coated steel frames and structural steel fenders
- XL Expedition gear box with locking inset doors and dual slide outs
- Timbren 3,500 lb. HD Axel-less suspensions
- Up to 20” of ground clearance
- Electric Brakes
- All LED lighting
- Dual-locking cabin doors with screens
- Hardwood cabinetry throughout
- Galley slide outs for cook tops and refrigerators
- 6” Memory foam mattress
- Large stainless countertop
- Three stabilizer jacks
- 2” Accessory receiver
- Choice of interior finishes and exterior colors
brxtrailers.com, info@brxtrailers.com,(336) 383-1001, located in Lewisville NC
| Model | Type | Base Price | Weight | Kitchen Standard | Options | RTT Compatible |
| BRX1-A4 | Teardrop | $22,950.00 | 2,400 lbs | Yes | Yes | Yes |
| BRX1-Limited | Teardrop | $25,750.00 | 2,450 lbs | Yes | Yes | Yes |
| BRX1-Platinum | Teardrop | $28,250.00 | 2,450 lbs | Yes | Yes | Yes |
Manufactured in the USA
Each trailer is hand built in Ohio. We offer many trailer options for the weekend warrior up to the veteran overlander. We build each trailer to order and offer many options that can be added over time or bought as a complete package. Our trailers are constructed from our custom extruded, fully welded aluminum materials, providing light weight, superb strength that will last a lifetime.
Our small expedition trailers use Timbren 3500# HD Axle-less suspension with the ability to match the trailer hub pattern to any vehicle and certain models run up to a 37” tire. We use a fully adjustable height coupler with the option to use ball (Standard), Pintle or Lock N Roll hitch. 7-way RV style plug and electric brakes are standard. Back-up light is standard and we use LED lighting throughout. An extended tongue and aluminum tongue box are included. Gas struts are used for the lid and lockable compression latches provide a weatherproof seal.The latches and tailgates are keyed alike. All hinges, vents and hardware are stainless steel. Options include: Solar, deep cycle or Lithium batteries, 110v inverter, propane, cooking and shower modules, heat & AC, Fridge/Freezer, electric tent height adjustment, RTT, awning and slide out trays. Our trailers can be painted to match your vehicle with many single color and custom colors options available.
nuthouseindustries.com, info@nuthouseindustries.com, (513)-899-2342, located in Morrow, OH
| Model | Type | Base Price | Weight | Kitchen Standard | Options | RTT Compatible |
| Beachnut | Box | $11,592.00 | 900 lbs | No | Yes | Yes |
| Hickory | Box | $11,999.00 | 1150 lbs | No | Yes | Yes |
| Peanut | Box | $12,724.00 | 1350 lbs | No | Yes | Yes |
| Hazelnut | Teardrop | TBD | TBD | Yes | Yes | Yes |
| Acorn | Toy Hauler | $22,850.00 | 3700 lbs | No | Yes | Yes |
| Mixed Nuts | Toy Hauler/Internal Living | $69,900.00 | 11,500 | Yes | Yes | No |
Manufactured in the USA
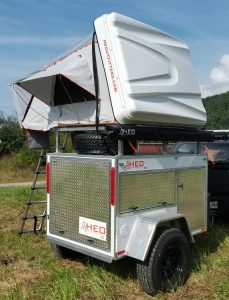
New from Highland Expedition Outfitters for 2019 – The All Aluminum HEO T4. Fully loaded with features you’d expect for your expedition adventure such as CFX50W Dometic fridge, 15 gallon fresh water tank, Camp Chef Summit cook stove, pantry, Stainless Steel sink basin, FlexoPower off grid solar system, Queen Size HEO Bifold Hard Shell RTT, 11 pound propane tank, aluminum tongue box, 2m x 2.5m straight awning with awning room covering the kitchen area, full size rear sliding cargo tray, independent suspension with 16 inches of clear span ground clearance, 3,500 pound spindles, Lock ‘n’ Roll 3 axis coupler, full size spare tire and more. All of this comes standard on the HEO T4. Each HEO T4 Expedition Trailer is hand built in the USA to the same specs as the trail proven and reliable HEO T3. Production models available April 2019.
heoutfitters.com, heoutfitters@gmail.com, (423)-608-6628, located in Crosby TN
| Model | Type | Base Price | Weight | Kitchen Standard | Options | RTT Compatible |
| HEO T3 | Box frame/Expo | $8,750.00 | 600 lbs | No | Yes | Yes |
| HEO T4 | Box frame/Expo | $20,000.00 | 1,100 lbs | Yes | Yes | Yes |
| HEO T5 | Box frame/Expo | $12,00.00 | 960 lbs | No | Yes | Yes |
Manufactured in the USA
TEARDROPS NW

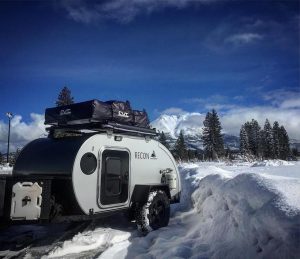 We build rugged, custom teardrop trailers that go wherever adventure awaits. Enjoy the outdoors and stay cozy. Our trailers offer a smooth ride on the highway or in the wild. We can customize a teardrop just for you, whether you want a sleek trailer with modern or retro appeal — or a tough trailer that can take whatever’s around the next curve in the road. Our high-grade components and rigorous quality control ensure your travels are always safe and fun. We also offer lots of accessories to make your campsite the perfect home base for exploration. What can we build for you?
teardropsnw.com, contact form on site, (503)-385-1227, located in Salem, OR
| Model | Type | Base Price | Weight | Kitchen Standard | Options | RTT Compatible |
| Scout 5’x8′ | Teardrop | $14,578.00 | 1,500 lbs | No | Yes | Yes |
| Recon 5’x8.5′ | Teardrop | $16,078.00 | 1,700 lbs | No | Yes | Yes |
| Ranger 5’x9′ | Teardrop | $16,989.00 | 1,800 lbs | No | Yes | Yes |
| Commander 5’x10′ | Teardrop | $17,889.00 | 1,850 lbs | No | Yes | Yes |
Manufactured in the USA
“Life in a ‘Drop” began for us in 2008, when TCTeardrops was established. At that time, our friends became our customers, and to this day our customers still become our friends. As any good friend would do, we ask the questions that determine what you want in a trailer. Choose from a variety of models and sizes, including our new Overland Package, for exploring the backwoods. Take your adventures to the extreme – reliably and comfortably – with an Off Road Expedition (ORE) package. We build trailers, but more importantly we build relationships.
tcteardrops.com, info@tcteardrops.com, (715)-842-0920, located in Wausau WI
| Model | Type | Base Price | Weight | Kitchen | Options | RTT Compatible |
| Standard | ||||||
| 4’x8′ | Teardrop | $5,600.00 | 750 lb | Yes | Yes | Yes |
| 5’x8′ | Teardrop | $6,600.00 | 850 lb | Yes | Yes | Yes |
| 5’x9′ | Teardrop | $7,300.00 | 950 lb | Yes | Yes | Yes |
| 5’x10′ | Teardrop | $7,800.00 | 1,050 lb | Yes | Yes | Yes |
| Overland | ||||||
| 4’x8′ | Teardrop | $6,700.00 | 850 lb | Yes | Yes | Yes |
| 5’x8′ | Teardrop | $7,700.00 | 950 lb | Yes | Yes | Yes |
| 5’x9′ | Teardrop | $8,400.00 | 1,050 lb | Yes | Yes | Yes |
| 5’x10′ | Teardrop | $8,900.00 | 1,150 lb | Yes | Yes | Yes |
| Off Road | ||||||
| 4’x8′ | Teardrop | $8,300.00 | 950 lb | Yes | Yes | Yes |
| 5’x8′ | Teardrop | $9,300.00 | 1,100 lb | Yes | Yes | Yes |
| 5’x9′ | Teardrop | $10,000.00 | 1,200 lb | Yes | Yes | Yes |
| 5’x10′ | Teardrop | $10,500.00 | 1,300 lb | Yes | Yes | Yes |
Manufactured in the USA
The standard features of the To Extreme Off-Road Trailers makes them perfect for all overland camping adventures! Our trailers are manufactured in the USA using CNC laser cut and formed 11 gauge steel, yet light enough to pull with nearly any SUV or truck. Each unit comes equipped with UL-lined fenders and frame, Powder coated body panels, a Timbren axle-less suspension package, over 20 inches of ground clearance, premium B-F Goodrich off-road tires, an adjustable cargo management system, a forward cargo rack, a lockable tailgate, and a 2” rear receiver. With two available sizes, 60” or 72”, you can pick the trailer that best meets your needs. Along with lockable lid options, multiple roof top tent and awning varieties are available also. We have provided you with the necessities and there is plenty of room for additional options to be added. Affordable, high quality, and designed to go anywhere you would like to go.
to-extreme.com, tesales@twino.com, (785)-833-2120, location Salina, KS
| Model | Type | Base Price | Weight | Kitchen Standard | Options | RTT Compatible |
| Rugged ‘N Ready 60″ High Country Trailer | M416 Utility | $6,239.00 | 860 lbs | No | Yes | Yes |
| Rugged ‘N Ready 72″Backwoods Trailer | M416 Utility | $7,998.00 | 1,020 lbs | No | Yes | Yes |
Manufactured in the USA
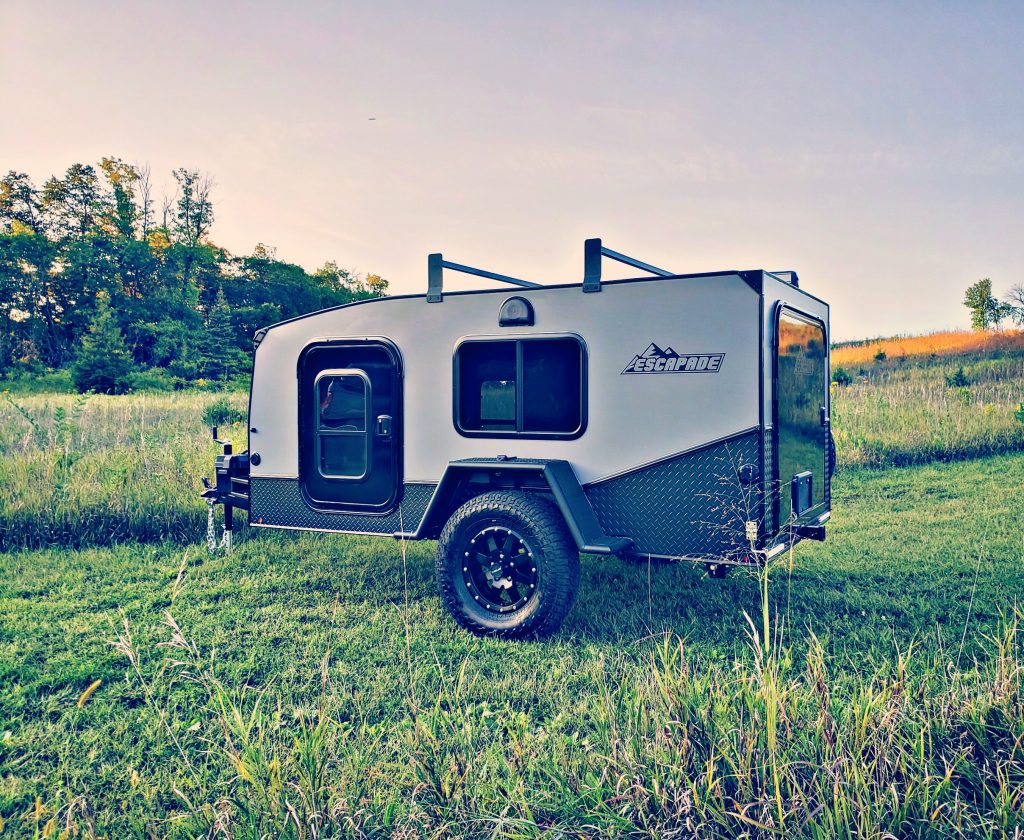 Mini Camper. Big Adventure. When simplicity, ruggedness and beauty collide you get an Escapade Backcountry! We set out to create a versatile all-terrain trailer that would give you everything you need without the price of everything you don’t. Escapade Campers are professionally built using high quality non-toxic materials. With a lightweight and aerodynamic design, Escapade Campers are built to get you into nature. Whether you’re cruising the open road or traveling off the beaten path Escapade Campers are designed to handle any terrain. Choose from one of our standard all inclusive models, or use our custom build feature and have us build your Escapade the way you want it!
escapadecampers.com, contact form on site, no phone number listed, located in Dassel MN
| Model | Type | Base Price | Weight | Kitchen Standard | Options | RTT Compatible |
| Escapade Your Way | Box Frame/Expo | varies | varies | No | Yes | Yes |
| Backcountry | Box Frame/Expo | $8,850.00 | 1,450 lb | No | Yes | Yes |
| TrailPass | Box Frame/Expo | $9,950.00 | 1,400 lb | No | Yes | Yes |
Manufactured in the USA
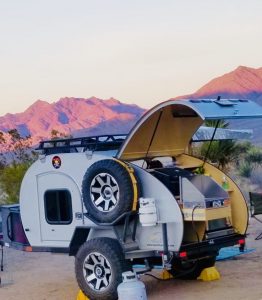 So-Cal Teardrops produces the finest “Teardrop Trailer!” From mountains, to desert, to beach, we have the model for you. A road, crossover, or off-road trailer will get you to camp in comfort and style! With the ability to be towed just about anywhere, So-Cal Teardrop Trailers are ideal for the camper that likes to get away from the crowds.
These tiny, towable, airfoil-shaped trailers that were all the rage in the 1940s and 50s. Eclipsed nearly half a century ago by hefty RVs and motor- homes, these streamlined tag-alongs have made a big comeback among the camping crowd. The Teardrops’ resurgence has grown out of a need for a light camper that can be towed by a smaller, more fuel efficient vehicle, with a comfortable bed for two and a galley, both sheltered from the elements. So-Cal Teardrops has painstakingly re-engineered the “original” Teardrop trailer, with modern materials and technologies, while maintaining a hand fit and finish. All models come standard with all the items listed in this FACT SHEET. All trailers are manufactured in Upland, CA. Delivery to the Continental U.S. is available. Come by and visit us. You can also call or e-mail us today to get your trailer “rolling” and become one of the many “Happy Campers” to own a So-Cal Teardrops trailer!
socalteardrops.com, info@socalteardrops.com, (909)-982-1199, located in Upland CA
| Model | Type | Base Price | Weight | Kitchen Standard | Options | RTT Compatible |
| Crossover | ||||||
| Buzzard 4×8 | Teardrop | $12,135.00 | 650 lbs | Yes | Yes | Yes |
| Kascade 4.5×9 | Teardrop | $16,135.00 | 1,250 lbs | Yes | Yes | Yes |
| Kascade 5×9 | Teardrop | $16,635.00 | 1,325 lbs | Yes | Yes | Yes |
| Kascade 5×10 | Teardrop | $17,385.00 | 1,400 lbs | Yes | Yes | Yes |
| Kascade 5×11 | Teardrop | $18,135.00 | 1,475 lbs | Yes | Yes | Yes |
| Off Road | ||||||
| Buzz Off 4×8 | Teardrop | $13,225.00 | 1,000 lbs | Yes | Yes | Yes |
| Krawler 4.5×9 | Teardrop | $17,725.00 | 1,250 lbs | Yes | Yes | Yes |
| Krawler+ 4.5×10 | Teardrop | $18,475.00 | 1,350 lbs | Yes | Yes | Yes |
| XS 5×10 | Teardrop | $18,975.00 | 1,400 lbs | Yes | Yes | Yes |
| XS 5×11 | Teardrop | $19,725.00 | 1,600 lbs | Yes | Yes | Yes |
Manufactured in the USA
What does “unplug” mean to people today? For some it could mean putting the phone down for the evening, or perhaps even for the day. The Trail Marker trailer is a vessel created to be the catalyst that helps you unplug for a period of time, leaving you rested, revitalized and ready to get back to your busy life.
My name is JP Ross and I created the Trail Marker trailer because I am a 42 year old with a toddler, an infant, a beautiful wife and a black lab who loves the outdoors.I could spend all of my time on trails with just a day pack and a dream, but I want to spend my spare time with my family, so I created Trail Marker trailers. They make getting away into the backcountry with your family easy. You won’t need to spend endless amounts of time setting up and breaking down camp. With a Trail Marker trailer you can take all the extras your family needs and have a basecamp that allows you to transport and deploy in minutes.
The mission of Trail Marker is to make strong, light, multi-use trailers. They are made with simple lines and both composite and organic materials. Trail Marker trailers are made completely of composite honeycomb walls with aluminum frames. We offer various options and configurations to help personalize your trailer to meet your specific needs. We’ve built many trailers now and they keep getting better and better with each collaborative innovation we have with our customers. We overbuild our trailers, taking many cues from the fabled Air Stream. Our standard models are made for light duty off road use and our Bushwhacker is designed for those interested in heavy off road use. Our trailers are meant to be handed down through generations like an heirloom. This is not a cargo trailer with windows and it is not a small RV. It is unique in its own way. We create shells that people can accessorize themselves, and we also make full blown base camps. Our trailers are tall enough for you to stand it, so you can truly make it into your own fully enclosed custom camping space. It’s entirely up to you. All we want to do is get you Outside! Please call or email us today.
trailmarkeroutdoors.com, trailmarkeroutdoors@gmail.com, (315)-580-3150, located in Marcy NY
| Model | Type | Base Price | Weight | Kitchen Standard | Options | RTT Compatible |
| Olympic | Semi Off Road Cab | $15,415.00 | 1000 lbs | No | Yes | Yes |
| Acadia | Semi Off Road Cab | $22,754.00 | 1400 lbs | No | Yes | Yes |
| Up and Out | Semi Off Road Cab | $22,000.00 | 2,000 lbs | No | Yes | Yes |
| Sequoia | Semi Off Road Cab | $26,194.00 | 1,600 lbs | No | Yes | Yes |
| Bushwacker | Off Road Cab | $13,000.00 | 1,000 lbs | No | Yes | Yes |
Manufactured in the USA
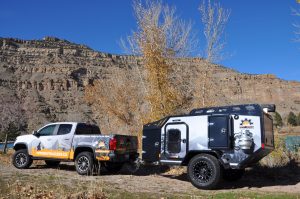
At Off Grid Trailers, we’ve designed our off-road trailers for traversing the backwoods, venturing off the beaten path and outside campgrounds to truly commune with and experience the wild. Our improved 2019 models are entirely CAD designed and modelled, are 100% wood free, and offer new features based on customer feedback. Our trailers can withstand any climate and any terrain.
Some of the standard features we offer include a fully insulated cabin with an extruded aluminum skeleton structure and laser cut aluminum panel skins. Our floor construction includes aluminum flooring, CNC cut R9 rigid foam insulation, and space age flooring for additional thermal break. New for 2019 is our laser cut and formed open C-channel frame for additional corrosion resistance, increased rigidity, and weight savings. Our customers have spoken; we include standard storage features including adjustable powder-coated aluminum cabinet shelving. We’ve also improved serviceability on our 2019 model lineup including serviceable and removable water tanks, multi-piece fenders, tail light guards, and fully accessible electrical bays.
We built with only the top industry known components including: Pro Comp Rockwell 17×8.5 wheels with 265/70R17 Toyo Open Country ATII off-road tires, Timbren 3500HD suspension (4-inch lift with 10-inch electric brakes), Dometic appliances, and Go Power electrics. We can add heat, 23 Zero roof top tents, Darche eclipse awnings, trailer stabilization, and so much more!
At Off Grid Trailers, we don’t just build trailers, we build relationships: with our customers and our team, with our partners and vendors.
offgridtrailers.com, contact form on site, (800)-786-3221, located in Edmonton, AB
| Model | Type | Base Price | Weight | Kitchen Standard | Options | RTT Compatible |
| Expedition | Squaredrop | USA- $23,900.00 CANADA-$29,500.00 | 1800 lbs | Yes | Yes | Yes |
| Pando | Teardrop | USA-$25,900.00 CANADA-$31,999.00 | 2000 lbs | Yes | Yes | Yes |
Manufactured in Edmonton Alberta Canada
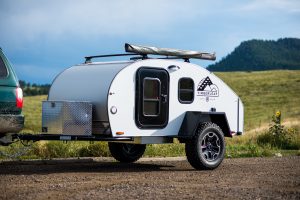 Timberleaf Trailers offers two distinct trailer platforms. Our Classic measures 5’ x 10’ with a queen size mattress. The smaller Pika (Pyka) is a very nimble 4’6” x 8’ with a full size mattress. Each trailer can be equipped as a road model, All-Road model or Off-Road model. Our intention is to offer the classic teardrop aerodynamic profile, uncompromising fit and finish with any level of suspension to fit your personal style of travel. Both the All-Road and Off-Road utilize the award winning Timbren Axleless suspension. Both of these also include brakes, Max Couplers and BF Goodrich KO2 tires. All our frames are 2” x 3” .120 steel tubing powder coated for premium protection. With over thirty options to add to either trailer we can accommodate most all your needs to get off the beaten path is style and comfort. We have a dozen exterior colors and ten interior laminate colors to make your trailer one of a kind. Every one of our trailers comes equipped with two doors, two windows and a huge skylight, All standard equipment. Each and every trailer is built to order.
timberleaftrailers.com, hello@timberleaftrailers.com, (970)-778-3744, located in Grand Junction, CO
| Model | Type | Base Price | Weight | Kitchen Standard | Options | RTT Compatible |
| Pika | Teardrop | $11,750.00 | 950 lbs | Yes | Yes | limited |
| Classic | Teardrop | $19,850.00 | 1550 lbs | Yes | Yes | Yes |
Manufactured in the USA
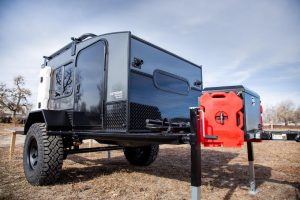 Hiker Trailer builds lightweight, affordable trailers to help people experience the outdoors in a comfortable and economic way. We keep it simple, focusing on quality, and only the added amenities our individual customers need for their outdoor adventures. We offer multiple models including a Highway Deluxe Road model, a Mid-Range Off-Road model and an Extreme Off-Road model. The Off-Road Extreme Deluxe model includes an all aluminum exterior, Jeep lug pattern, 33″ tires, 17″ steel black wheels, a 3500 lb axle, 2 rear drop down jacks, front jacks, a black front storage box, 2×3 off-road steel frame, LED surface mount lights, and more.
Call us for a quote at any one of our three locations:
-Hiker Trailer West,(303)-906-0224, Colorado@hikertrailers.com, located in Denver, CO
-Hiker Trailer East, (317)-774-4933, Indiana@hikertrailers.com located in Noblesville, IN
-Our authorized reseller, Lead Dog Motorsports, (928)-208-2006, located in Lake Havasu, NV
| Model | Type | Base Price | Weight | Kitchen Standard | Options | RTT Compatible |
| Highway Basic | ||||||
| 4×8 | Box Frame/Expo | $2,895.00 | 670 lb | No | Yes | Yes |
| 5×8 | Box Frame/Expo | $3,895.00 | 780 lb | No | Yes | Yes |
| 5×9 | Box Frame/Expo | $4,895.00 | 860 lb | No | Yes | Yes |
| 5×10 | Box Frame/Expo | $5,695.00 | 980 lb | No | Yes | Yes |
| Highway Deluxe | ||||||
| 4×8 | Box Frame/Expo | $3,795.00 | 670 lb | No | Yes | Yes |
| 5×8 | Box Frame/Expo | $4,795.00 | 780 lb | No | Yes | Yes |
| 5×9 | Box Frame/Expo | $5,795.00 | 860 lb | No | Yes | Yes |
| 5×10 | Box Frame/Expo | $6,795.00 | 980 lb | No | Yes | Yes |
| Mid-Range Deluxe-Expedition model | ||||||
| 5×8 | Box Frame/Expo | $6,395.00 | 980 lb | No | Yes | Yes |
| 5×9 | Box Frame/Expo | $7,395.00 | 1,090 lb | No | Yes | Yes |
| 5×10 | Box Frame/Expo | $8,395.00 | 1,170 lb | No | Yes | Yes |
| Extreme Off-‘Road Deluxe- Expedition Model | ||||||
| 4×8 | Box Frame/Expo | $7,995.00 | 1,350 lb | No | Yes | Yes |
| 5×8 | Box Frame/Expo | $8,995.00 | 1,510 lb | No | Yes | Yes |
| 5×9 | Box Frame/Expo | $9,995.00 | 1,620 lb | No | Yes | Yes |
Manufactured in the USA
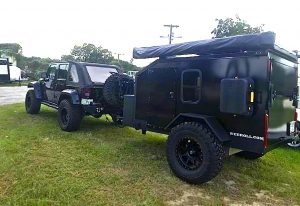 When you are ready to buy a trailer, wee ask you to please search the market. Be an educated consumer. If you do, wee promise that you won’t find anything out there that’s comparable to our trailers. Wee then ask you to do your due diligence. Compare our trailer with any other manufacturer’s. It’s important to know the strength of the material you are choosing, the location and type of electrical wiring used, how it is installed etc. Put any product up to ours and lets go from head to tail and compare. You will see that what wee offer, pound for pound, dollar for dollar is superior to any other trailer on the market. Wee are willing to put our money where our mouth is and show you, with full transparency, how wee build the best aluminum trailers in America.
weeroll.com, weerollusa@gmail, (353)-454-8210, located in FL
| Model | Type | Base Price | Weight | Kitchen Standard | Options | RTT Compatible |
| Weeroll Overland | squaredrop | $7,595.00 | 810 lb | No | Yes | Yes |
| Weeroll Xtreme | squaredrop | $8,795.00 | No | Yes | Yes |
Manufactured in the USA
The Tuff Stuff Xtreme Base Camp Expedition trailer provides all of the off-the-grid amenities in very well thought out package! All Base Camp trailers come standard with what most charge extra for such as: 18 gal water tank/electric water pump, 110 AH battery, 1000W inverter, solar controller, external solar plug, power ports throughout, LED courtesy lights at all 4 corners, interior lighting, 2 burner gas stove (with instant start), adjustable tent rack, adjustable awning mount, sealed front storage box, exterior sliding drawer, dual jerry can storage, full-size propane tank mount, independent suspension (axle less), articulating hitch, spare tire, 4X leveling jacks, 31X10.50X15 all-terrain tires (5 X 5” bolt pattern) and tons of interior sealed storage with ball bearing drawers and slide outs.
tuffstuff4x4.com, support@tuffstuff4x4.com, (866)-220-0171, located in Santa Ana CA
| Model | Type | Base Price | Weight | Kitchen | Options | RTT Compatible |
| Xtreme Base Camp Expedition | utility | $12,999.00 | 1,654 lb | Yes | Yes | Yes |
Manufactured in China
Why should you consider purchasing a Conqueror off-road Camping trailer? Conqueror off-road Camping trailers have been safari and outback tested for over 25 years in the harsh and unforgiving environments of Africa and Australia. What other trailer in the US market can boast of this proven pedigree?
How would it be for you to be able to go camping anywhere you want? The untouched, pristine campsite on the other side of the river or just over the next mountain are now within reach with a Conqueror off-road Camping trailer. Anywhere your vehicle can go, your conqueror trailer will effortlessly follow. Modern day conveniences coupled with a proven track record of surviving the harsh African and Australian environments qualify the Conqueror trailer to be your (UEV) Urban Escape Vehicle.
conqueror4x4usa.com, sales@conqueror4x4usa.com, (937)-594-9565, located in Bellefontaine OH
| Model | Type | Base Price | Weight | Kitchen Standard | Options | RTT Compatible |
| UEV 310 Extreme- North America | utility | $20,600.00 | 1,500 lbs | Yes | Yes | Yes |
| UEV-390 Extreme-North America | utility | $33,500.00 | 1,875 lbs. | Yes | Yes | Yes |
| UEV-390 Extreme Platinum Edition–North America | utility | $35,300.00 | 1,875 lbs. | Yes | Yes | Yes |
| UEV-440 Extreme-North America | utility | $47,850.00 | 2,755 lbs. | Yes | Yes | Yes |
| UEV-440 Extreme Platinum Edition-North America | utility | $49,650.00 | 2,755 lbs. | Yes | Yes | Yes |
| UEV-490 Extreme-North America | utility | $50,950.00 | 3,200 lbs. | Yes | Yes | Yes |
| UEV-490 Extreme Platinum Edition-North America | utility | $52,750.00 | 3,200 lbs | Yes | Yes | Yes |
Manufactured in Australia
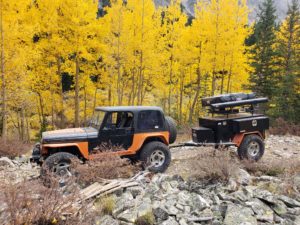 Crawlorado Offroad specializes in custom built off-road camp trailers that are lightweight and virtually indestructible. We can also take care of your custom fabrication needs. Our mission is to furnish a first class product that is reliable and virtually indestructible as well as affordable. Everything we produce can be built to the customers specific needs. We will use only the best available products.
Off road reliability is our primary concern. They are assembled with heavy duty box steel frames and will withstand even the most extreme off road trails that allows you to have the camping conveniences usually restricted to the camp grounds.
CrawloradoOffroad.com, bob@crawloradooffroad.com, (719)-492-8049, located in CO
| Model | Type | Price Range | Weight Range | Kitchen | Options | RTT Compatible |
| Custom | utility | $8,950.00- $13,500.00 | 1150 lbs. -1550 lbs. | Yes | Yes | Yes |
Manufactured in the USA
The VORSHEER XOC is the home you can take with you on your expeditions into the wild. Whether it’s a weekend getaway or a cross-country trek into the unknown. With exceptional ground clearance, rigid construction, and thoughtful design, the XOC is handcrafted to embody unyielding excellence. Standard features include 33” AT tires on 18” wheels, electric drum brakes, an independent suspension, rear leveling jacks, ample storage space, full LED lighting and a full-size cabin. A variety of optional features include a complete kitchen, propane cabin heater, full-size spare tire swing, queen size mattress for two, and the ability to sleep up to five more with a tent – all in a compact and lightweight design. With the embodiment of exploration in the VORSHEER XOC, you are not bound to any road or trail – you’re able to go wherever freedom leads you.
vorsheershop.com, contact form on site or help@vorsheer.com, (385)-685-5037, located in Springville UT
| Model | Type | Base Price | Weight | Kitchen Standard | Options | RTT Compatible |
| XOC | Squaredrop | $19,999.00 | 2,200 lbs. | No | Yes | Yes |
Manufactured in the USA

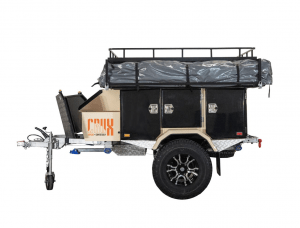
CRUX Expedition Trailers marks the culmination of a life-long passion for the outdoors and back-country exploration. As a former Geologist, co-owner Lorrie Francis intimately understands the need for a capable and reasonably priced camper trailer that can withstand the abuse of normal operation in extreme conditions. Finding a market full of overpriced and under-built towables, Lorrie and Sam set out to fill the void. CRUX Expedition Trailers is a family owned and operated Colorado business that strives to produce top-Quality products that are safe and comfortable for our family and yours.
Whether you’re planning a week long excursion into the dry and dusty deserts of Utah, traversing treacherous mountain passes in Colorado, or simply taking the family out for a laid-back weekend by the lake, CRUX Expedition Trailers will be right behind you.
Crux Expedition Trailers were born from the need to wander. Our agile and compact yet heavyweight trailers, have everything one would need to explore the far reaches of the outdoors or simply set up for a quick weekend trip. “We are just supplying the passport for people to travel. It is up to them to create the adventure.” -Lorrie
cruxexpeditiontrailers.com, lfrancis@cruxexpeditiontrailers.com, 303-513-1814, Denver CO
EXPLORE. COMFORTABLY.
| Model | Type | Base Price | Weight | Kitchen Standard | Options | RTT Compatible |
| 1610 | camper Trailer | Quote form on site | 1,960 lbs | Yes | Yes | Included |
| 2700 | Camper Trailer | Quote form on site | 2,700 lbs | Yes | Yes | Included |
| 3100 | Camper Trailer | Quote form on site | 3,042 lbs | Yes | Yes | Included |
Manufactured in the USA

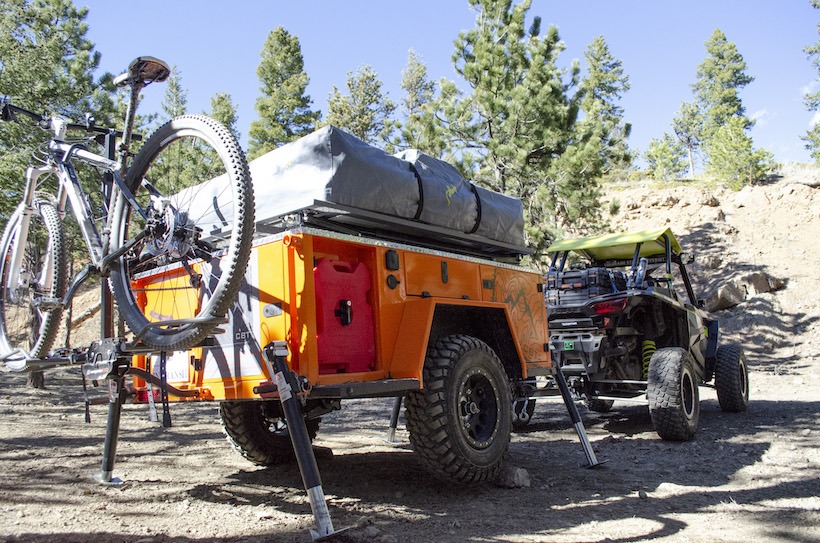
When adventure calls the Colorado Backcountry Trailers 2019 TIMBERLINE camping trailer is ready to answer and bring the comforts of home deep into the backcountry. We take “Go Where Others Can’t” seriously. The TIMBERLINE was born out of the idea that the best camping trailer should be able to go off-road as easily as on-road. The TIMBERLINE was designed to be pulled by a side-by-side or similar UTV as well as a small car, truck, or SUV. Small enough to go on an array of easy to difficult trails, or store in the back of your garage, the TIMBERLINE trailer is perfect for a weekend getaway or extended backcountry adventure. We’ve made sure that you experience full size luxury in a small package. Our standard trailer includes a full-sized roof top tent with an electric lift system (two buttons take the tent up off the ground and down again), a 100-watt solar panel and 12-volt battery. The slide kitchen features a three burner Furion propane stove (best on the market) powered by a 5-pound propane tank and on-demand hot and cold running water. The kitchen includes a large slide for a cooler and is pre-wired with a 12-volt fridge/freezer outlet. You’ll enjoy plenty of storage with two drawers in the kitchen. It houses a 17.9-gallon water tank which is easy to fill up and drain, a water pump, LED lights over the kitchen and in the storage and utility compartments. There is even a shore power hook up. The TIMBERLINE weighs 1568 pounds dry, is built with a 2000-pound Timbren axel-less suspension, a Kilby Max coupler hitch for versatility when going over uneven ground and a four-corner angled leveling system for even the most uneven camp site. Our trailer includes a receiver for a bike rack, and features a 10 cubic foot locking storage compartment, one RotoPax with room to extend, 2 USB ports to keep your cell phones charged up, an electrical shut off switch and a Victron BMV 712 battery monitor. You are even able to have an ap on your smartphone to monitor your battery power. Options for the TIMBERLINE include a five sided, 5’8” x 6’10” annex room that easily zips on under the tent, adding a complete enclosure. In addition, you can purchase a 270-degree awning that covers the kitchen and storage areas, awning sides with windows that Velcro onto the awning. Additional RotoPax for longer stays in the backcountry, a second battery, an 11-pound propane tank and a water filtration system, enabling you to stay off-grid as long as you want. You may be in rough country but you’ll be far from roughing it. You will be rested and ready for the next day’s adventure. Colorado Backcountry Trailers was founded on the belief that you should be comfortable no matter where you want to camp. The 2019 TIMBERLINE is Handcrafted in Colorado by Colorado Backcountry Trailers, LLC ColoradoBackcountryTrailers.com, 720-338- 0619, austin@coloradobackcountrytrailers.com, Loveland, CO
| Model | Type | Base Price | Weight | Kitchen Standard | Options | RTT Compatible |
| Timberline | camper Trailer | $18,900.00 | 1,568 lbs | Yes | Yes | Included |
Made in the USA
There you have it. The most comprehensive off-road trailer guide on the net. Enjoy!
 Author: Lori Palmer, TAP Editor and Co-Owner
All verbiage and photos came from the trailer companies.
